
How many times have you taken a really cool picture, only to notice that there is a stray telephone line running across your image? Thankfully, this problem is pretty easy to fix! This tutorial shows the best way to remove telephone lines in Photoshop, and it’s quick and easy to boot!
The “Almost” Perfect Image
Have you ever snapped a photo of a neat skyline or building, only to find that you’ve got a stray telephone line or electrical line going through a large part of it? Frustrating as it may be, it doesn’t mean that the picture is ruined. This easy to follow tutorial will show you the best way to remove telephone lines in Photoshop, and you’ll have your pristine photo back in absolutely no time flat!
This tutorial was written using Adobe Photoshop CS4, but should work easily for anyone using Adobe Photoshop CS or higher. It also requires just a little bit of knowledge of Photoshop, but should be easy enough to follow for anyone who has a basic understanding of Photoshop.
Removing Telephone Lines
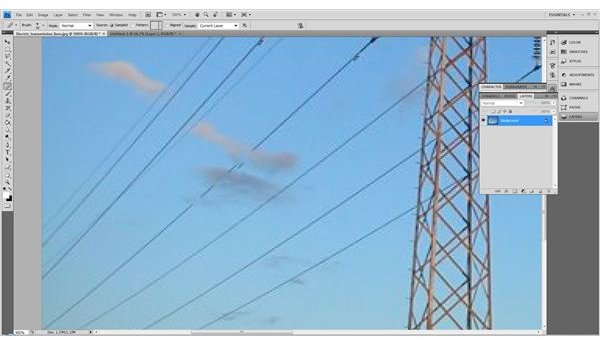
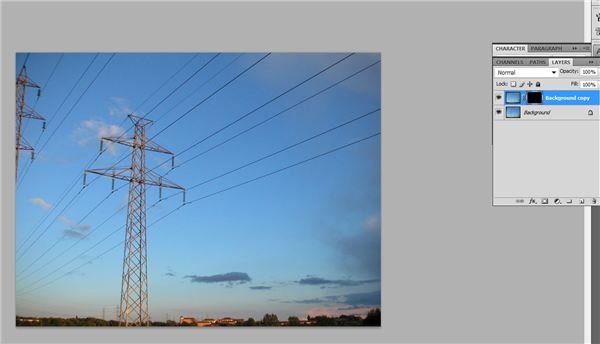
Open your image in Photoshop. Now, while this sample photo is an extreme case, it’s a great example of the way electrical or telephone lines run through photos.
Click any image for a larger view.

Preserving Detail by Using the Healing Brush
Preserve as much detail as possible. For large blank areas, such as the sky in this image, you don’t have to worry about airbrushing out too much detail. However, for areas with a lot of detail such as clouds, trees, and buildings, a bit more babying is required. For these areas, we have to implore the use of the Healing Brush Tool . This tool will sample a chunk of pixels when you hold down ALT and allow you to paint those exact pixels over a blemish on an area. This is a very common method of airbrushing, but should be used as sparingly as possible, as the effect can easily look very fake over large areas.
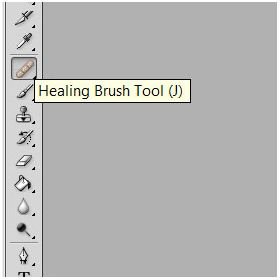
Identify areas of detail that need to be preserved and gently brush out the telephone line. To do this, hold down ALT and click on an area with a similar makeup to the area covered up by the telephone line. You may want to zoom in like I have to really see where you need to brush. Use small strokes paying careful mind that you are painting over the area with a portion of the already existing image - don’t go too heavy handed with this trick or it looks very fake!
Using the Dust & Scratches Filer for Easy Airbrushing
After you airbrush all the detail heavy areas out like I have done, we’re ready to move onto a little more realistic airbrushing. In this next step, we will be using a layer mask and the Dust & Scratches filter to selectively airbrush out the telephones.
Duplicate your image. The easiest way to do this is to click and drag the image layer in your layer panel down to the new “New Layer” button. This will automatically duplicate your layer for you. Feel free to rename your layer if you would like. Make sure you select the new, duplicated layer as your active layer.

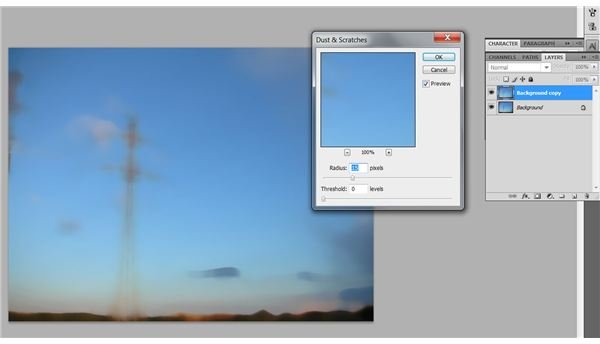
Click the Filter menu option in the top filter, and inside of the “Noise” folder, you will find an option called “Dust & Scratches” select this.
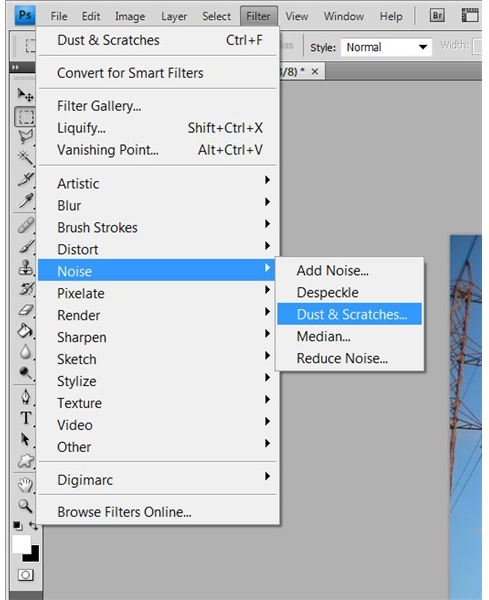
In the Dust & Scratches pop-up, you will notice two different slider bars and a preview window. Leave the threshold setting at zero, but you will need to adjust the radius until you can no longer see the telephone lines. This will require a little bit of fiddling around with. The goal is to only take it as far as you need to, so you can preserve the color, lighting, and pattern as best as possible. For this image, the radius is 15 pixels - I can still see the lines at 14 pixels, so we know we haven’t gone too far. Don’t worry about how blurry the image looks right now. We’ll fix that very soon. Once you find your ideal number, click OK.
Now, click the layer mask button in the bottom of your layer pallet - it looks like a white circle on a grey backround.
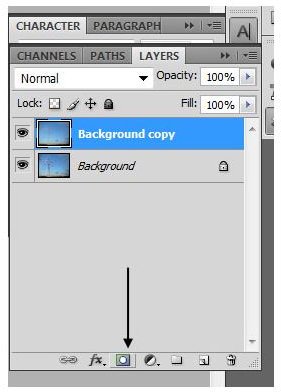
Grab your paint bucket tool and fill in your layer with black. Notice how it seems to remove the entire effect? This is exactly what you want!
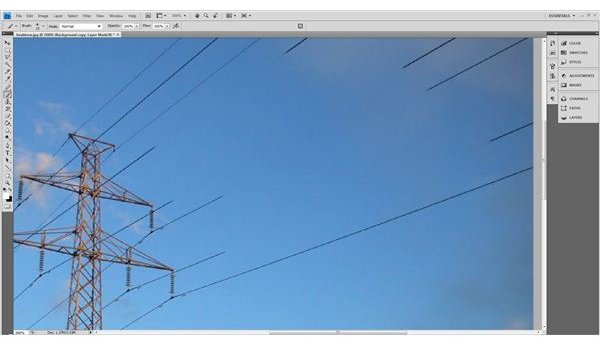
Now, grabbing a thin, soft-edged paintbrush (I’m using a 13px soft edge brush here) set your foreground color to white and begin to gently brush over where the telephone lines go through your picture. See how easily it erases them? This is the effect you are going for! This works great over large areas that are relatively low in detail. You may want to zoom in again to make sure you’re brushing away at just the area you need to. Continue brushing away the telephone lines until they are completely gone!
Here is the completed image!
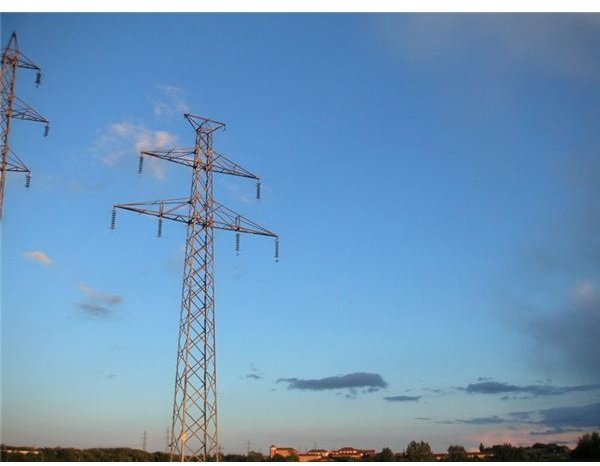
Image Credits
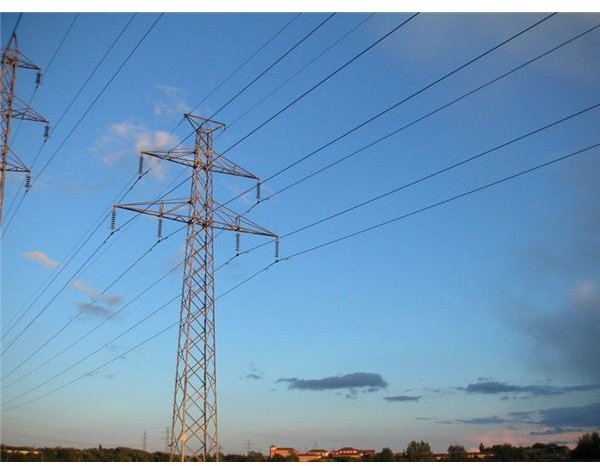
Image Credit: https://commons.wikimedia.org/wiki/File:Electric _transmission_lines.jpg
All screenshots were taken with Adobe Photoshop CS4 and are intended for educational purposes only.


