In Photoshop, creating brushes is a powerful, yet easy way to take control of your work and your time. By saving certain special effects that you frequently use as brushes, you always have them available. Learn how to create Photoshop brushes and you will have a lot more fun in your everyday work.
Photoshop Brushes Overview
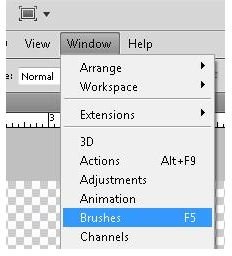
Brushes are a fundamental component of Adobe Photoshop. To access them you can select the “Brush” tool from the Adobe Photoshop tool box.
Press
Click any image for a larger view.
You will then see a window appear that is the primary interface between you and Adobe Photoshop brushes.
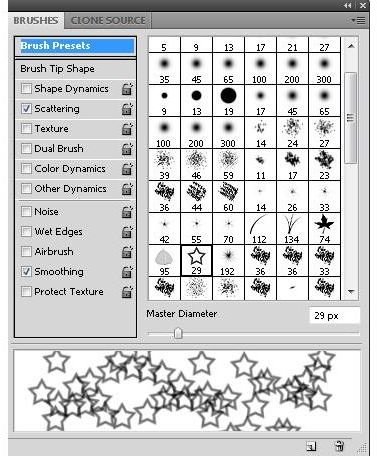
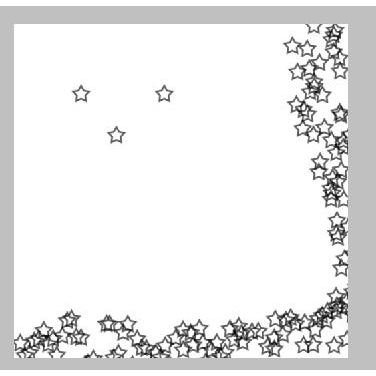
In this example, the star has been selected. You may be able to tell from this window that brushes are images that users draw with in Photoshop. To demonstrate this, select the star and close the window. You will now see that the start brush is on display near the top left corner of the work area.
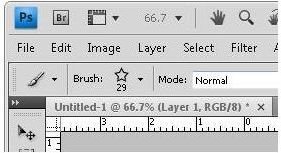
You should also notice the down arrow to the right of the brush shape. This provides an easy way to quickly change brushes.
Now, with the “Flowing Stars” brush selected, draw a little bit in the work area so you see how brushes work. If you click the mouse, Adobe Photoshop will create one star at a time. If you drag the mouse, you will see many stars displayed rather than lines.
Now you are probably aware that you can make a brush out of virtually any image you create.
Creating a Brush
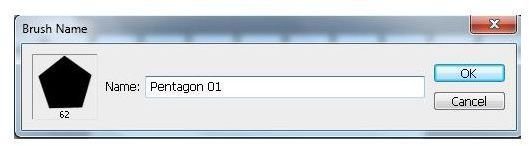
In Photoshop, creating brushes requires that you create an image first. For this Adobe Photohop tutorial we will use a pentagon to create a brush.

Once your image is created, click “Edit” on the main menu and then select “Define Brush Preset” and then click the “OK” button.
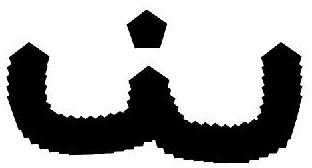
You now have a brush that will draw lines with pentagons.
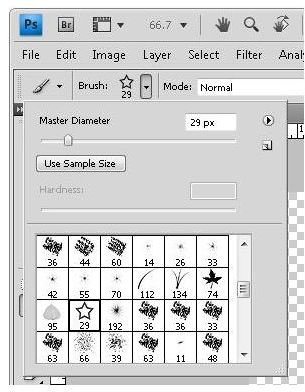
To edit the qualities of a brush, press

Tips on Brush Creation in Photoshop
When creating brushes in Photoshop, there are just a few hints that might save you time or help you optimize the appearances of your brushes.
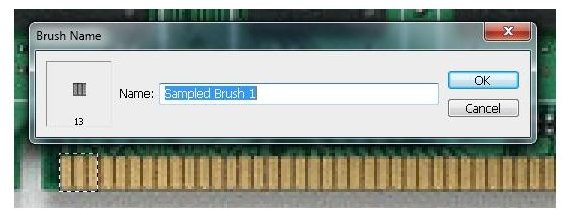
1. Select part of a shape or image to be your brush. Some people don’t realize that you can choose less than an entire shape from which to create a brush. All you do is select the area you want to use for a brush and then click “Edit” and then “Define Brush Preset.”
2. Alter exiting brushes. So many brushes come with Adobe Photoshop, before you spend the time creating one from scratch, see if you can modify a brush you already have to fit your needs. This is easily done by selecting the “Brush” tool from the tool box and then pressing
3. Organize your brushes into sets. This helps you keep the brushes you use for particular jobs together for easy access. Brush sets are created and managed by clicking the drop down arrow on the menu bar with the “Brush” tool selected.
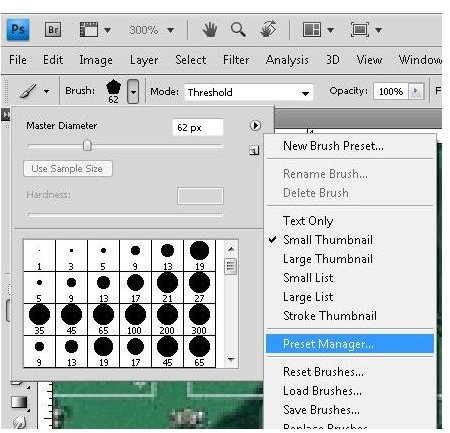
Click the “Preset Manager option and you will be able to save and organize your brushes in a variety of ways.
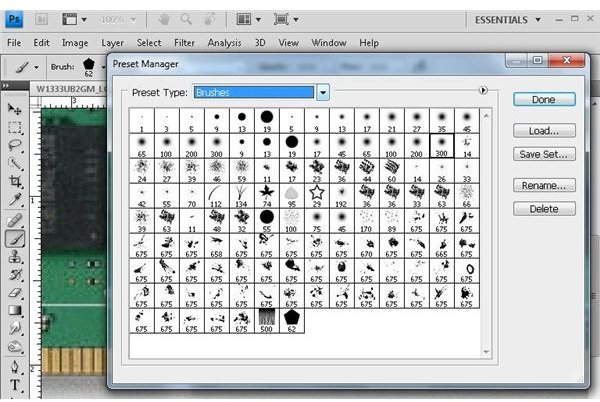
Image Credits: Screenshots taken by Bruce Tyson.


