
In this Adobe Photoshop tutorial, you will learn how to draw pixie dust in Photoshop. Although you are expected to have a basic knowledge of how to use Photoshop, this article will take you step by step through the process of creating a pixie dust effect that will add a touch of magic to all you do.
Making Pixie Dust with a Custom Brush
This tutorial uses Adobe Photoshop CS4 , although you should be able to follow along if you are using a different version.
Begin by opening a new file in Adobe Photoshop. Any size will do. In the Photoshop toolbox, select the brush tool.
Since we’re going for the magical effect here, click on the brush selection drop down box at the top of the screen. Scroll down until you see the star brushes. Select one and then click a few times in the work area. Select two or three different sizes of brush and get a few random clicks in the work area.
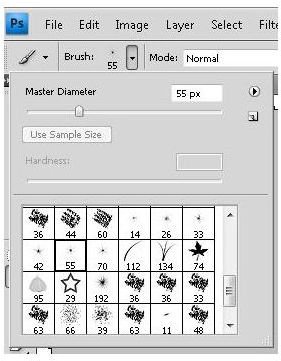
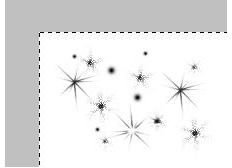
Next, choose a starburst brush by clicking on the brushes options menu and then choosing “Assorted Brushes.” Click with each brush a couple times to complete your pixie dust sample. Here’s an idea of what your artwork might look like at this point.
Now that we have a pixie-like pattern created, we will turn this into an Adobe Photoshop brush. To do this, click “Edit” on the main menu bar and then clicking “Define Brush Preset” from the options list.
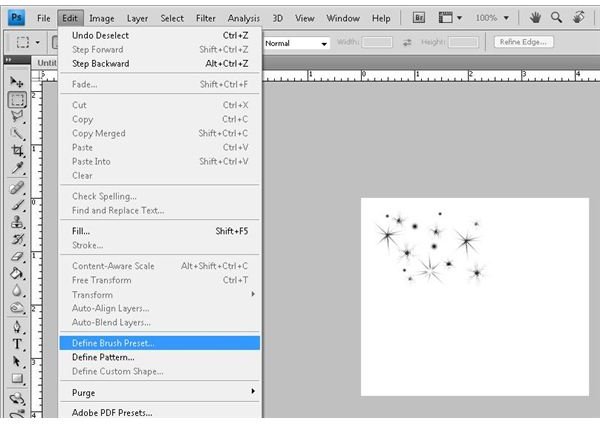
In the “Brush Name” dialog window, name the brush and then click the OK to save the pattern you have made as a new brush. Now, close the image you created (Adobe Photoshop will retain the brush that you just created).
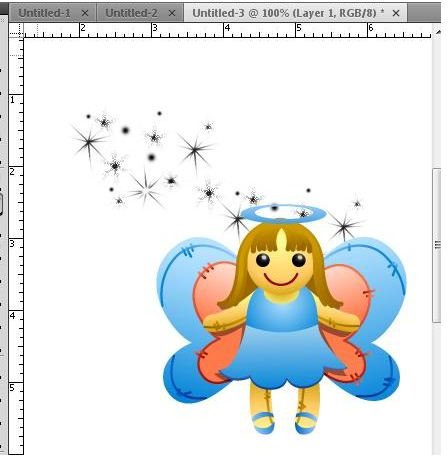
Now, either create or open the image that you want to enhance with pixie dust. For this example, we’ll use a fairy.
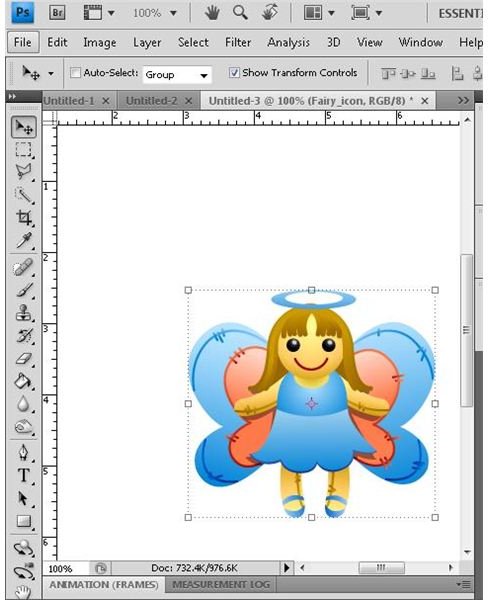
When your image is open, Add a new layer and call it “Pixie.” Grab the “Brush” tool and then select the newly created brush.

Now, using your brush, create pixie dust to the extent you see fit.
If the appearance of the brush is not good enough, you can press the
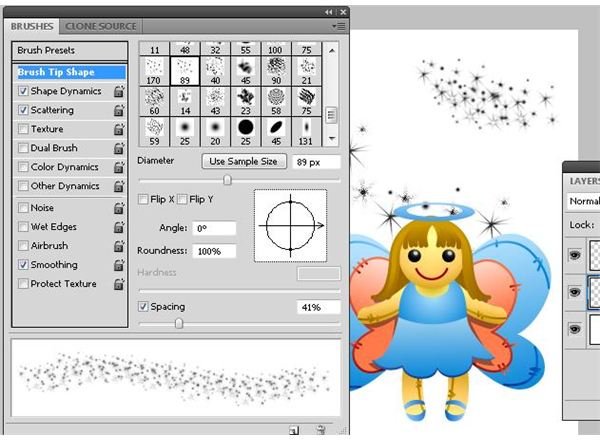
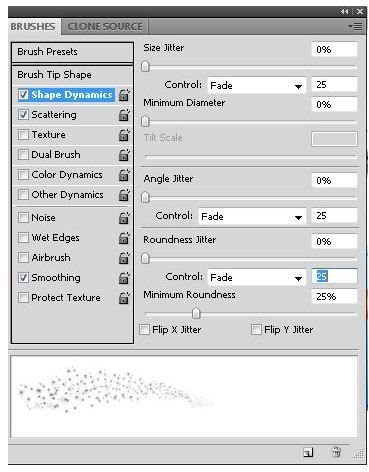
In the brushes window, you can change just about every attribute conceivable with your new brush. You can change your brush size, spacing and more in the main window and then you can select options on the left for additional effects. To get even more out of your new brush, double click the attributes on the left and you can edit each one even further. For example, you can double click on the Shape Dynamics and set one or more of the jitter attributes to “Fade” for a more pixie-dust-like look.
You can now change the look of your pixie dust and tweak it until you are happy with your results. You may even want to create multiple pixie dust brushes so you have several effects available at all times.

Image Credit: Wikimedia Commons/Zeus Box (Kuswanto) (fairy)
Screenshots taken by Bruce Tyson.


