InDesign has become the most popular solution for desktop publishing because of its ease of use and its features. Beginning with Adobe InDesign CS3, Several new special effects were added to the software that have made more powerful than ever. The following are three InDesign best special effects.
Applying Transparency
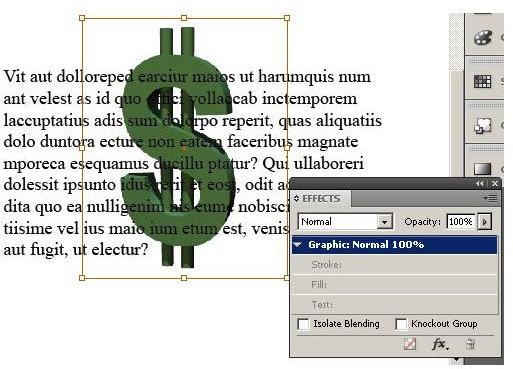
Transparency is one of InDesign’s best special effects. With it, you can change the solid appearance of an object, graphic, text, stroke or fill. Begin by clicking on “Window” and then “Effects.” We will demonstrate the transparency effect by making the dollar sign graphic transparent enough so that the text above it is legible. Using the direct selection tool from the Adobe InDesign toolbox, select the graphic. Because InDesign recognizes this object as a graphic, that becomes is the only option configurable in the “Effects” window. (Click any image for a larger view.)
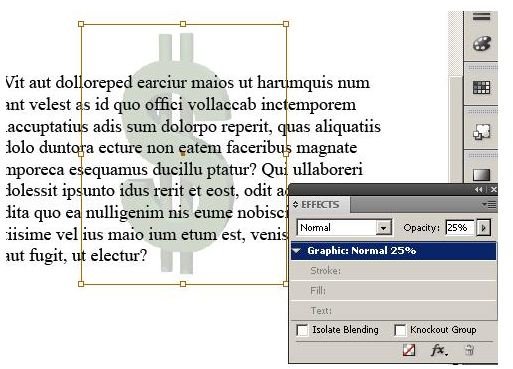
Using the “Opacity” slider or by typing directly in the box, change the value of “Opacity” to 25%. The graphic becomes transparent, allowing the text above it to be easily read.
Applying Bevel and Emboss in Adobe InDesign
“Bevel and Emboss” effects add depth to text and to objects. To demonstrate “Bevel and Emboss,” create a text frame and then select it with the “Direct Selection” tool. In the “Effects” window, click on “Text.” On the lower right hand side of the “Effects” window, you will see a small fx button. Click on it and you will see an option menu that shows you a lot of special effects from which you can choose (notice that transparency is the default option at the top).

Choose “Bevel and Emboss” from the menu. This option allows you to give text and objects a 3D feel.
If you select “Inner Bevel,” you will see that the bevel is created within the constraints of the text or object.
“Outer Bevel” will impinge on the fill of the object or text, extending the bevel outward.
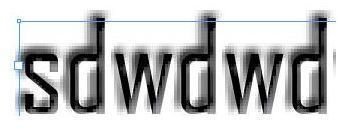
Emboss gives the appearance that the text or object is rising from the page or sinking below it by coloring part of the object as well as the area around it.
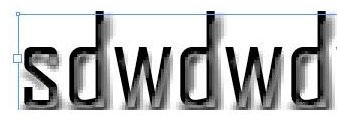
Pillow Emboss mimics the effects of stitches in a pillow where the stitching sinks in and the rest of the object or text is raised.
Explore all the shadow, highlight, opacity, and techniques and see how they affect objects that are beveled and embossed.
Gradient Feather
The “Gradient Feather” effect is used to graduate a color into no color. This effect takes a long time to create manually, but with the “Gradient Feather” tool, it helps you work faster without sacrificing quality. This feature works like a traditional gradient except the stops are gradients rather than colors. You can access “Gradient Feather” by clicking the fx button at the bottom of the “Effects” window.
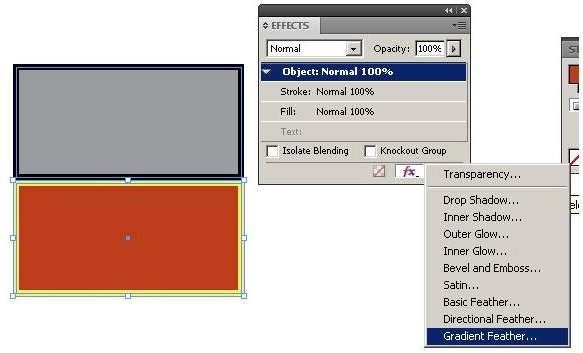
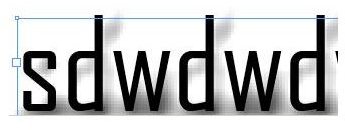
Here is the same graphic with a feather gradient applied to both frames.
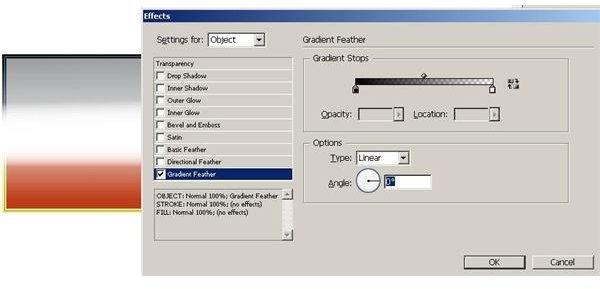
As you can see, there is a range of options to work with including “Angle,” “Type,” “Opacity,” and “Location.” Also gradient stops can be added removed and distributed as needed.


