Enhance your desktop publishing projects and web graphic designs with this easy step by step Adobe Photoshop tutorial on creating a plastic effect for text.
Overview
If you are fond of creating designs and layouts using any kind of desktop publishing or photo editing software, you easily crave for more styles and effects of fonts. One of the best editing programs is Adobe Photoshop, and it is widely used by expert graphic designers to achieve their desired creative digital art. The common text effects include gradient, embossed, crystallized, wooden, fire, snow and of course, the plastic effect which you will be learning today.
In this Photoshop tutorial on creating plastic effects, I will be using Adobe Photoshop CS3, but don’t worry if you have an older or a newer version because all have the needed commands.
Just to give you an idea, the image below shows the final output of this tutorial:
Let’s Get Started!
Step 1: Open Adobe Photoshop. Press Ctrl N to create a new document and change the settings to the following:
(Click any image for a larger view.)
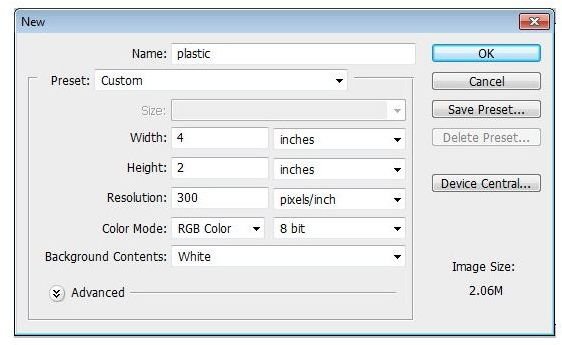
- Width: 4 inches
- Height: 2 inches
- Resolution: 300
- Background: white
- Change the name to your desired file name.
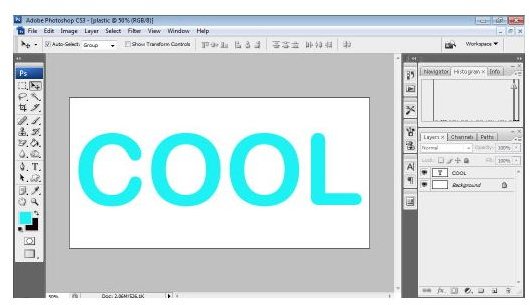
Step 2: In the working area, write your desired text. You can increase the size of your document if you use a longer word. I used “COOL” as my sample text, sky blue for my text color and Arial Round for a more generic font style. You can also choose your desired color and font.
Note: For Steps 3-7, we will only be changing the layer style settings in one pop-up window.
Step 3: In the layer tab located at the right lower portion of your screen, click the fx to add effects to the layer style and select the Bevel and Emboss**.** Change the settings to the following:
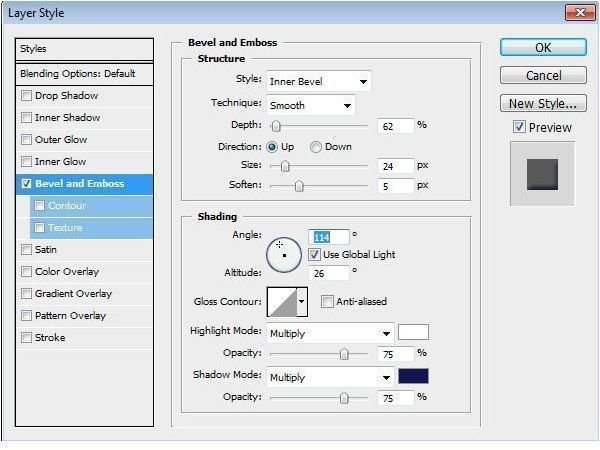
- Style: Inner Bevel
- Techniques: Smooth
- Depth: 62
- Size: 4
- Soften: 5
- Angle: 114
- Highlight Mode: Multiply
- Opacity: 75
- Shadow Mode: Multiply and Change the color to a darker shade
- Opacity: 75
Step 4: Make sure not to click the ‘ok’ button until you are done with step 7. Now, click Satin for the next layer style to adjust and make the following changes:
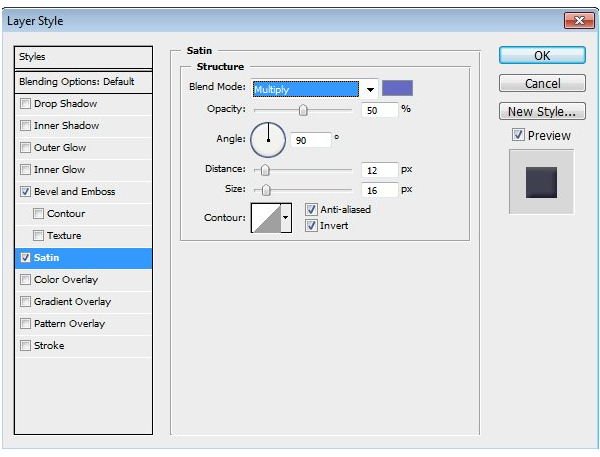
- Blend Mode: Multiply, and select a darker color than your original font color
- Opacity: 50
- Angle: 90
- Distance: 12
- Size: 16
- Make sure to check anti-aliased and invert
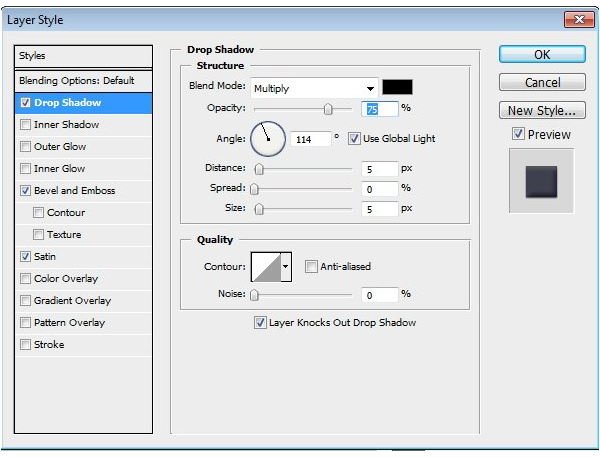
Step 5: For the Drop Shadow, choose Multiply for the blend mode with 50% opacity and 114 degree angle. Set the distance and size to 5 and spread to 0
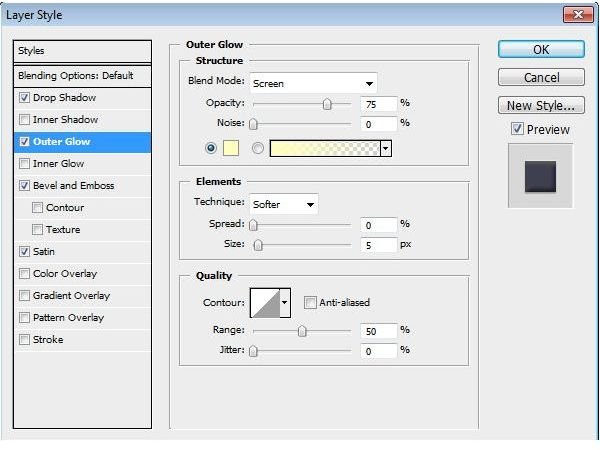
Step 6: For the Outer Glow, change the blend mode to screen with 75% opacity. Choose light yellow, change technique to softer, 5 px in size, and 0 for spread. Same goes with the Inner Glow.
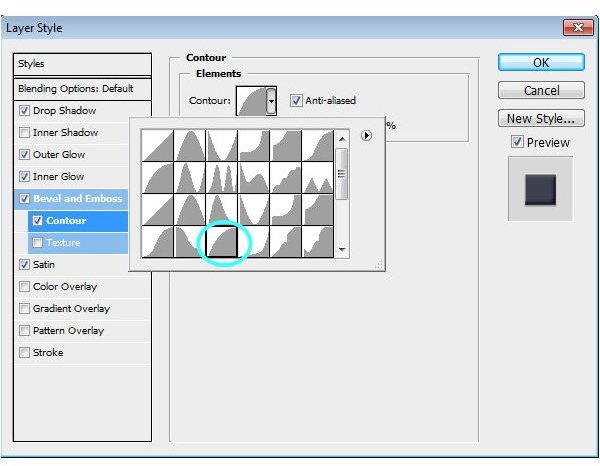
Step 7: Just below the Bevel and Emboss, click Contour and choose the ‘half round’ contour. Now, click the ‘ok’ button to apply all effects to your text.
After changing the layer style settings, your text would be similar or close to this:

Step 8: In the drop-down layer menu found at the upper portion of your screen, click Layers, Smart Objects and Convert to smart object.

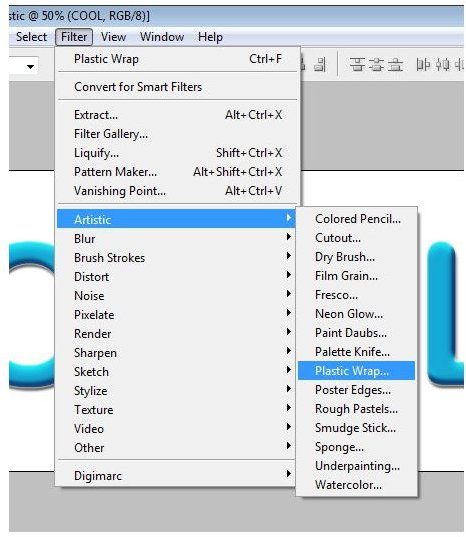
Step 9: Still in the upper part of the screen, click the Filter tab, Artistic and Plastic Wrap. In the Plastic Wrap pop up window, change the settings to: Highlight strength: 11; Detail: 13; and Smoothness: 8. Then, click ok.
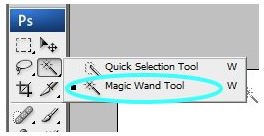
Step 10: Located in the left side portion, click the magic wand tool on the icon tray**.** Click the white background using the magic wand tool and press Ctrl Shift I to invert the selection.
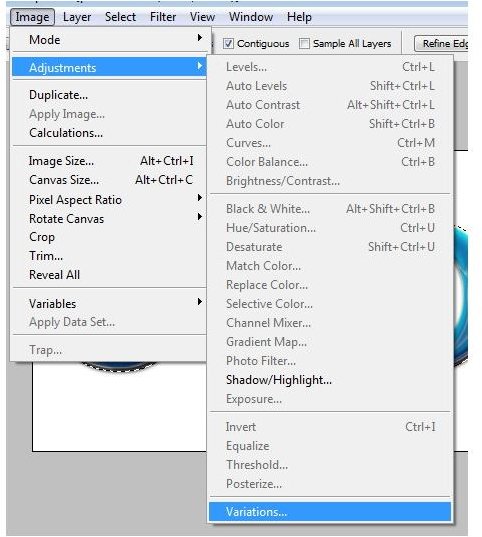
Step 11: After which, click the image drop down menu and choose variations.
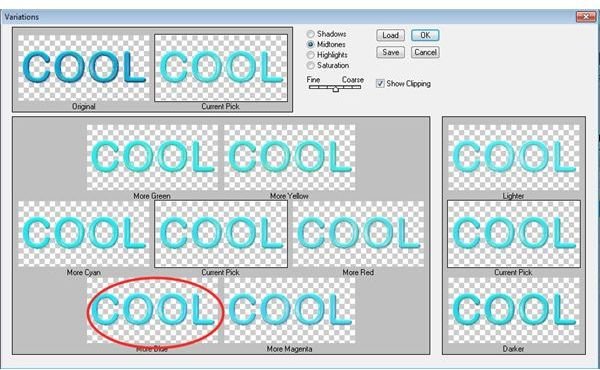
From the different image variations, choose the ‘more blue’ or similar, depending on your chosen color. Click ok.
Step 12: Finally, save your work and you’ve created a plastic effect.