Textures are everywhere - from the brillo pad on our kitchen sink, to the frizzy feel of our pet cat, to the grittiness of sand in our hands on the beach. This makes creating textures in Photoshop an adventurous experience.
Nature Texture
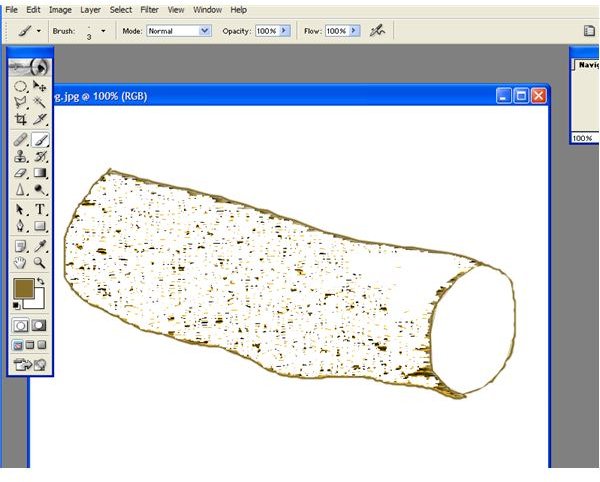
We will start out by showing how to create the “Bumpy Log” texture effect, beginning with the drawing shown below. (Click any image for a larger view.) The clearer your drawing is and the sharper the line is, the better your texture will come out.
1.Open Photoshop and import your log line drawing. Click on the drawing with the “Magic Wand” tool. If you find that you don’t have the entire area selected, you can choose to increase the tolerance field number on the top tool bar. Type “35” for your tolerance level. Now click back on the log and select it.
2.Hold down the “Shift” key and select to make your selection grow. We need to add a color. Click on the “Paint Bucket” tool and select the “Foreground Color” icon. When the Color Picker dialog box is open, select the color of your choice. In our case we will select a sandy brown. Click OK.
Select the log and fill in the color in its totality. Now let’s add the texture with the log still selected. Go to Filters > Textures > Mosaic Tiles. Slide the “Tile Size” to “9’ then make sure “Grout Width” is set to “2” and keep “Lighter Grout” set at “4”. Click OK.
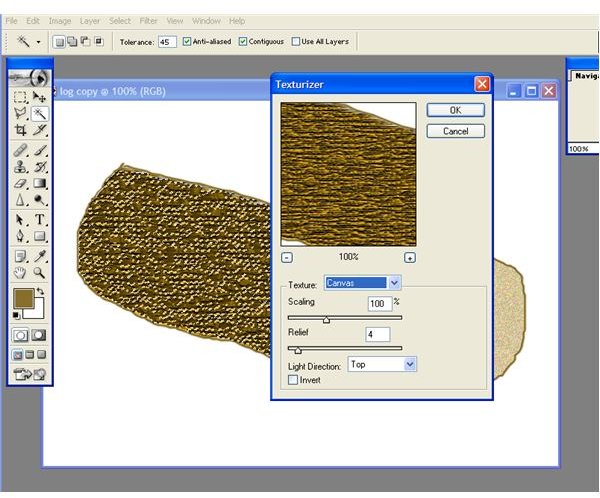
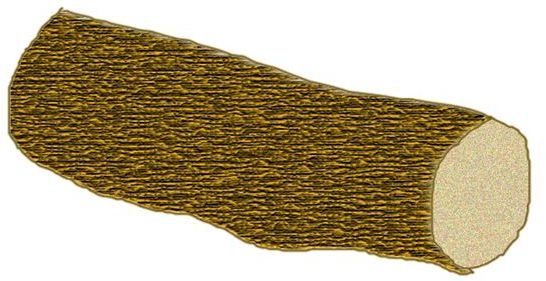
3.You now should have the beginning application of the desired texture. Let’s go for detail. Go to “Filter Stylize Emboss”. Make sure the angle is set to 135, height is 9 pixels, and amount is 100 percent. Click OK. The log should look like the image below.
Hair and Fur Texture
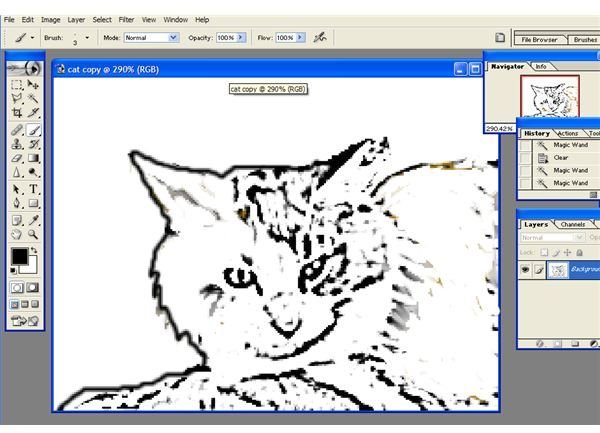
Now, let’s look at another example of how to create a texture in Photoshop. Let’s say you need to add some fur or hair to a drawing of a kitten. The same tools that are used to create fur are also used to create hair.
Open your line drawing of the kitten. Fill in the base color for the ears and face, using the same technique from the above tutorial.
Select the “Paint Brush” tool and choose white. Go over to your kitten image and begin to paint the outer left cheek in quick fast strokes, from right to left. Continue this motion until you have completed the entire outer left side of the face.
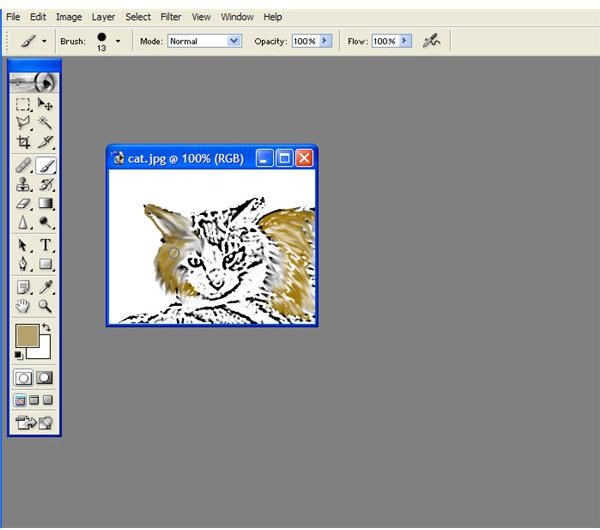
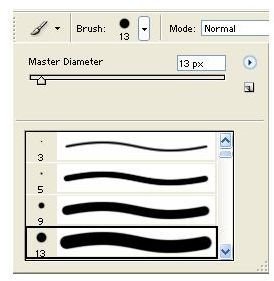
Now select a lighter brown color from the “‘Color” palette and begin to paint alongside the white fur strokes you have just created. You will need to change the size of the brushes to see a contrasting texture. Choose a smaller brush from the “Brush” palette.
Choose a darker brown color for your last texture. Continue the left to right stroking with the paint brush, on top of the lighter brown color.
Now we want to blend the colors together for that furry look. Select the “Smudge” tool and begin the left to right stroke over all three colors on the kitten’s outer left cheek. Continue this exercise on the right cheek, head and body.
Now let’s look at another example and try to create hair texture using the same techniques, but this time with a little change in direction for the strokes.
Creating Hair Texture in Photoshop
1. Open a line illustration similar to the one below, where there is human hair that needs texture.
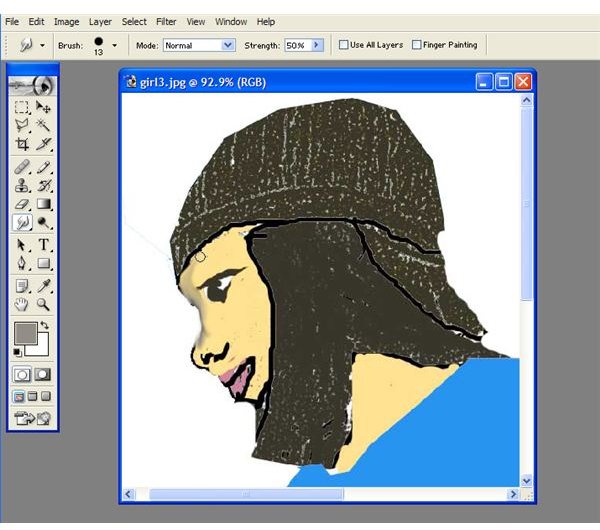
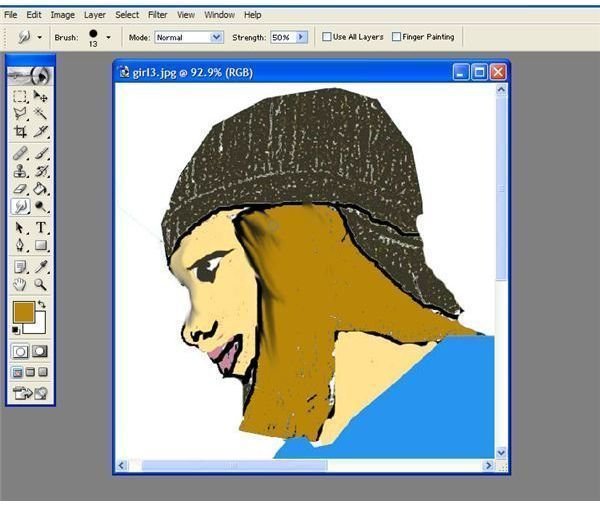
2. Once the color is established select the “Brush” tool. Let’s set the brush size to 25. Click on black, beginning from the top and stroke in an up and down motion on both the left, then the right side of her face. Now let’s choose a dark brown color and repeat the strokes. A highlight can be created using white and a size 10 brush. Highlights vary depending on where the light is falling on the hair. In this case the highlight is coming more from the left. Take the brush and continue the up and down stroke on a specific left section of the hair. Make sure it’s not too solid. The purpose is to let the color naturally come through.
Denim Texture for Clothing
Now let’s try to give that denim shirt on your character some depth. Click on the character’s shirt and add a medium blue. Go to Filter > Add Noise. Set the amount to 16. Now go down to Filter > Texture > Texturizer. On the drop down menu choose “Burlap”. Set the “Amount” to 16.02 and “Distribution” should be “Gaussian”. Click OK.
Just one last touch to give the shirt a real jean-like illusion. Go to “Filter Stylize Wind”. Choose the “Stagger” radio button. Make sure the “Direction” is set from the left. Click OK. There we have it! A denim shirt for our character, custom created in Photoshop. As you experiment with different textures, you will find other ways to achieve some really fascinating results.


