Gradients are a popular aspect of digital graphics and Adobe Photoshop makes it easy for us to create a gradient. In this article, we take a look at different types of gradient and how to create them in Photoshop.
Photoshop Gradient Design
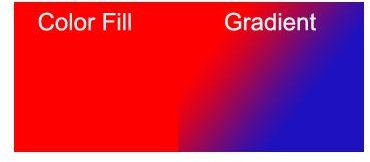
The gradient is one of Adobe Photoshop’s most used effects and also a easy to create one. First of all, let me tell you that in layman’s terms, a gradient is a kind of color fill involving two or more different colors that blend with each other by progressing from one color to the other. Still confused? Check the two images below. The first one is a plain red color fill while the second image is a gradient with two colors red and blue. (Click any image for a larger view.)
Types of Gradients
With Photoshop, you can do more than just create a simple gradient like the one above. You can control various aspects of your gradients by adding different colors and choosing what type of gradient you want. Here are the types of gradients that you can create with Photoshop.

How to Create a Gradient?
Okay, here’s the part you are probably reading this for. How do you create a gradient in Adobe Photoshop? Well, the first step is to obviously start Adobe Photoshop and create a new document. I have used Adobe Photoshop CS4 for this tutorial so, depending on the version of Photoshop you are using, you may find the options a little different but there shouldn’t be a big difference.
You can apply a gradient to almost anything including backgrounds, rectangles, circles, and text. The process is almost the same in all cases.
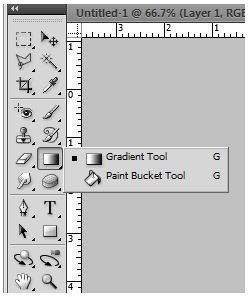
Let’s start by applying a gradient to the background. On the toolbox locate the gradient tool. If you can’t see it, then click on the little arrow at the bottom of the Paint Bucket tool (you can use the keyboard shortcut of G to locate the paint bucket tool) and the gradient tool shall appear.
Click on the gradient tool and notice the new options that appear on the toolbar. You should see a box with several small boxes (with combination of different colors). This is the gradient picker. Here we can choose a gradient style from one of the many preset styles. Note that I have marked a region with a red oval. The small icons here let you choose what kind of gradient you are going to create.
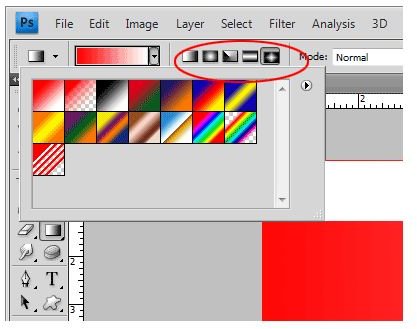
First choose the type of gradient you want by clicking on the respective icon in the toolbar next to the gradient picker box.
Now, let’s create a simple gradient with the foreground and background color. Set your foreground and background color as per your choice and bring up the gradient picker. The first style on the gradient picker by default is a foreground color to background color gradient. Click on it to select the style and on your image, click anywhere and drag your mouse. You should see a line appear that follows the mouse cursor.
Release the mouse button a little further from where you first clicked. You should be able to see your gradient now. Depending on where you start the gradient and how you drag the gradient line (how long and which direction), the gradient will differ in appearance.
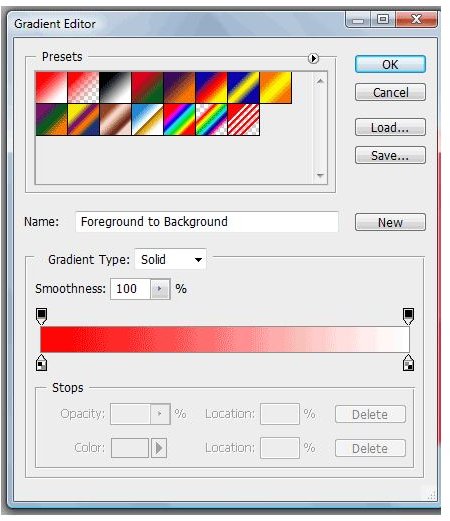
That’s all, and you’ve created your first gradient! If you want a little more control, just double click on the gradient picker and the gradient editor dialog will appear (image below). Here, you can create your own gradient style or edit an existing style by choosing settings like smoothness, colors, etc. Just experiment with the options a bit to get a better idea.