Parchment Paper Craft is a popular material used for writing documents and for illustrating treasure maps. It is commonly found in pirate and treasure hunting movies like Captain Hook and Indiana Jones. Learn how to make your own with this Photoshop parchment tutorial.
What is Parchment?
Have you ever watched a pirate or treasure hunting movie? Did you notice the yellowish or brownish paper where the treasure map was drawn? Well, that is a parchment! Parchment is made of animal skin, usually goat or sheep. It was used for creating documents, maps, manuscripts, and books during the 16th century.
In this Photoshop parchment tutorial article, you will learn how to make a digital parchment paper craft with burnt edges. You can use this as a background to blog posts, e-cards, image designs on your website, or as a digital border for your pictures.
Let’s Get Started
I am using Photoshop CS3, but this Photoshop parchment tutorial is applicable to any Adobe Photoshop version.
Step 1: Open your Photoshop program. Click File on the upper left corner of your screen and press Ctrl N to create a new document.
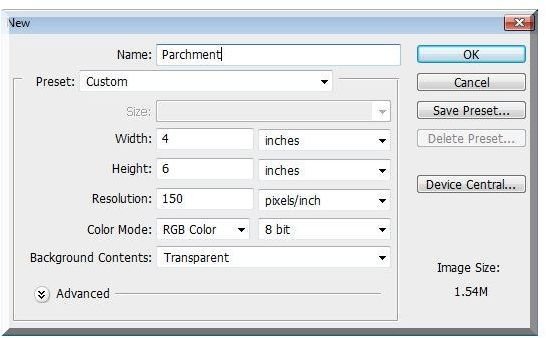
Step 2: A pop-up window will appear, rename the file “parchment” for easy identification. You can choose your own paper width and height. I made mine 4 x 6 inches or 4R. Change the resolution to 150 and background content to transparent. Then, click OK.
Click any image for a larger view.
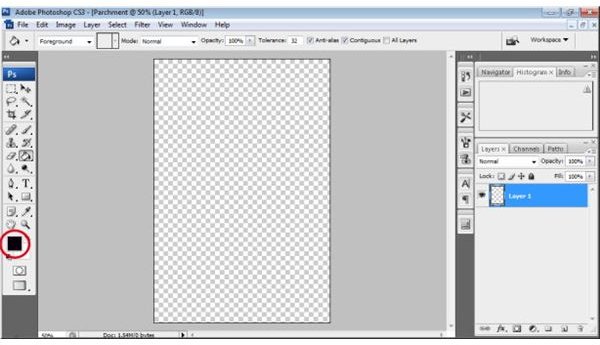
Step 3: This is how your working area would look like. In the sidebar, click the foreground color encircled in the screenshot below.
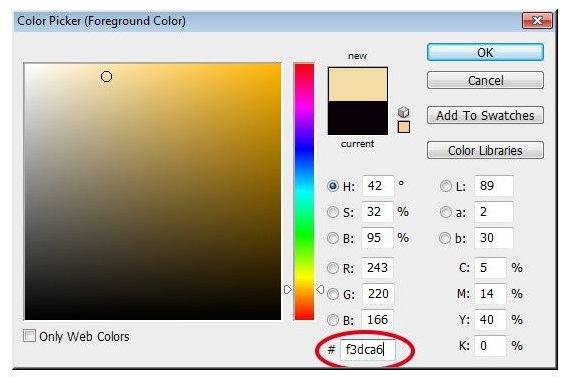
Step 4: The color picker window will appear – change the color by copying this color code #f3dca6. You can experiment with different colors as you wish but if you want to come up with the same result, you can use the given color for now.
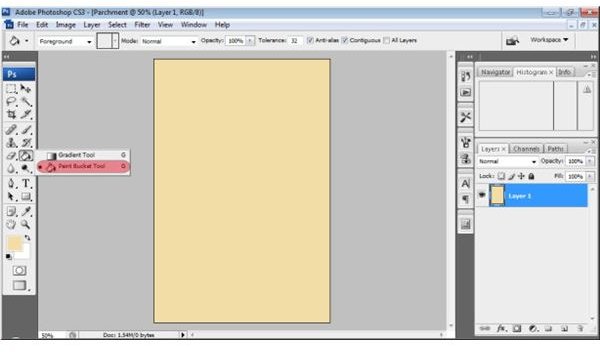
Step 5: Click the Paint Bucket Tool found on the sidebar and click on the transparent area to fill it with the defined color.
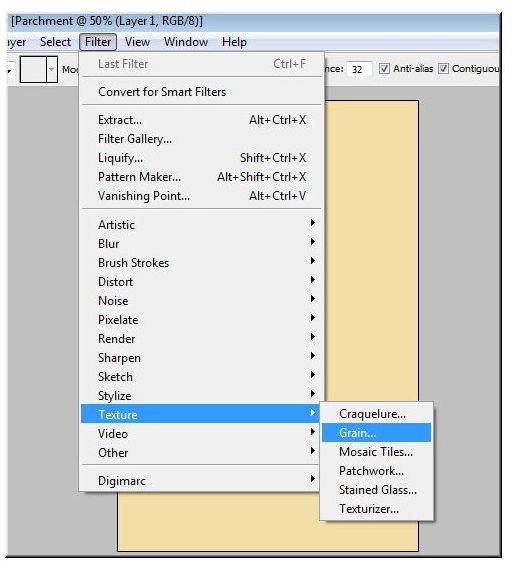
Step 5: From the drop down Filter Menu, select Texture and click Grain. Follow this setting: Intensity = 10, Contrast = 50 and Grain type = Horizontal and click OK.
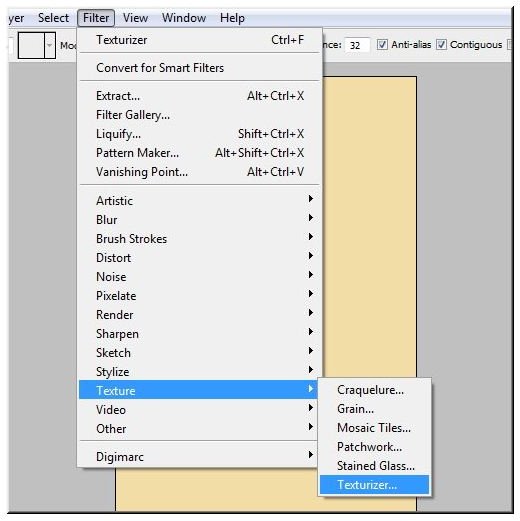
Step 5: Again, click the drop down Filter Menu, select Texture and click Texturizer. Change the Scaling range to 66 and Relief to 4.
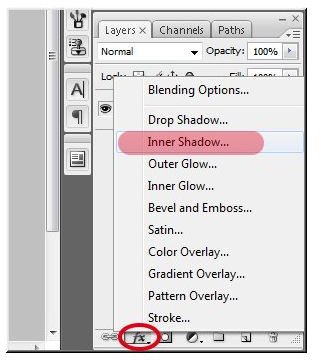
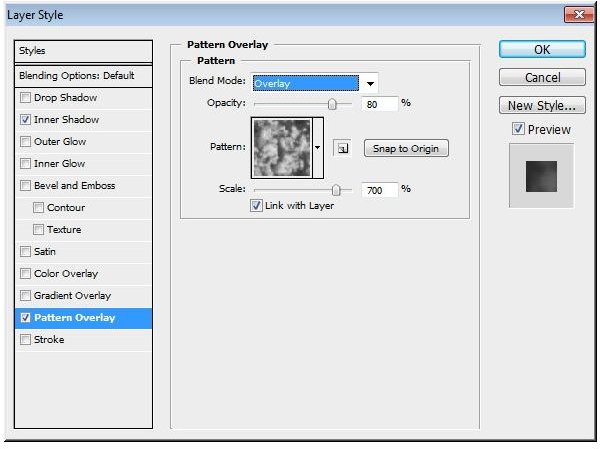
Step 6: Let’s now add an inner shadow to your textured paper by clicking the fx button found on the layers tab. Then select Inner Shadow.
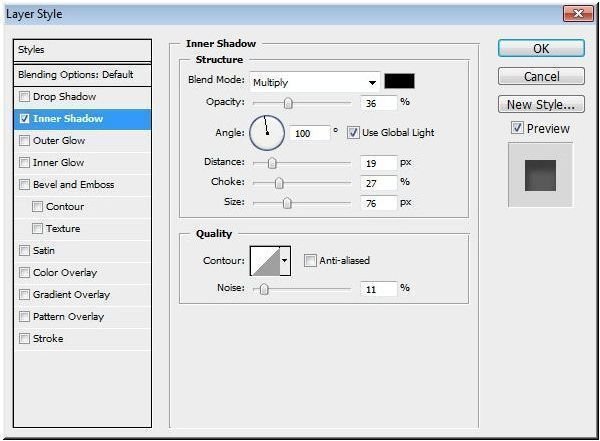
Step 7: The Layer Style window will pop-up. Now, change the angle to 100 degree; color = black; opacity = 36%; distance = 19; choke = 27; size = 76; noise = 11%; and make sure the you checked the “Use Global Light”.
Step 8: In the same window, go to pattern overlay. Change the pattern as shown in the screenshot below. Change the normal blend mode to overlay. Reduce the opacity to 70% and increase the scale to 700. Click OK.
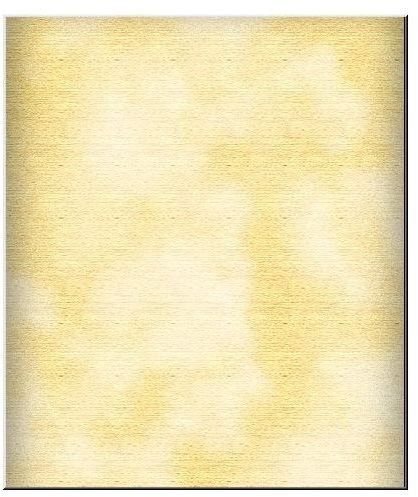
After clicking the OK button, your document should already look like this.
Step 9: What we should do next is to make the crooked edges using the Lasso tool found at the side bar.
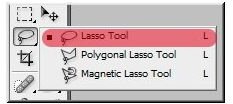
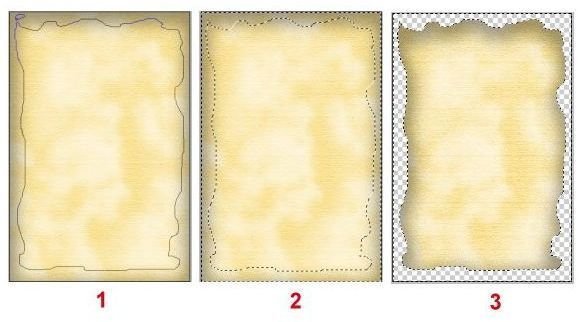
1. Using the Lasso Tool, draw crooked lines around the paper until both ends of the line meet.
2. Press Ctrl Shift I to inverse the selection.
3. Press Delete to remove the selected area and Ctrl D to remove selection mask.
Step 10: Now let’s create the burn edges effect by selecting the Burn Tool and brush around the edges. You can also add a teared paper effect inside and on the edges of the paper using the Lasso Tool.
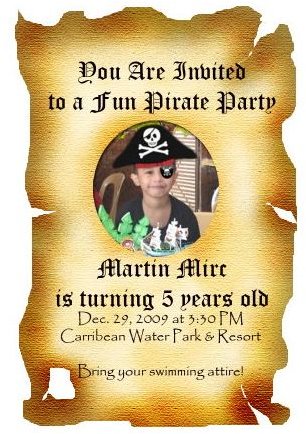
Now, it’s up to you how you will utilize your digital parchment paper craft. As mentioned earlier, you can use it as an image for your website, background for your blog post, border for your picture or even a birthday party invitation.
Remember that you can be more creative by trying out different settings and add ons to come up with your own personalized parchment paper craft.
You may also want to change your hair color or cut a person from a picture using Photoshop.


