
Have you ever tried to make collages in Photoshop? It can be a great skill to hone if you would like to combine a collection of images into a memory keepsake or a professional graphic design project.
Photoshop Collages
Want to learn more about making collages with Photoshop ? It can be quite an awesome process. Collages are created for several reasons. The sky is definitely the limit where collage art is concerned.
This is the one collaborative project that allows you to spread your wings as a visual artist and bring together all of the visual elements of photography, illustration, typography and – most of all – your life experience to create an engaging design project. It’s amazing what can be done with a combination of contrasting images and text. Making a collage is fun, easy, and creative!
There are many ways to go about making collages in Photoshop – here is one technique you can try.
Step 1: Open Photoshop. Click on File>Import Image or File>Open to import an image and open your custom image.
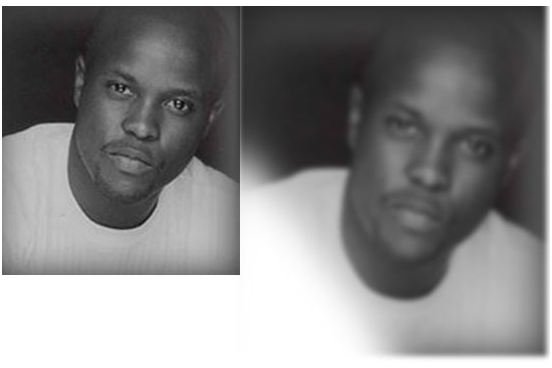
Step 2: Duplicate the imported picture by going to the Layers Menu, right clicking, and then selecting the Duplicate Layer command. Now begin to trace on the portion of the duplicated picture that you would like to isolate. Use the lasso tool to do this. Once you have selected the entire portion of the duplicated image go to Select>Inverse to select the background of the image. Hit Delete to delete the background of the duplicated image.
Step 3: Select the duplicated image in the layers panel. Duplicate the image 4 additional times. Click on the new layer and go to Filter>Gaussian Blur. This will blur the image.
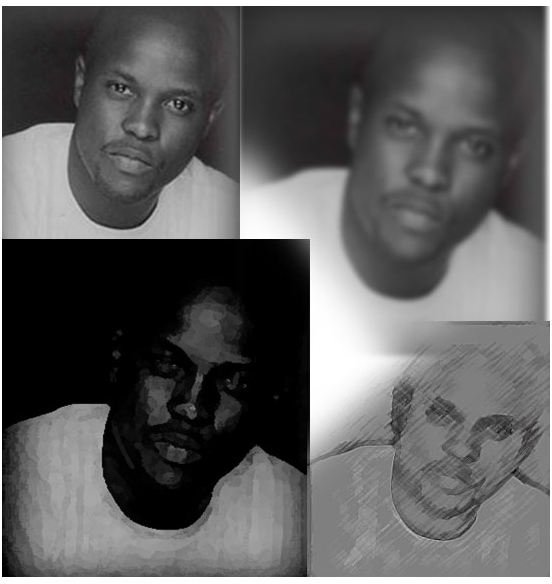
Step 4: With the next duplicated image, we will change the texture and distort the color. Choose a third duplicated image, and go to Filter>Artistic>Colored Pencil. This gives your image a colored pencil texture. Now we want to enlarge the image to distinguish it from the other images. You can also try the plastic wrap, radial blur or lightening filters as an interesting effect. Now use the Move tool to move the duplicated images to fill the space as you see in the image below. It’s important to play around with different filters until you find what you are aiming for.
Step 5: Let’s include some text. Go to the Type tool and click on the collage image. Type the person’s name or initials. Enlarge the text by selecting it and type 100 pts in the size field. We can place this text in the middle of the collage with the move tool. Click on Layers > Bevel and Emboss. In the Bevel and Emboss dialog box, choose Outer Bevel then click OK. Another very cool effect is the Warp Text effect, with which you are able to create bulging and arched text manipulation.
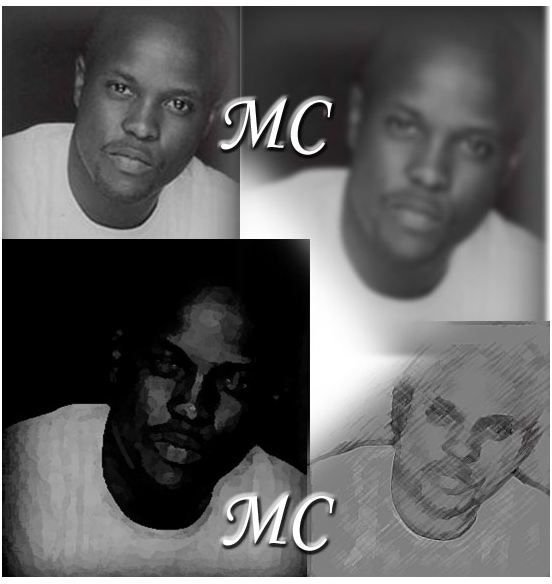
There you have it – a Photoshop collage with 4 images, which have been slightly manipulated with text placed in the center. This exercise can be used with other images and text. Have fun with it and explore other filters as well. Good luck with your collage adventures!


