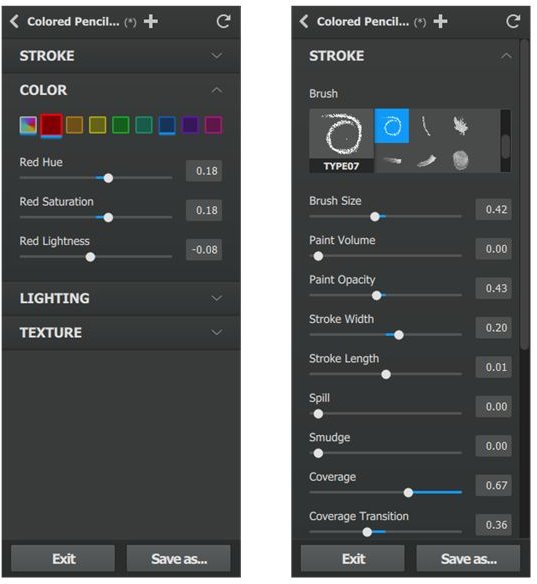
This step-by-step Photoshop tutorial shows you how to create text effects simulating the logo fonts used to design the Volkswagen and Fiat logos. You can easily adapt these Photoshop text effects to create your own custom logo fonts.
How to Create the Volkswagen Logo Font
1. Create a new page by pressing the [Control + N] keys on your keyboard.
2. Click on the Text tool and select the Arial font. Type in the letter “V.”
3. Copy the letter by holding down the [Alt] key and dragging the “V.”
4. Hold down the [Alt] key, click on the letter “V” and drag it sideways. This will duplicate the letter so that you have two “V’s” as shown below.

5. Arrange letters as shown in image below.
6. Merge the layers by pressing the [Control + Shift +E] keys.

7. Press the [Control + N] keys to create a new layer.
8. Use the Radial Marquee tool to make a selection as shown in the image below.

9. Invert the selection by pressing the [Control + I] keys.
10. Select the previous layer, and then delete the area of selection.

11. Invert the selection again [Control + I].
12. Stroke the selection by 6 pixels [Edit > Stroke].

13. Use the Transform tool to arrange and re-size the circle and letter layers.

14. Merge all layers [Ctrl + Shift + E].
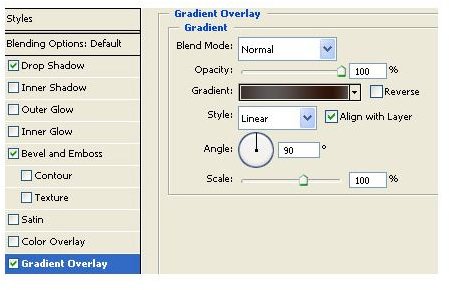
15. Open the Layer Styles. Select Gradient Overlay
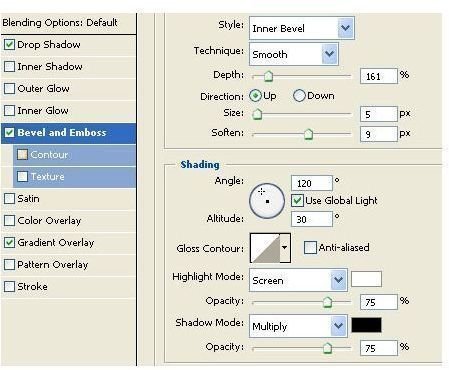
Select Bevel and Emboss.
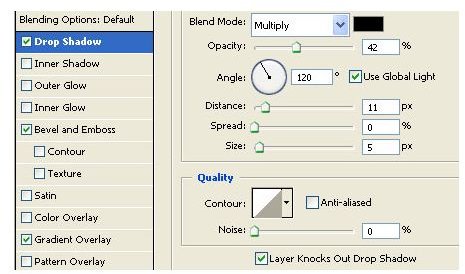
Select Drop Shadow.
You can add some texts and images if you like.


And you are done!
How to Create the Fiat Logo Fonts

1. Create a new page by pressing the [Control + N] keys on your keyboard.
2. Press the [Ctrl + Shift + N] keys to create a new layer.
3. Use the Rectangular Marquee tool to draw a rectangle.
4. Create a gradient scheme as shown in the image below.
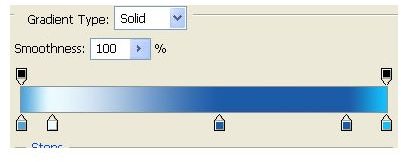
5. Fill the gradient in to the selection.
6. Split the selection in to four equal parts.


7. Type in the text “FIAT” in the Arial font.
8. Arrange each of the letters in the position as shown in the image below.

9. Select the font color using magic wand.
10. Uncheck the visibility check box of the text layer.
11. Select the previous layer.
12. Delete the selection.

Use the skew symmetric feature by clicking Edit > Transform > Skew to arrange the image as shown in the image.

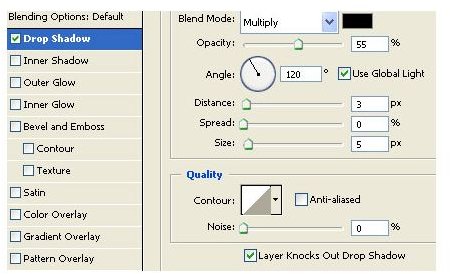
14. Open the Layer Style options.
15. Check the Drop Shadow box.
And you are done!