This Adobe Photoshop tutorial provides instructions on how to create custom, patterned text, a popular Photoshop text effect that enables you to apply an eye-catching pattern to your fonts.
Patterned text is a popular Photoshop text effect that adds an eye-catching pattern to text. This tutorial provides stepwise instructions on creating candy cane and star-patterned text in Photoshop.
How to Create Candy Cane Text Effects
1. Create a new page by pressing the [Control + N] keys on your keyboard.
2. Click on the text tool from the toolbar.
3. Type in the text that you want to work with.
3. Rasterize the text. To do this, click Layer from the menu, select Rasterize and then click Type.

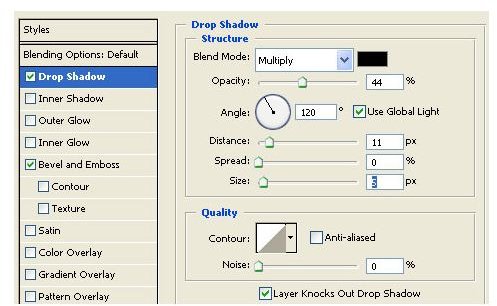
4. Open the Layer Styles ( Click Layer and then Styles). Check the Drop Shadow option. Set the values as shown in the image below.
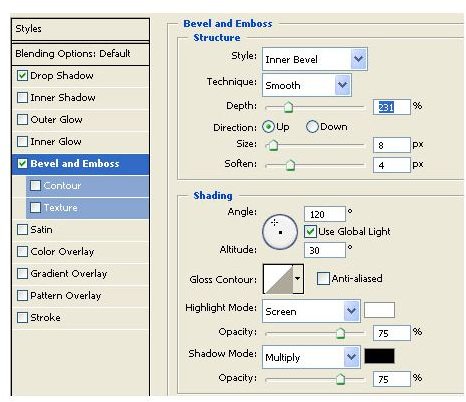
5. Check the Bevel and Emboss option. Set the values as shown in the image below.
6. Create a new layer. Draw a few red lines as shown in the image below.

7. Select the text layer, and then select the background using Magic Wand.
8. Select the layer with the red lines. Delete the selection.

And you are done!
How to Create Star-patterned Text Effects

1. Create a new page by pressing the [Control + N] keys on your keyboard.
2. Use the text tool to type in the text that you want to work with.
3. Rasterize the text: click Layer from the menu, select Rasterize and then click Type.
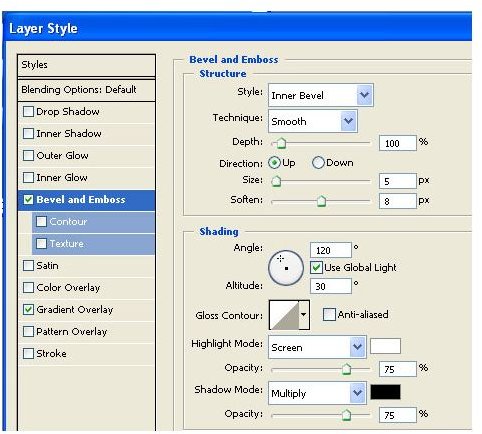
4. Open the Layer Styles (Click on Layer and then Styles). Check the Drop Shadow option. Set the values as shown in the image below.
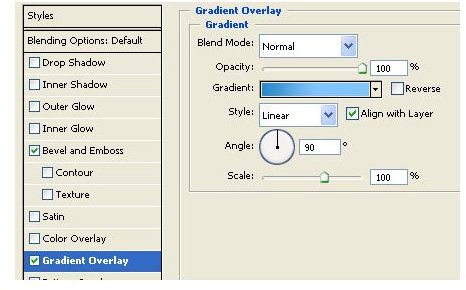
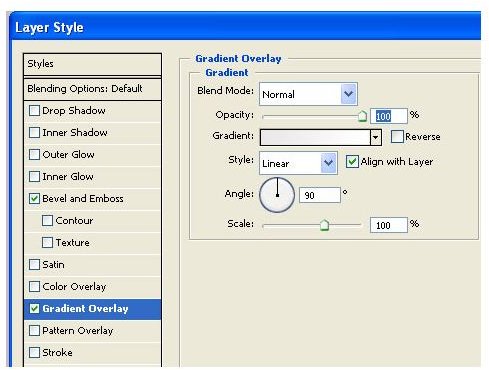
5. Select the Gradient Overlay option
5. Select the Bevel and Emboss option
6. Duplicate the layer by clicking on Layer and then Duplicate Layer.
7. Select the duplicate layer and then open Layer Styles.
8. Modify the Gradient Overlay

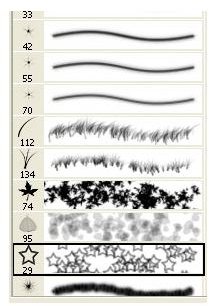
9. Select the Erase tool, and then set the hardness at 100%.
10. Select the star-shaped brush.

And you are done!