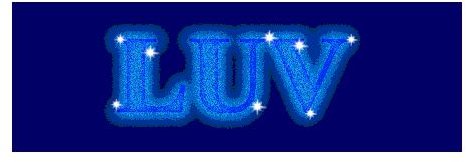
This Adobe Photoshop tutorial shows you how to create eye-catching, animated text that literally sparkles and glitters on the page.
.
Section #1
-
Create a new page by pressing the [Control + N] keys on your keyboard.
-
Set the size of the canvas at 450x150px.
Advertisement -
Apply a background color of your choice.
-
Select the text tool and open a text box.
Advertisement -
Choose a fancy font, and a color that contrasts with your background color.
-
Type in the text that you want to work with.
Advertisement -
Rasterize the text: right-click on the text and then select Rasterize.
-
Select the rasterized text using the magic wand.
Advertisement -
Feather your selection by 2 pixels [Select > Feather].
-
Contract the selection by 3 pixels [Select > Modify > Contract].
Advertisement -
Delete the selected area.
.

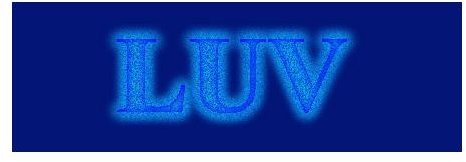
Section #2: Adding the Glitter Text Effect
- Create a new layer without canceling the selection
- Position this layer over the rasterized text layer.
-
Feather the selection by 2 pixels once more.
Advertisement -
Expand the selection by 2 pixels [Select > Modify > Expand].
-
Select a lighter shade of the font color to fill your text.
Advertisement -
Without canceling the selection, create a new layer.
-
Position it over the previous layer.
Advertisement -
Expand your selection by 3 pixels [Select > Modify > Expand].
-
Fill the selection with a lighter shade of your font color.
Advertisement -
Create three duplicate layers of this layer [Layer > Duplicate layer]
-
Add noise to each layer [****Filter > Noise > Add Noise].
Advertisement -
Ensure that the noise level is the same for all four layers.

Section #3: Creating Sparkles
- Create a new page by pressing the [Control + N] keys on your keyboard.
- Size the canvas at the size of 500x500px.
- Select the background as black.
- Add new layer and then zoom in to 300%.
-
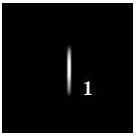
Select the Line tool and use it to draw a 2pixel line.
-
Press the [Ctrl + Enter] keys to make a selection.
Advertisement -
Fill the selection with white color.
-
Use the erase tool on both ends of the line without canceling the selection.
-
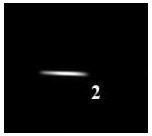
Select the Transform tool [Ctrl + T] and use it to rotate your image 90 degrees.
-
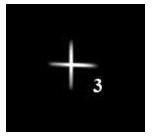
Position the second line over the first to form the shape of a cross.
-
Merge the two layers.
-
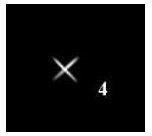
Copy the cross shape and then use the Transform tool [Ctrl + T] to rotate it 45-degrees to form an X shape.
-
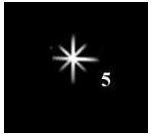
Use the hand tool to position this X-shape over the cross shape, forming a “star.”
-
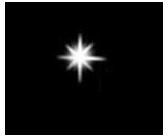
Create a new layer and position it behind the above layer.
-
Draw a circle around the center of the star-shape.
-
Feather the circle by 6pixels, and then fill it with white color.
-
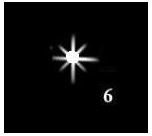
Copy this sparkle and use the Transform tool [Ctrl + T] to create one small-sized sparkle.
-
Paste copies of the sparkles onto your text.
It is important to note the order in which you place the sparkles, for the purposes of animation in the next step.

Step 3: Animate Your Text
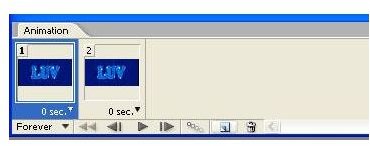
- Open your content in Adobe Image ready.
- Open the animation panel [Window > Animation] and make four frames there.
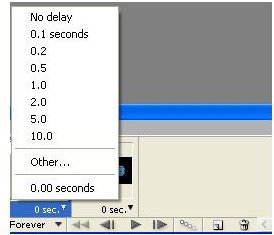
- Set the time delay for 0.1 Seconds
- Animate the Sparkles by randomly turning-off the visibility of sparkle layers in each frame.
- Animate the glitter by turning off visibility of noise layers one after another in each frames. For example, turn off the first noised layer for first frame and turn it on for second frame and so on for each successive layer.
Play the animation, and watch your text in sparkling, glittering action.


