This Adobe Photoshop tutorial will show you how to create crystal embossed text effects for your blog or website.
Simple to Follow Steps
Follow the steps outlined below to create this stylized text effect for your company logo or website using Adobe Photoshop. Simply select different fonts and color schemes to create your own customized crystal embossed text.
Selecting Background and Font
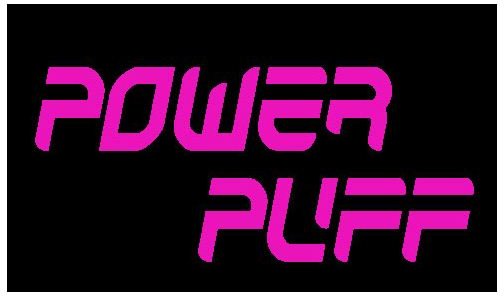
1. Open a new canvas (Ctrl+N) in Photoshop. Set your background color as black.
2. Create a second layer (Ctrl+N). Select a font and font color, preferably one that will contrast with the black background. In our example, we have selected Pink. Type in the text that you want to have stylized.
Rasterize and Create a New Layer

3. Rasterize your text. To do this, right click on the layer and then select Rasterize from the menu that opens. Select the text color using the marquee tool.
4. Without canceling the selection, create a new layer. Place the new layer below the text layer. Expand the selection by 6px (Select > Modify > Expand). Fill the selection with black color (Shift + F5 > Black).
Bevel and Emboss Options
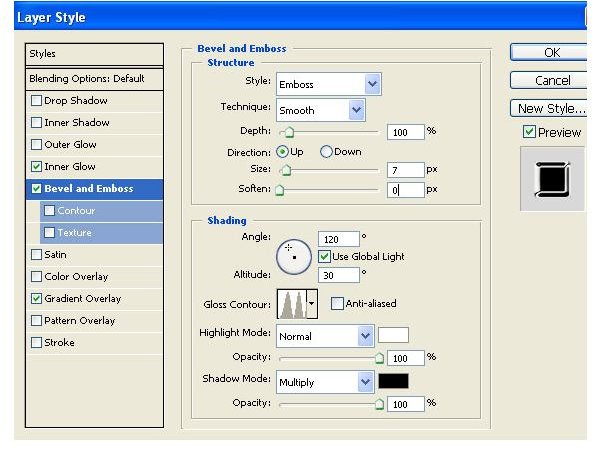
5. Open layer styles and then check the ‘Bevel and Emboss’ option. Adjust the values as desired (See the Image below).
Gradient Overlay

6. Check Gradient Overlay in the left-hand column, and then adjust the gradient values as desired. (See the Image below).
Adjust Inner Glow
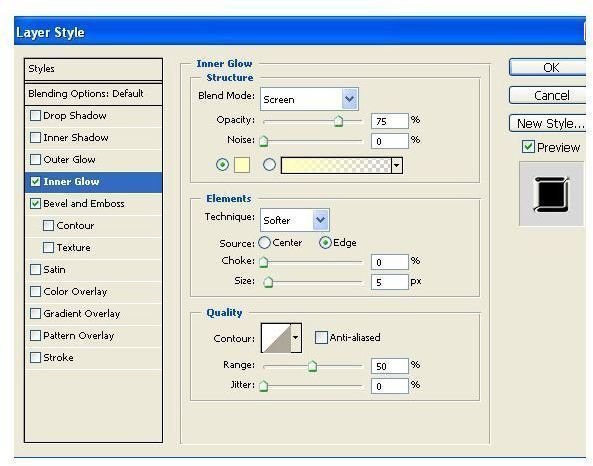
7. Check Inner Glow in the left-hand column, and then adjust the Inner Glow values as desired. (See the Screen shot below). Click OK once you are done.

After completing these steps, your image will now look like the image below. (To better demonstrate these effects the top layer has been disabled).
Bevel and Emboss Settings on the Final Layer
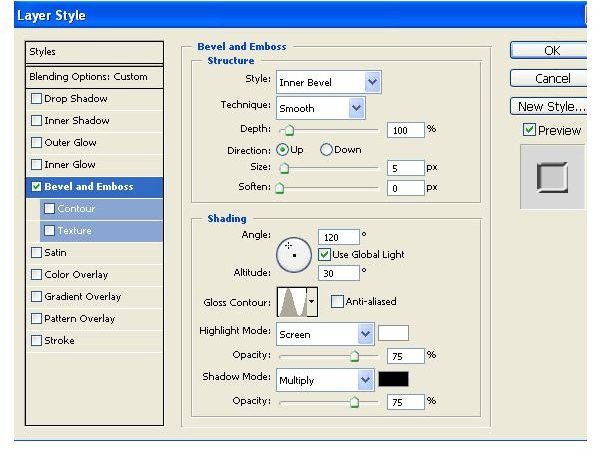
8. Select the text layer, and then open the Layer Style dialog box. Check Bevel and Emboss in the left hand column. Set the values as desired. (See the Screen shot on the left).
Crystal Embossed Final Image

Once you are done with these steps, your final image will display chrystal text as shown below. Create your own customized chrystal embossed text simply by selecting different fonts and color schemes.