I have a list of people each year to whom I like to give gifts at holiday time. You can create beautiful personalized gift tags with Microsoft Publisher and some glossy business card paper for very little cost.
Design the Cards and Print
To get started you will need 2” x 3.5” business cards. I love to get the glossy ones, as the gift tags then look very professional.
Create an excel file where you put the name of each recipient on each line of this file. Save it as a .csv file.
In Microsoft Publisher 2007, start a new publication and select business cards as the template. Select the blank template according to the size of your cards. Select Create, and then on the next screen you can select ‘Change Page Size’ and then set up the margins. These margins are usually specified in the instructions that come with your business cards.
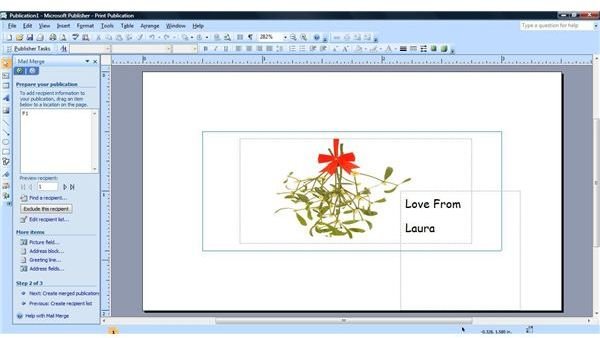
You can now either insert your own photo or clip art. You will need to resize the image to fit into the box on the screen.
Insert a text box to sign your own name – Love from Laura.
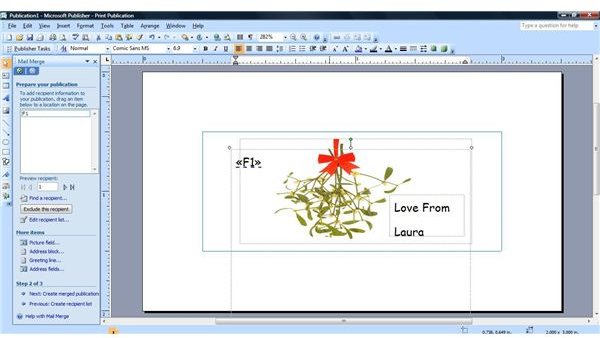
To insert the recipient names, select Tools -> Mailings and Catalogs -> Mail Merge. Select ‘Use an existing List’ and then select your csv file containing the names of all your recipients. Select ‘Tab as your text separator’. Deselect ‘First row of data contains column headers’. You will then see a box showing all your recipients. You can leave them all checked, or you can select just some of them.
You will then be presented with recipient information in left hand margin. The name field is F1, and you can drag that into the position you want on your design.
Select Next -> Create Merged publication. Select Print.
If you want one card for each recipient, select ‘Multiple Pages per Sheet’. If you want a full sheet of business cards for each recipient, select ‘Multiple copies per Sheet’. In this case, you would want ‘Multiple Pages per Sheet’.
Select Print and now you should have beautiful gift tags, individually labelled to each of your friends and family.
One final note: you can also use these same instructions to make gift tags for any time of year on any kind of gift you have for that special someone on your list.


