Google Docs won’t order your flowers and book your musician, but you can create an awesome, fun form that will allow you and the people close to you to collaborate on a wedding guest list, including the bridal shower, gifts, head count, meal choices, and even thank you notes. Here’s how!
Have You Tried Google Docs?
You can create documents, forms, spreadsheets and even presentations using Google Docs, and this wonderful tool is all premised on
the idea that collaboration is key. When you’re organizing a wedding, nothing is more true. In this article I’ll show you how to create an attractive, user-friendly form and share it with your mother, future mother-in-law, and other people who keep track of family statistics. That way you can get some help organizing your guest list!
Create a Wedding Planning Form
We will be creating a Google Doc that contains the following information:
-
Guest Name
Advertisement -
Address Line 1
-
Address Line 2
Advertisement -
Phone Number
-
Relationship
Advertisement -
Bridal Shower 1 Attending?
-
Bridal Shower 2 Attending?
Advertisement -
Bridal Shower Gift
-
Thank You sent
Advertisement -
Wedding RSVP Head Count
-
Meal Choice
Advertisement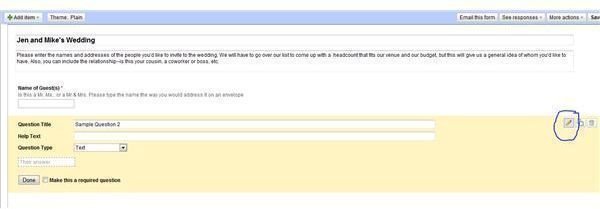
-
Seating Assignment
Advertisement -
Notes
-
Wedding Gift
Advertisement
Go to Google Docs; choose Create and, in the drop-down window, choose New Form.
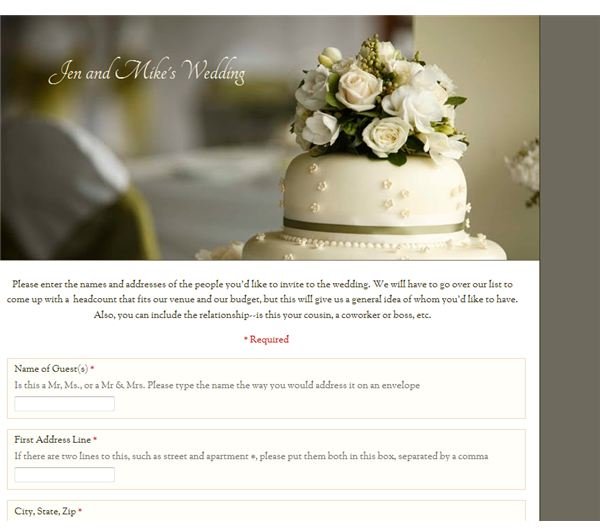
In the top you can type in the name of your form, and then enter the information you want people to answer in the first question. It should be a place for your mom and future mother-in-law to type in the names of people they want to invite to the wedding. When you complete the first question, you will click on the pencil to the right—in the blue circle—to add another question.
Entering Your Questions
As you proceed, Google Docs will want you to keep adding questions by using the Add button at the top left. As you click Add, a drop-
down menu allows you to specify the question format, such as text, paragraph, multiple choice, checkboxes, choose from a list, scale, and grid.
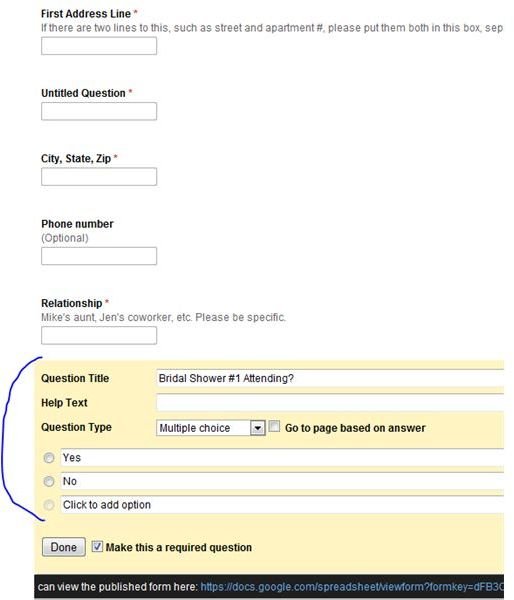
When I came to the question about attendance at the bridal shower, although I chose a text question at the top under Add, I was able to change my choice while I was creating the question. I changed it to multiple choice. Google Docs provides you with a radio-button format in which you can enter your choices, in this case Yes or No. Incidentally, I did not make this a required question, because it is information that I can add as we go through the various stages of wedding planning.
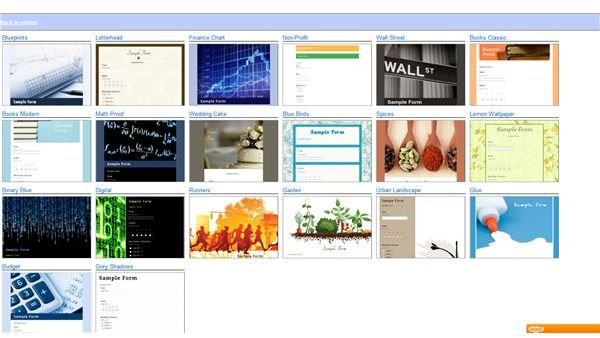
Now that we have entered every question that needs to be included in the Wedding Google Doc, we can actually create the form. Go to the top of the form, toward the left. Next to the word “Add” you will see the word Theme. Click on this and you will see a whole array of choices—up to 97.
Once you’ve chosen a theme, you will see your finished form. Then you can close it and you will see it in your list of Google Docs. Right-
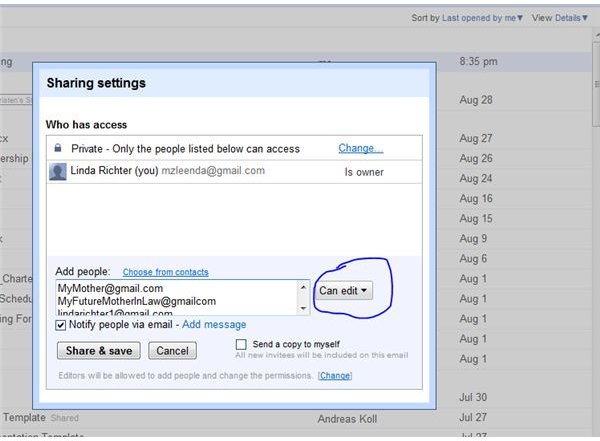
click on it in order to share it. A window will open up that allows you to enter the email addresses of the selected people, and on the right-hand side of the address window is a box so that you can decide whether people can edit it—i.e., add names—or simply view it. Then send it.
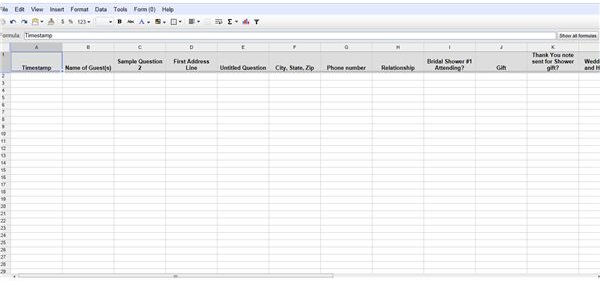
When your recipient opens it up, he will see a Google Doc that resembles an Excel spreadsheet. If the person chooses Form (or Tools) and then Go to Live Form in the drop-down window, the attractive questionnaire you created will be available and they can begin entering the names of suggested wedding guests.
Since Google Docs saves all the changes that everyone makes, your mom (if that’s who you’ve chosen, for example) will be able to see your updates, and she can enter data, too. As your mother, your future mother-in-law, and your cousin the family historian all enter data—which is really fun and easy using the form—it will all be collected on your copy of the form, which is designated the master copy. Each time your friends open it, they will see the new changes made by others.
Create Labels From Your Google Doc
You can also download your Google doc and use it to make labels for your invitations.
-
First, you click on File, then Download, then Excel. Then go to Word and open it.
-
Choose Mailings, and then Labels.
-
In Options, choose the label number you’re using. For example, for address labels, I usually use Avery 5160.
-
Click New Document.
-
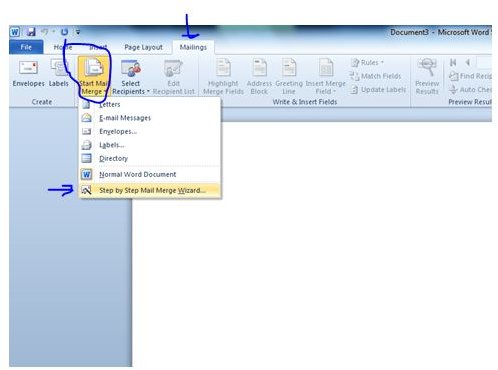
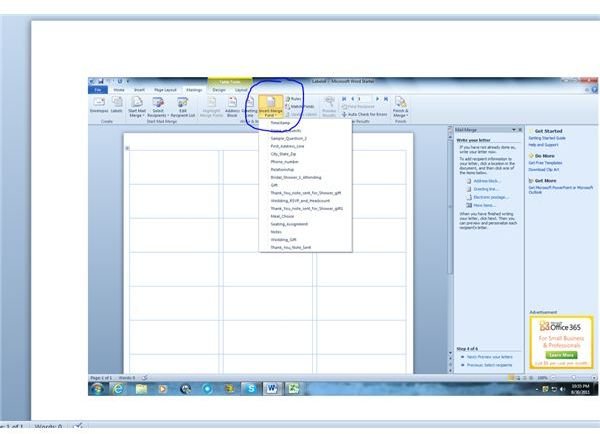
Go back to the Mailing tab, and then choose Start Mail Merge, and in the drop-down window choose Step-by-Step Mail Merge Wizard. It will open on the right-hand side of your Word doc.
-
For Select Document Type, choose the radio button for Labels.
-
At the bottom, under Step 1 of 6, click on Next: Starting Document
-
Under Select Starting Document, the radio button will be automatically selected for Use Current Document
-
Go to the bottom at Step 2 of 6 and click on Next: Select Recipients.
-
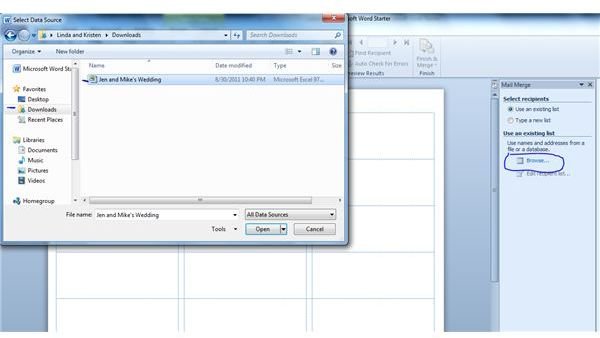
Where it says Use an Existing List, Select Browse
-
Choose the Excel doc that was created from your Google Doc. It will be in the Downloaded files. If you get an error message, resave the Excel doc in your Documents and retry.
-
A window will pop up that says Select Table. Click OK.
-
Another window will pop up that says Mail Merge recipients. Click OK.
-
At the bottom of the Mailmerge Wizard, click on Step 3 of 6, write your letter.
-
Choose the Name and Address fields from your Mail Merge list. You will then click under Replicate Labels choose Update all Labels, and then at the bottom right where it says Step 4 of 6 click on Preview Your Labels
-
Then choose Complete the Merge, Step 5 of 6.
-
At Step 6 of 6, whether you choose Merge of Edit Individuals Labels, a pop-up window appears, and assuming you want to print
all labels, click all.
-
Before you print them, you can edit their appearance by changing the font style and also the color of the ink. Bradley Hand is a delicate and attractive font, yet one easily readable by mail carriers.
-
Your labels will then be ready to print.
If you have an older version of Word, you can follow mail merge instructions written in 2009 by Bright Hub’s Dianna Monda Dill.
It’s Versatile!
Besides printing labels for your invitation, you can go back to your Google Doc at any time to get a head count for your event, monitor seating assignments, and count menu choices if you’re offering them. You can also track what thank-you notes are still owed. Your notes column will keep you from seating two feuding cousins at the same table. As you create your own form, you can insert whatever questions work for you.
The address list will form the basis for holiday planning lists and guest lists for any functions you and your new husband have in your new life together. Have fun with it—you can even go back to the live form and choose a new template. You can add and delete questions as new occasions occur for you as newlyweds. Let me know how it works for you!
If you simply want to use the basic Excel wedding planning spreadsheet to enter data without using a fun template or sharing the form, you can do that also. You will find it uploaded in the Desktop Publishing Media Gallery, called Wedding Planner Spreadsheet. Happy Wedding!
References
-
Based on the writer’s experience with Google Docs and Microsoft Office.
All screenshots by the writer.


