Self-Publishing Children's Books in a Snap: From the Software to Printing
Daunting Task?
Publishing books for children on your own can be daunting especially to first-timers. The tasks it entails include designing, editing, marketing, pricing, etc. Thus, to help you get going and eventually be successful with this venture, learn about the basic software, editing, illustrating, choosing a binding style and page size, laying out, designing the cover, and more vital tips.
First Things First – The Software
Before anything else, to publish, you need to choose software that is apt to work with large files (common in children’s books) and one that is user friendly. Note: It is not advisable to work on two or more different software as you create your manuscript. Just select one and stick with that. Below are the most common software programs to create children’s books.
-
Microsoft Word – This is the most common software writers use to develop manuscripts. It allows writers to at least set a style, work on fonts, control line spacing, use typographic characters, manipulate options, work on selective kerning, and basically develop a manuscript by yourself (just like the others, though it’s simpler to use).
-
Adobe PageMaker – Adobe PageMaker, though seldom used today, still has the usual functions allowing writers to layout and design the book’s interior. One, however, needs to master using it and deal with some file transfer issues.
-
Adobe InDesign & Quark – Described by most self-publishers as the best, these programs also demand a large learning curve. Likewise, these are the most expensive among the lot.
-
Corel WordPerfect – Considered as the most user-friendly, this program, however, is not compatible with commercial printing presses due to font restrictions.
Editing the Manuscript
Before submitting the manuscript to be produced, the writer still needs to edit it or have it edited by a student from a University or local community college (to save on the cost) to prevent printing delays due to last-minute corrections.
Note: It is inadvisable, as the author, to edit the final draft. Seeking second opinion to prevent overlooking your own mistakes is highly recommended.
Locating an Illustrator
If you are a first timer, most likely finding an illustrator can turn out as frustrating and difficult. Thus, to search for the best one based on your needs, be as keen as you can. Ask for his/her portfolio. Also talk about the arrangement terms such as the price and turnaround time to prevent changes or miscommunication halfway along the process.
Selecting a Page Size and Binding Style
Binders use different formats. For this purpose, let us discuss the most common.
-
Saddleback - Saddle stitch resembles a paperback book; however, unlike the adhesive binding of paperbacks, two staples hold the book together on the edge-most part of the spine. A children’s book with saddle stitch must not exceed 52 pages. Usually, such books are 24 pages long, including the cover. This is often matched with the 8 1/2" x 8 1/2" page style, which is best to allow the placement of text and illustration.
-
Spiral Binding – Good for books with 25 to 250 pages, spiral binding is another great option when binding children’s books because when opened, they turn out flat, making the reading experience easier. In addition, books that are spiral bound are cost effective and less prone to wear (due to the flexible pages).
-
Hardcover – Best for books with 50 to 1,000 pages, this type of binding indeed costs the most expensive, yet turns out to be the most valued. Hard-covered books, also, look excellent and last long.
-
Soft Cover (Perfect Binding) – This type of binding is used for children’s books with 40 to 300 pages. With a square back, a book with such binding appears to be a hard cover. However, it is less costly, yet retains its good look. Nevertheless, covers can soon wear out, especially when used heavily. Note: You can prevent this by laminating the cover.
Laying out the Page
Working with Fonts
Selecting the styles of fonts for your book is essential for the overall make and for the transferring of files for printing. Old style fonts are most commonly used because of they can be read easily, most especially for large body copy. Examples of such fonts include Baskerville, Garamond, Times New Roman, and Goudy. Note, however, to use a font that contrasts (for headings). Arial, a sans serif font, is often chosen for this purpose.
Sans serif fonts do not have “hooks” at each letter’s end, unlike Old style fonts. Such “hooks” help guide one’s eye as it goes from one letter to another, making reading easier. For this reason, experts do not advise using sans serif fonts for the body of the text.
Meanwhile, for children’s books, experts still recommend that authors use a slab serif font due to their clean straight lines. Some of slab serif fonts include, but are not limited to the following: Clarendon, New Century Schoolbook, and Classic SSK.
It is advisable for writers to insure that every font used is saved in the Windows font folder. Sometimes, even if one uses italicized or bold commands, it does not ensure that the fonts are there. To prevent these setbacks, one should avoid unusual fonts such as Wing Dings and others.
ISBN, Copyright
Information concerning copyright, CIP (for those in Canada), ISBN, ISSN, and Library of Congress must be placed directly after the title page. This page is often called the copyright page. When it comes to self-publishing, check that all the needed details are included on the copyright page. Authors can check websites offering complete packages to acquire the copyright, ISBN, and other needed information. They may also be purchased from various publishers online and offline.
Illustrations
Before adding illustrations to children’s books, scan them. If, however, they are underexposed or overexposed, adjustments or image touch-ups may be done. Since you are self-publishing your book, note that you also get to choose your scanner. Do not go for the most expensive one, though. Less expensive scanners can still produce excellent images by scanning the as 300 DPI JPEG or TIFF files.
Be cautious when you scan, by the way, as some scanners have a default of 72 DPI. Thus, they will not be accepted as you print. Likewise, higher resolutions (such as those higher than 300 DPI) would also be inadvisable. Moreover, this can result in slowing your computer.
Designing the Cover
Designing your book’s cover would be a cinch if you were a graphic designer. However, for those who are struggling in this highly regarded field of design, how do you survive?
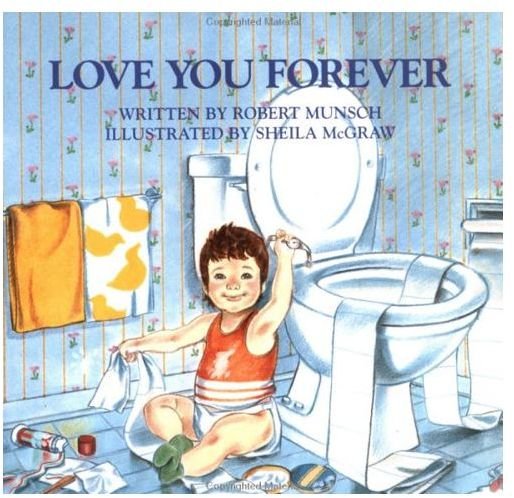
As a newbie, one helpful hint is to look into other children’s books and see how they are designed. This will seem like your very own ocular inspection of best practices, so be keen at it. Look closely at the spines and the book face.

Consider the following helpful hints as given by Callum Chapman in his “30+ Creative Children’s Books Covers”:
- Custom typography, clean-cut shapes and a hint of texture
- Humorous and funky; with an interesting characteristic
- Colorful and filled with adorable illustrations of characters
- Yellow and black color combination
- Vectors, soft colors, and appropriate styles based on the book’s theme
Pricing
Setting the price of children’s books is as difficult as it is with other kinds of books. The writer should not take it greedily or lightly. Hence, there are various factors to be considered when it comes to pricing.
Related books’ price – Take note of similar books’ prices. Similar refers to those with the same page count and trim size. For those with better illustrations, notice that they have higher prices, just as those with less number of pages and with a soft cover can charge a lower price.
“Per unit” cost – As the writer considers the price of the book, he/she has to take note of the “hidden” costs, too. These include proofreading, editing, artworks/illustrations, and cover design, etc.
Discounts – This is by far one of the most important factors to consider when setting the price of a book; however, it can also be overlooked at times. As a self-publisher, you may want to structure your discounts (just as Moira Allen, author of various writing books) suggests in tens (in increments of 10 percent per range of nine books). For instance, 10% discount for two to nine books.
Submitting the File for Printing
Often times, files are sent through email or saved to the hard drive. Different printing copies have different requirements for printing so check with the printer as to their protocol for sending files. However, large files are often uploaded to a file transfer protocol (FTP) site to make sending easier and faster.
Overall, as you work on self-publishing children’s books, take note of the basics and work your way through to success. With dedication, perseverance, and the right techniques, you shall soon release your very own children’s book.
References
- Image: BookCover by mattlemmon under CC BY 2.0
- Allen, Moira. “Setting a Price for Your Book”, http://www.writing-world.com/publish/pricing.shtml
- Chapman, Callum. “From a Child’s View: 30+ Creative Children’s Book Covers”, http://vector.tutsplus.com/articles/inspiration/from-a-childs-view-30-creative-childrens-book-covers/
- Image: InDesign Icon by youngdesign under CC BY 2.0
- Lorenz, Scott. “15 Tips for Great Book Cover Design”, http://www.sellingbooks.com/15-tips-for-great-book-cover-design/
- Shepard, Aaron. “Books, Typography, and Microsoft Word - Excerpted and abridged from the ebook published by Shepard Publications”, http://www.newselfpublishing.com/WordType.html
