
If you’ve ever wondered how to use the Photoshop Stamp Tool, be it for image correction or any other reason, this article will help you get started. This guide will explain when and why you would use the Photoshop stamp tool, as well as different methods for image correction.
If you’ve never tried it before, the stamp tool is a quick and easy way to correct your photographs before you upload them to your favorite social networking site, or before finalizing any digital scrapbooking pages. Imagine a two-click-fix for acne, or perhaps you have a small amount of damage on your photo that you would like to remove. The stamping tool, not unlike the healing tool, can easily help you in these difficult situations.
The Stamp Tool: Understanding What it Does
The stamp tool is essentially a brush that, instead of painting a solid color, samples a specific chunk of pixels from elsewhere in the document - or even an entirely different document - and clones them upon your image. Like a regular brush, you can change the hardness (1-100%, 1 being the softest), the size, tip shape and even blending modes. However, in addition to this, the stamp tool can sample from not only the active layer, but an entire, multi-layered document.
The fact that it can easily sample from a multi-layered document can present a few problems though. Advanced users can easily take advantage of this feature, but new users might quickly find that they find their document spattered with strange effects. This is largely due to the fact that you might forget that this tool will sample adjustment layers as well, lending to some unwanted changes in color, hue, saturation, because essentially you will be applying the effect to the area twice.
Still, this is a tool worth getting to know, because you’ll find it is great for airbrushing away blemishes, dirt, damage, and several other unwanted things in photos.
How To: Photoshop Stamp Tool (A Practical Guide)
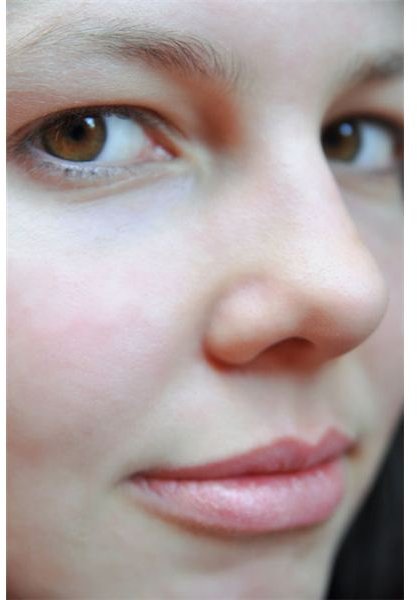
There aren’t a lot of areas when you cannot simply use the healing tool instead of the stamp tool, and in most cases the healing tool is far superior. However, learning the tricks of the trade with the stamp tool has its moments of usefulness. For example, say you’re doing a wedding scrapbook layout , and there are a few dark spots on the close up of your blushing bride. Rather than trying to use the healing tool to slowly lighten up the spots in hopes of them looking natural, try setting your stamp tool to to the settings below:
Opacity: 50%
Hardness: 50%
Blending Mode: Luminosity
Then, alt-click in an area where the skin is the color you wish to match. Generally this is an area very close to the edge of the area you want to match, otherwise you might get some unwanted, and very noticeable differences. What this does is easily allows you to lighten the dark spots without changing the color out of the natural skin tone. Here’s an example of a before:
And after:
Helpful Hint: If you find that the spot has a color to it, such as a red blemish or a purple bruise, the luminosity setting on the stamp tool will simply change the color to a much more bright, noticeable spot. How do you work around this? Simply set your blending mode to color and re-brush over the area, which will change the color back to that of a natural skin color. As always, this is going to take a bit of practice and a light touch. Don’t try to remove the blemish or shadow completely - just make it a little less noticeable.
References and Image Credits
References: Author’s personal experience.
Image: Close Up, by Thibaut Dutartre - https://www.flickr.com/photos/thib-thib/5387690052/


