Add new water effects to your creative toolbox by following along in this Photoshop tutorial. Here, readers will learn how to make spraying water in Photoshop, giving them a new way to create outstanding layouts.
Getting Started
This Photoshop tutorial uses Adobe Photoshop CS5 running on Windows 7 Ultimate (32 bit). Users with different versions of the software should be able to follow along without much difficulty.
Those who do not have Adobe Photoshop installed on their system can visit the Adobe Web site and download a trial version of the software.
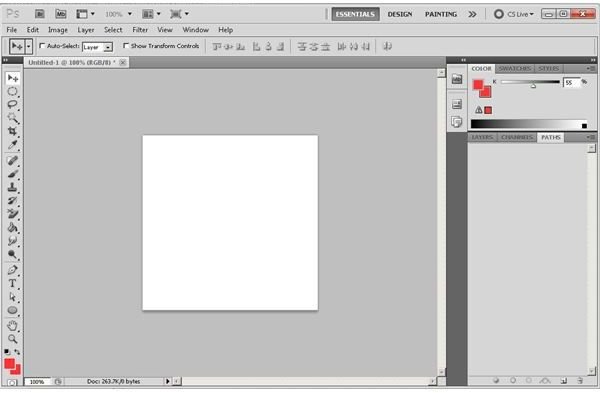
To begin, users should open Adobe Photoshop and create a new document. Next, create a background or load an image where the water spray will be easily visible. Here, we’ll use a blue layer.
Creating the Water Spray
To complete this tutorial on how to make spraying water in Photoshop , follow the instructions below.
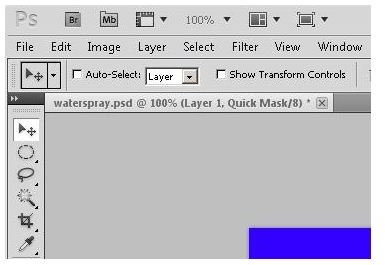
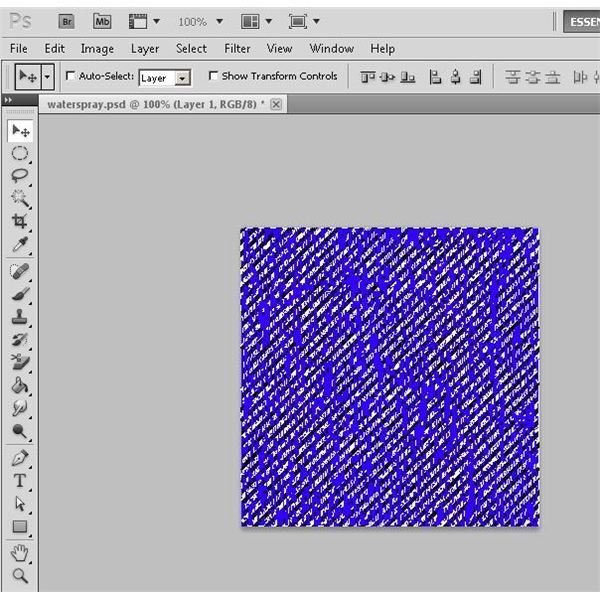
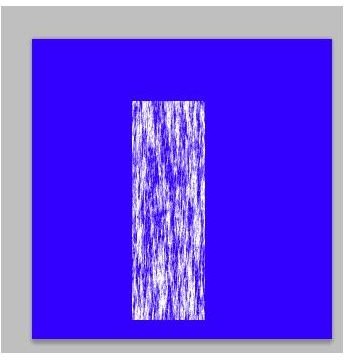
In the layers palette, create a new layer. Next, press the Q key to change the layer to “Quick Mask.” When this is done, the document tab will now say “Layer 1, Quick Mask /8” for the active document as shown here.
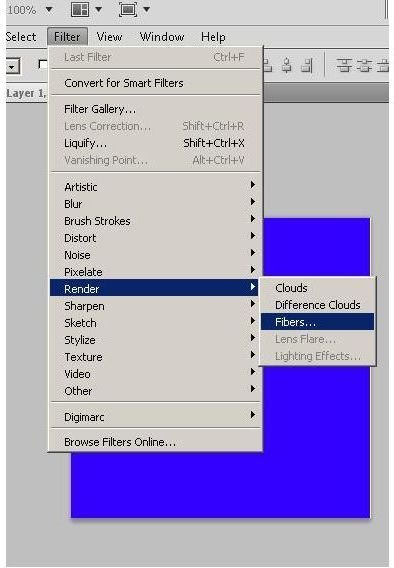
Now, click “Filter” on the main menu and then click “Render” and then “Fibers” from the expanding menu.
In the “Fibers” window, set the “Variance” to “35,” the “Strength” to “9”
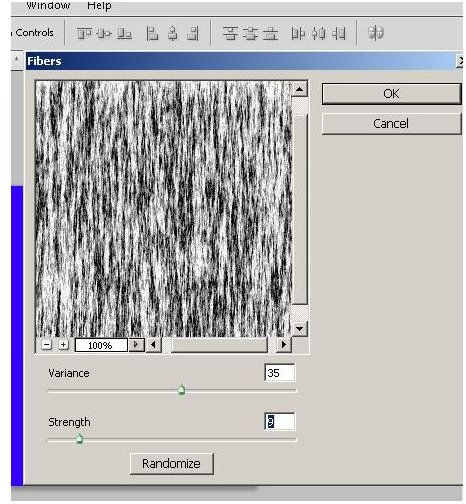
Users can experiment with different settings here, choosing the ones that provide the preferred effect.
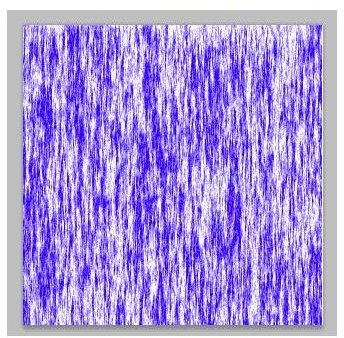
Next, press the “Q” key on the keyboard to turn off the Photoshop “Quick Mask” function. The work area should now look similar to the image below.
With the area still selected, click “Edit” on the main menu and then choose the “Fill” option. In the “Fill” window, choose the option to fill the selection with “White.”
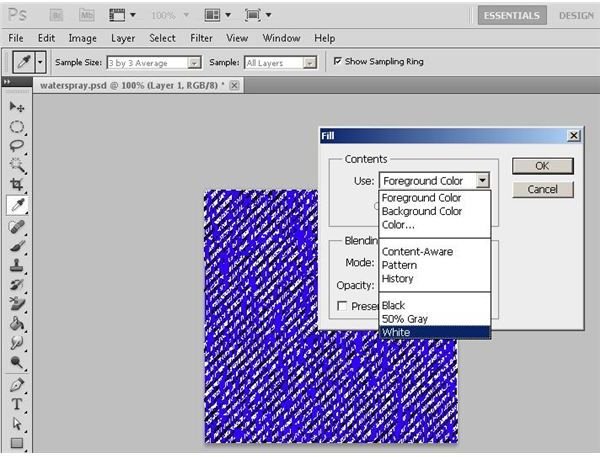
Now, click the “OK” button in the “Fill” window to complete the fill process. Next, click “Select” on the main menu followed by “De-select” to de-select the artwork.
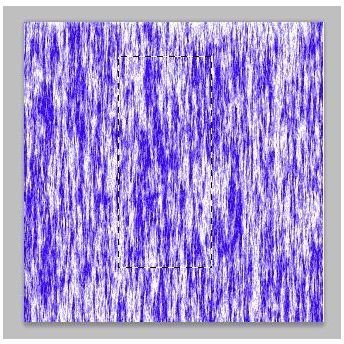
Now, grab the rectangular marquee tool from the Photoshop toolbox and them make a rectangular selection on the art board.
Simultaneously hold down the
Users can now press
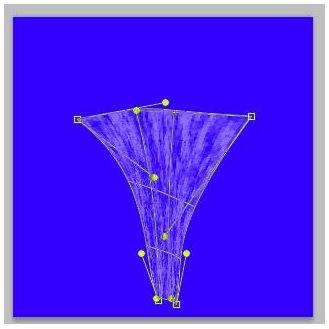
Grab the “Gaussian Blur” from the “Filter” option on the main menu and set the radius for 1.5.
Now, duplicate the layer and then press
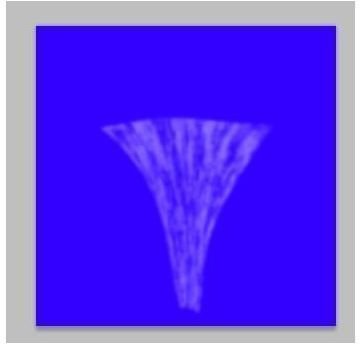
Now, change the mode for the layer to “dissolve” in the layers palette.
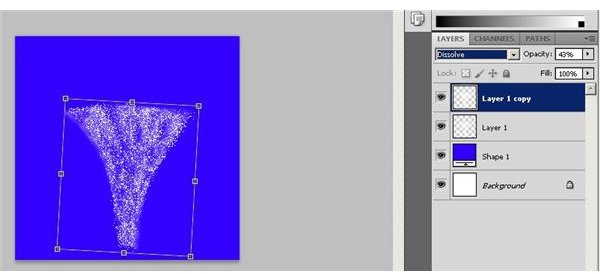
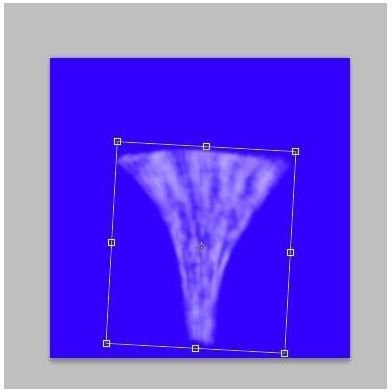
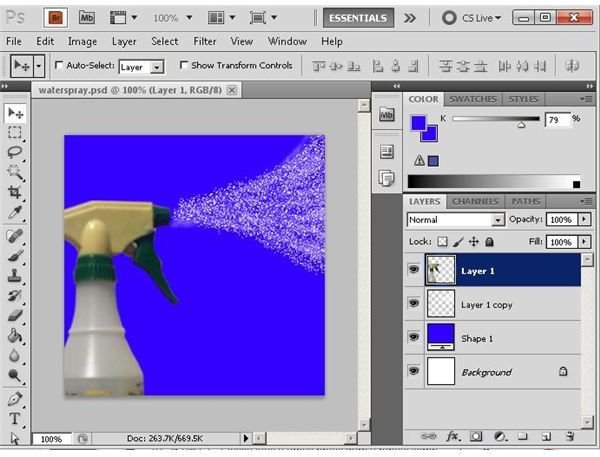
Now get the “Blur” tool from the toolbox and use it on the spray. Now the spray is ready to be used as part of a final product. To illustrate this, we used the free transform tool to size the spray to fit with a spray bottle as shown in the final image below.
With this helpful technique, users will be able to add impressive water spray to a variety of settings.
Image Credit: Wikimedia Commons / Chuck Marean (Spray bottle)
Image Credits: Screen shots taken by Bruce Tyson


