Learning how to auto blend in Photoshop is a great trick to know if you would like to create a mock panoramic image, or enjoy blending together images for graphics design or photo manipulation. Photoshop CS3 and above offer this neat feature, so read this article if you’re looking to learn.
What is Auto Blend?
Auto blending is the process of combining more than one photograph together, though this can be applied to any image within Photoshop. This is especially useful when creating panoramic images without a panoramic camera. These can be easily applied to graphics design of all sorts as well, such as banners of websites, scrapbooking, and cards. It also can be applied to digital photo manipulation or graphics design, when you’re looking to create a neat effect.
Photoshop Side Note
Auto Blending is specific to versions of Photoshop CS3 and up. In CS2, Photoshop had a feature called Photomerge, but Auto Blend is a vast improvement on how it works. For this tutorial, I’ll be using Photoshop CS4 , but it should work just fine for versions CS3 and up!
Preparation
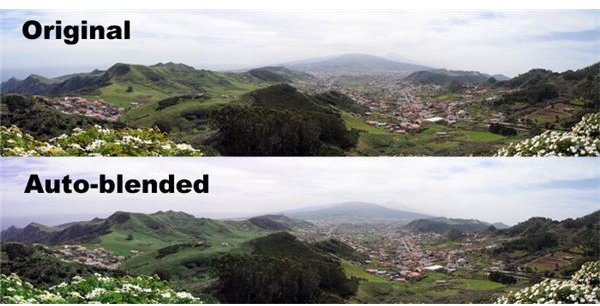
You’re going to need at least two images that you want to blend together. This is a great way to blend images that you’ve taken with cameras that help you attempt to recreate panoramic images without any special lenses. These have to be images that actually will blend together, and not just two random images. For this example, I’ll be using a picture that was actually taken with a panoramic camera, but I will be splitting it up for the example. In the end, we can compare the original with the new.
A big thank you to ahisgett on flicker who allows their work to be used under the Creative Commons license.
Please also take note that Photoshop requires the photos to overlap to detect panoramic images. Photoshop recommends about 40% overlap, but will sometimes work with as little as 15%-20% overlap.
Drag & Drop
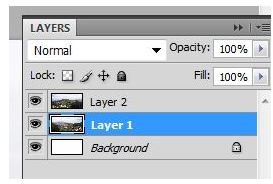
Open all your images in Photoshop and drag and drop them into a new document, each being on a separate layer. Don’t worry about making the canvas a size that will fit all of your images, and don’t worry about aligning them either, Photoshop will do all the work for you. When you’ve finished this, press shift and click the top layer. This should select all your layers.
Auto Align
Now, go up into Edit in your top menu bar, and then select Auto Align Layers. You’ll get a dialogue box that - depending on your version of Photoshop - will offer a few different options. No matter your version of Photoshop (be it CS3, CS4, or CS5) - you’ll still have “Auto” which is the one you are going to use. Make sure the radio button next to Auto is selected. Click OK.
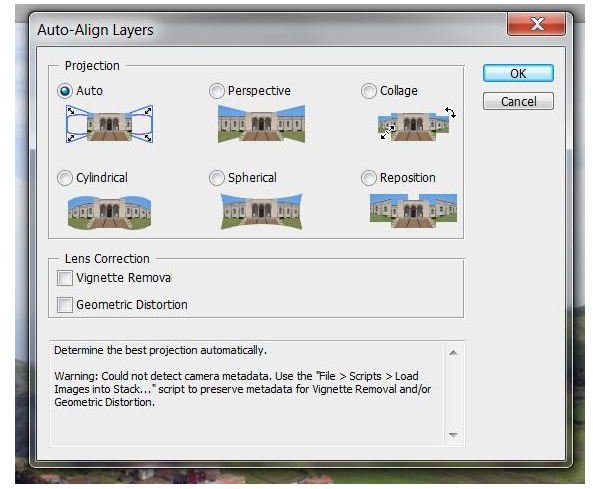
Photoshop will spend a little time calculating the best way to align your layers, and when you’re done, you’ll have a horizontal strip of images. Don’t worry that they don’t look perfectly blended - we’ll get there!
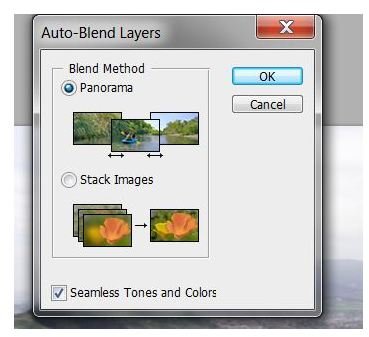
Auto Blending your Layer
Now all you have to do is select Auto Blend from the edit menu. Simply click “Panorama” in them menu, and Photoshop will take a few moments to adjust the brightness, hue, and saturation of your image.
Select OK and wait for Photoshop to auto blend your layers. Below is the example compared against the original. While you can tell there are some slight color differences and alignment differences, Photoshop does a pretty good job auto blending faux-panoramic images.