They’re back. That is, iron-on knee patches are popping up everywhere from jeans to slacks. You don’t have to spend a fortune on knee patches when you can create knee patches to iron onto your favorite pair of pants using desktop publishing software. Find out how here.
Iron-On Knee Patches: No Longer Things of the Past
If you’re like me, you may remember a childhood filled with knee patches, but then once junior high hit, those iron-on knee patches disappeared and shredded jeans took over the scene. Now, you don’t even have to have a hole to patch in order to put iron-on knee patches on your clothes. All you need is a little ingenuity, some creative ideas, and the drive to create a masterpiece that will complement your outfit or your child’s outfit. Oh, and you’ll probably want the proper supplies for your project. In order to execute this design project, you will need:
- Desktop publishing software - When it comes to DTP software, you can use what you have and what you are most familiar with. While many people use Photoshop for professional quality illustration, you can use other DTP options including Paint.Net, a free option , and GIMP.
- Iron-on transfers - In order to get your design onto a patch, you’re going to need some intermediate steps. The iron-on transfer paper will allow you to print your design. Once printed, you’ll need to transfer the design to the fabric of your choice.
- Fabric of your choice - This can be whatever you want. It is strongly recommended that you use a light colored fabric and you select a heavy-weight fabric. You can choose prints, but be aware that the transfer process can get a little hairy when you use iron-on transfers on dark colors and on prints unless you purchase special paper for this.
- Iron-on adhesive - Once you’ve ironed your design onto the fabric, you will need to attach your patch to the knee that you want to cover. This is the best way to do it.
Optionally, you can create embroidered effects, hand-bead the patch, add dimensional paint to the patch, or otherwise embellish it in any number of ways. If any of those further embellishments appeals to you in any way, you’ll want to be sure you have the necessary supplies on hand.
Designing Your Iron-On Knee Patches
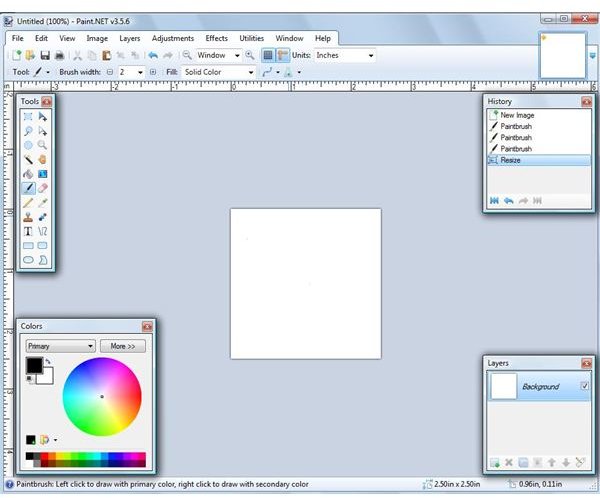
The very first thing you will need to do in your program is determine how large you would like for your patch to be. Set your DTP software to the size you want. In the screenshots, you will see that I have used Paint.NET, but you can use whatever DTP software you are most familiar with.
Once you’ve determined the size, you might want to do some thumbnail sketches on a piece of scratch paper of what you might want your design to look like before you dig in. I’ve decided to use an abstract pattern. Once you’ve decided what you will want on your patch, then you can block in the shapes. You may want to use layers when you’re working on your design .
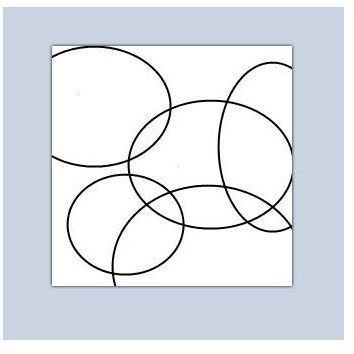
Okay, so once you’ve got your design laid down, you can create your artwork. Here’s what I came up with, and some other ideas for your iron-on knee patch.
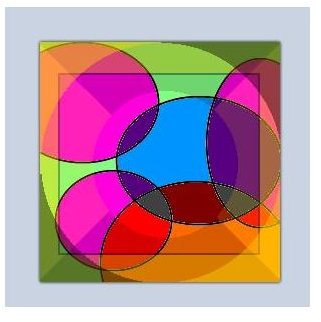


When you’re working up your image for your patch, it’s important to ensure that you’ve kept the design simple. The image on the right is the most questionable as to how it would come out as a patch, because it contains both abstract and detailed images. Think about the colors you will want to use, and try to balance your design in terms of color and style.
IMPORTANT: If you do any lettering, remember that it will appear backwards on your iron-on transfer!
Printing the Knee Patches
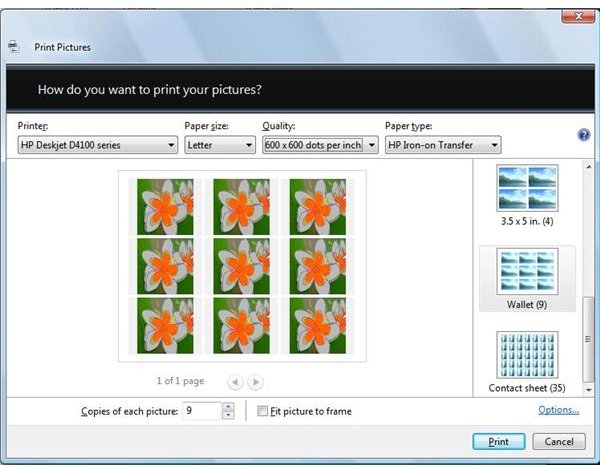
Now that you have your design(s), it’s time to print them. Be sure that when you purchase your transfer paper, you purchase the paper that is right for your printer. If you have an HP printer, use HP paper. If you have an Epson printer, use Epson paper. This will greatly simplify your life. Next, go to print your design. If you are using a Windows computer, you will then have the option to set up your paper. Do you want multiple copies of the same design to sell at a craft fair? Make sure you select “Iron-on transfer” from the design menu. You may want to run a test sheet on regular paper to ensure that your iron-on knee patches will appear properly.
Making Your Creation into a Patch
Once you have printed your patches, you can now affix the image to your fabric . Cut out each image from your iron on transfer (or, you can iron the whole sheet onto your fabric, and then cut them out if you like). Place your transfer paper, image-side down onto your fabric. Heat it up with the iron. Peel back the paper slowly to ensure you don’t pull the design off.
You can now embellish the patch further if you like, or use it as is.
Finally, attach the patch to the pair of pants following the directions on the iron-on adhesive. The directions for this will vary depending on the brand of adhesive you purchase, but the idea is that you iron the adhesive onto one piece of fabric, then remove the paper, place the patch in the desired place, and then iron it on.


