Unified Color Technologies have recently released a new high dynamic range (HDR) software solution for digital photographers called HDR Expose. This review gives an in-depth look at how good it really is.
This high dynamic range software, from Unified Color Technologies, has replaced HDR Photostudio 2 in the company’s product lineup. If you have used HDR Photostudio before, then HDR Expose should be an easy transition for you because it has the same core architecture. However, updates to the program include a full range of color editing tools, plug-ins for both Lightroom 3 and Aperture , and the ability to process images in 32-bits. On paper it is a promising package, but how will it perform in the field?
The Shoot
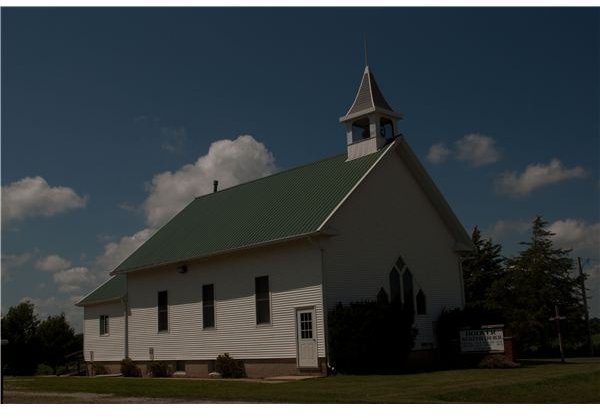
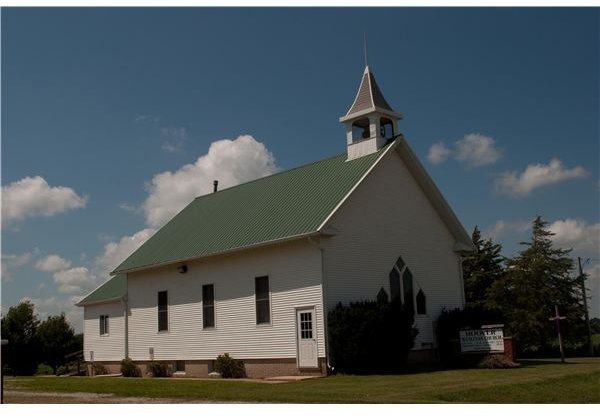
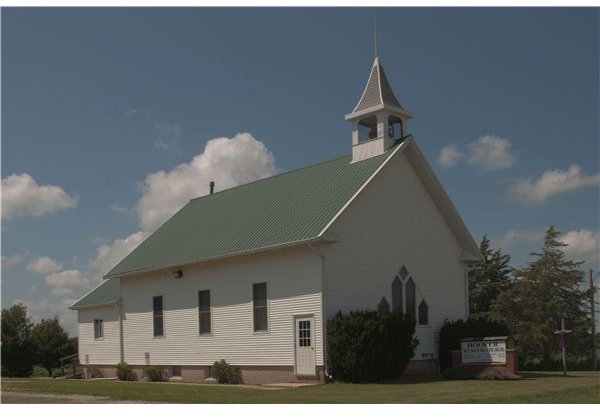
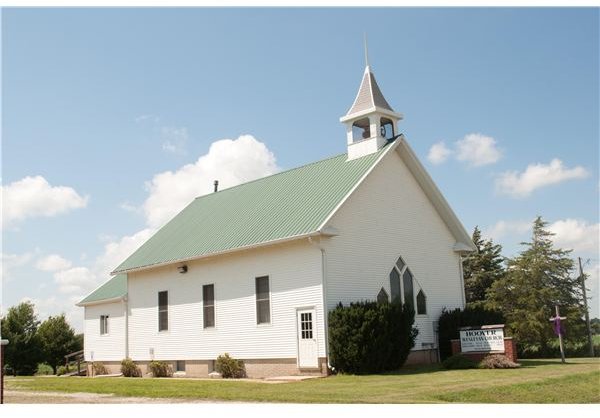
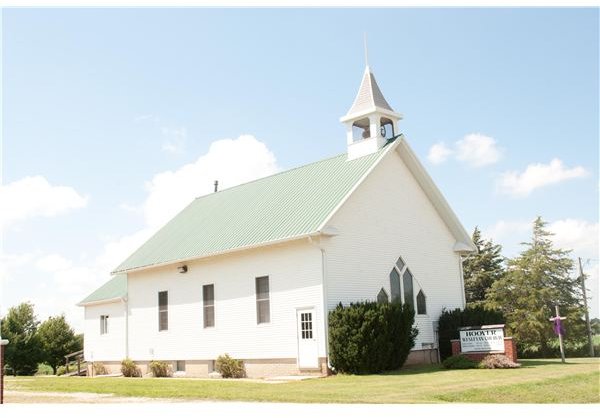
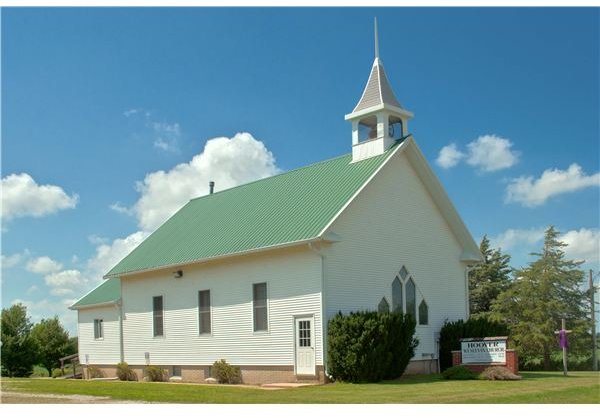
To make effective HDR photos, you really need a stationary subject and background. I considered a few subjects, but ended up visiting a local church one afternoon - the Hoover Weslyan Church in Walker, IA. I had the camera mounted on a tripod, and I set my Nikon D90 to shoot RAW images at f/11 on aperture priority mode. I tried the exposure bracketing mode, but this would only give me three images at a time, and I really wanted five to get the full range of shadows and highlights. So, I used exposure compensation to manually set the one stop exposure differences on the five images that I wanted. You can see the results in the gallery below. Shots range from -2 to +2 exposure.
Bracketed Exposure Shots
Software Performance (4 out of 5)

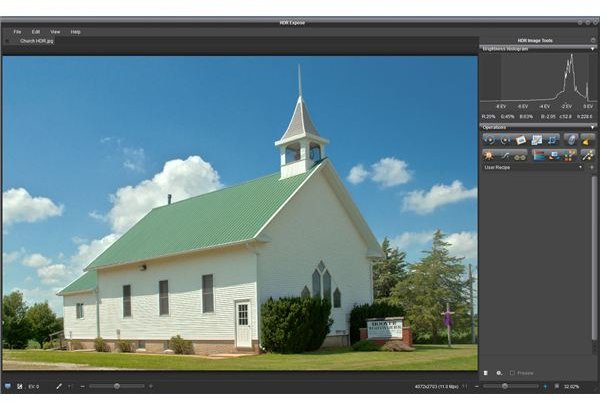
Well, the picture on the left, (click to see larger), was the finished product I settled on after I had processed the image with HDR Expose. I say ‘settled on’ because with high dynamic range software, there is more often a subjective feel to your final image. Still, when all was said and done, I was happy that the software offered me enough options to create the image I wanted to. I was happy to see a good amount of detail in the shadows, without compromising on clipped highlights.
I started the process in Adobe Photoshop Lightroom 3 , and because of the included Lightroom plug-in, I was able to easily export the photos to HDR Expose to edit. Five RAW images took around two minutes to load on my desktop, but this seemed quick enough, and if you prefer to import directly into the program, instead of going through Lightroom, then you can do that too.
Any adjustments you make can take a couple of seconds to process, so you don’t get to see that gradual live preview you get with some image editors as you move the sliders left and right. However, it is speedy enough and easy to make minor adjustments quickly. Moving to and from Lightroom was not a problem, and your finished image will be dropped back in to the collection it started in when you save and close HDR Expose. In this image I did not have too much problem with the halo effect often found in HDR photos, but the little I did have was easily dealt with by the built-in halo reducer. Other adjustments were intuitive and predictable, and you can’t ask for much more than that.
Adjustments can be stacked so that in theory you can adjust the same setting more than once. Say, for instance, you started by adjusting the veiling glare, then brightness and contrast, and then played with the color editing tools, you can still add another veiling glare option on top of all that you have already adjusted. The preview option is good for seeing the before and after of each adjustment, and there are other options that you might not expect like black and white presets and noise reduction.
Ease of Use (4 out of 5)
For me ease of use was the big test, because although I have been a keen photographer for many years, I have never created an HDR image before. To me, HDR images often seemed so crass and over processed. For every good example you find, there is often 4 or 5 bad ones. I liked the idea of HDR, and I wanted to experiment with an enhanced range of tones, but I still needed my images to be a realistic representation of the scene. This seemed less of a priority to the manufacturers of some high dynamic range software tools. While you can create some extreme looking results with HDR Expose, a more ’natural’ look is just as easy to produce.
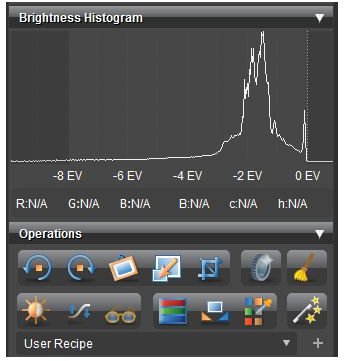
The interface is pretty straightforward and has some similarities to what Adobe did with Lightroom 3. On the right-hand side, you have a histogram , and a variety of colorful adjustment buttons. Each button reveals a selection of sliders that you can use to adjust various aspects of your image. A brightness/contrast tool, shadow/highlight adjustments, veiling glare, and halo control are just some of the options you have to play with, but many more are included.
A decent place to start is with the Dynamic Mapping Tool. Think of it as an autofix for HDR images. It may not be exactly how you want an image to look, but it can be a good starting point for further tweaks. However, if you are serious about getting started with HDR photography, I would recommend taking some time to read through the included PDF manual, and watch the tutorial videos the Unified Color Technologies website , because together they are a great introduction to the software.
Overall, if you have some experience of editing in Photoshop, or a similar editing program, it should not be too big a leap to learn how to create HDR images with HDR Expose if you take the time to learn and appreciate the impact that the adjustments will have on your images. Is it easy? Not at first, but it sure is rewarding when you get it right!
Overall Value (4 out of 5)
I enjoyed using HDR Expose. It is a slick and well-made product that does what it is supposed to do. At times it would be nice if it worked a little faster, but given the amount of data it is crunching, I had no real problems with the speed of the software. The price is okay, but maybe still a little on the high side. It sells for around $149, while other high dynamic range software solutions, like the popular Photomatix , can be had for just $99. However, the results it produces are as good, or better, than any other software out there just now, and the seamless integration with Lightroom and Aperture will be worth a lot to users of these programs. So, if you are looking for an HDR program to process your images, you can be sure that HDR Expose is one of the best. Try it free for 30 days by signing up on the Unified Color Technologies website and you can see how well it really works.
This post is part of the series: HDR Photography from Unified Color Technologies
Find out how to create stunning HDR photos with software from Unified Color Technologies.


