GIMP stands for GNU Image Manipulation Program. This may not tell you much, but what you do need to know is that it’s free. It was first released back in 1996. Since then it has been developed and matured to be recognized as a real alternative for Photoshop.
GIMP is a solid free alternative for digital image manipulation software compared to other commercial products. While Photoshop remains the king of the hill, GIMP fulfills many of the same uses. The software is updated regularly and it seems they are investing a lot in improving and taking it even further. Photoshop may be the standard but it is an expensive product and not everyone can afford it. GIMP is a realistic alternative.
User Interface (3 out of 5)
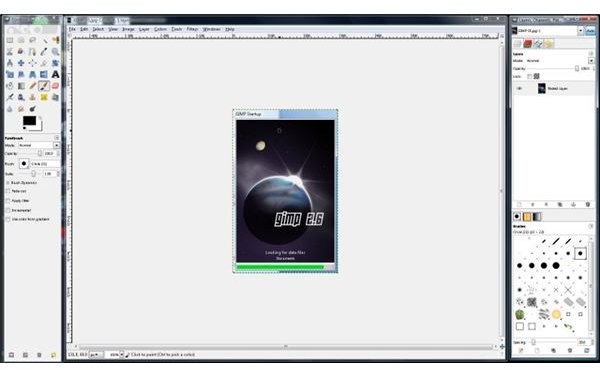
If you have used Photoshop, you will notice that GIMP has more or less the same tools located in a familiar setup. On the left side is the Toolbox and the properties of the selected tool. On the right side you have the Brushes, Layers, Channels, Paths, etc. In the center you have the main window with the main menu.
There is one major difference with the Photoshop user interface: GIMP uses different windows for each of these sections. This means that instead of one main window with all tool bars in it, all the tool bars are located outside the main window. The location of the separate control boxes takes a little bit to get used to since all your tools controls are not in one tidy place.
RAW Support (5 out of 5)
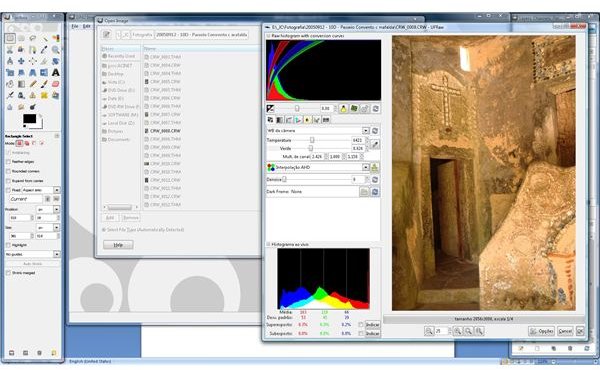
If you need RAW file support for your camera in GIMP, you can download UFRaw and install the plug-in. This plug-in supports Adobe Digital Negative, Canon, Nikon, Sony, Fuji, Olympus, Pentax and Minolta RAW file formats. The download, much like the software, is also free. It can also be ran both as a standalone feature or from within GIMP.
After installing the UFRaw, you just need to open a RAW file normally using File>Open or open a file directly with UFRaw. Because UFRaw can run as a standalone, it means you don’t have to open GIMP to see your RAW files.
As you can see, it’s quite straightforward. If you ever worked with RAW images in Adobe you will find some similarities. The feature offers a few interesting options including Curves, Levels, a noise reduction option, white balance and more. This is a tool that comes in handy for many amateur photographers.
Photoshop Plug-in Support (5 out of 5)
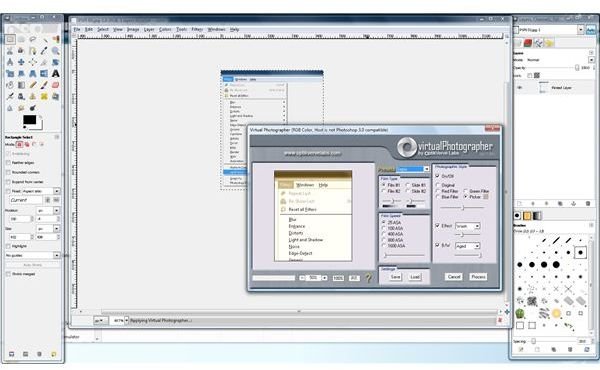
This may sound strange to talk about in a GIMP review, but it is an invaluable addition to the program. Many Photoshop filters will add value to any software they can be used with. A good example of one that works with GIMP is VirtualPhotographer from OptikVerveLabs. There are also a number of commercial Photoshop plug-ins that can save you time and improve your photo editing experience. So instead of having to find alternatives, you can use PSPI, enabling you to use these Photoshop plug-ins in GIMP. Again, the plug-in is free, the source is available to anyone interested and it works as a cross platform tool.
After placing PSPI.exe in the GIMP plug-ins folder, start GIMP and you will find a new Menu option under Filters. Selecting the configuration menu, it will open a Dialog box so you can identify where you will place Photoshop plug-ins.
For example purposes, I’ve installed VirtualPhotographer on my machine and copied the files to the folder I specified. Close GIMP and start it again, and you will notice another menu option on the filters menu.
Price to Value Comparison (4 out of 5)
Photoshop is an amazing product but it is also an expensive one. If you are a photographer who needs photo editing software and don’t have the money to pony up for the best, give GIMP a try. It is a solid product and, with the Photoshop plug-ins, it is an amazing value. The software does almost everything you need in photo editing and you won’t find any other free photo editing software that is this intuitive.
References
https://www.optikvervelabs.com/


