It’s easy to take photos during the day when there’s plenty of sunlight; shooting at night is more difficult, but the results can be quite rewarding.
Taking Night Photos
Night photography can be very rewarding. You can get beautiful shots without the distraction of harsh daylight. Of course, getting these great photos does require knowing how to work in low light situations . In this article, we’ll discuss some techniques for night photography with digital cameras (although these techniques will largely work with film cameras as well).
To get started, you’ll need two things: a camera and a tripod it can attach to. Which tripod you use isn’t particularly important, as long as it holds the camera set. For the camera itself, it will be helpful if it has either a remote trigger or a self-timer; the reason for this is that you’ll often be using slow shutter speeds and want to avoid even the small amount of motion that would be caused by depressing the shutter button.
This article assumes that you are already comfortable with using your digital camera; if you’re just getting started, you might want to check out our free digital photography tutorials .
Lighting Up Night Photos
When you’re photographing at night, you essentially have two choices for getting a correct exposure. You can add light (generally by using a flash) or you can increase your exposure time, allowing the camera to collect enough light to make a good photo. While a flash works well for lighting up the scene, it often destroys the mood that the photographer was going for with the photograph.
A better option is to use fast lenses and/or longer shutter speeds. Fast lenses are those that have wide maximum apertures, allowing a lot of light in so that they can capture the photograph quickly. For example, some of the most popular lenses are the 50mm f/1.4 and f/1.8 (the so-called “nifty fifty”) lenses; not only do these allow in a lot of light, but 50mm is an excellent length for a portrait lens on a cropped sensor camera . Thus, if you wanted to take photographs of children in their Halloween costumes, once of these lenses lets you get the photo without using a flash but without having to have them stand still for an unrealistic period of time.
Of course, night photos often involve either unmoving objects, or moving objects where the motion becomes part of the photograph. We’ll discuss these pictures next.
Movement in Long Exposures
Taking a quick photo, using either a flash or a fast lens with sufficient ambient light, is pretty simple. But what if the situation remands a longer exposure, on the order of seconds, minutes, or even hours?
Obviously, this is one of the cases when you definitely want to use a tripod and preferably either a self-timer or a remote trigger. (For exposures over 30 seconds, you’ll probably have to use bulb mode on your camera, which keeps the shutter open until you trigger it
again).
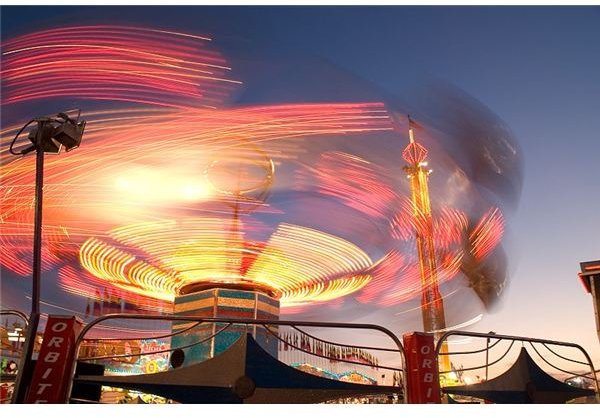
With a long exposure, moving objects will often become completely invisible, but light sources - be it the headlights of a car, a flashlight, or otherwise - will be captured in the photograph. In the picture at right, for example, the spinning fair ride creates an interesting effect. This particular shot was taken in 2/5 of a second, just slow enough to blur out most of the ride details while leaving a show of lights.
Getting Started
Of course, it often takes a bit of practice to successfully use these techniques for night photography. With digital cameras, you have a huge amount of flexibility in finding the right settings for the best exposure; if the shutter speed you need doesn’t allow in a sufficient amount of light, you can always dial in a larger ISO setting (although this does increase the amount of noise in the photo). Additionally, shots that require a particularly long shutter speed are often beyond the capabilities of the camera to accurately meter, which means you’ll have to find the correct exposure time through trial and error. Done correctly, however, night shots can result in stunningly beautiful photographs.


