This article walks you through how to make a photo book using Adobe Photoshop Elements 6.0, including screenshots to accompany the steps so you can see what you should click on if you are not familiar with Photoshop Elements 6.0.
Getting Started
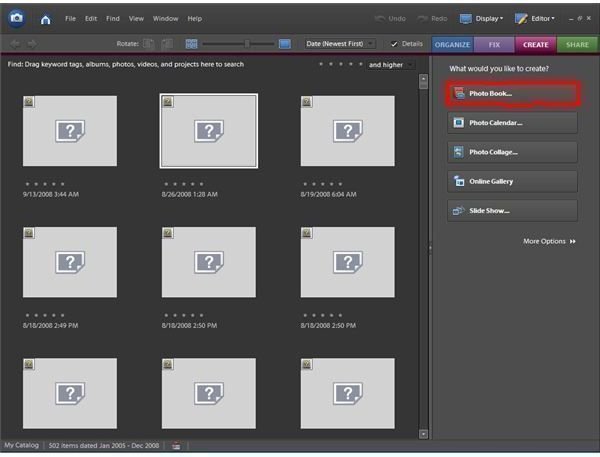
Go to your Start menu and bring up the first screen of Adobe Photoshop Elements 6.0. When the screen appears asking you what you would like to do, click on the “create” button. This will bring up a screen like the one in the first screenshot shown below. Once that screen is loaded, click the button on the right that’s called “Photo Book.”
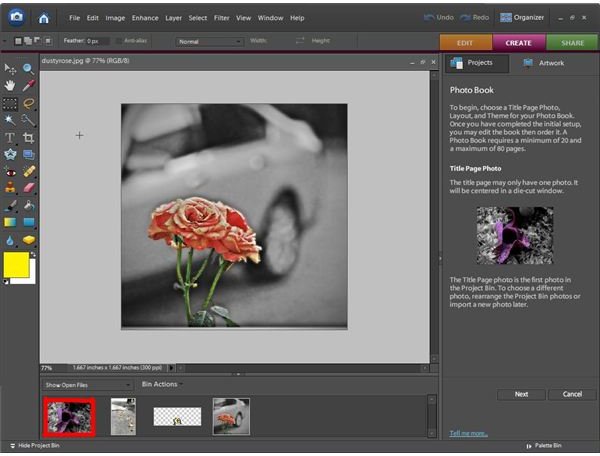
Next, you’ll want to open the photos you wish to use for your photo book so that you can easily drag them to the pages you want them to appear on. The title photo will be the first photo in your Project Bin (see second screenshot below), so be sure to open that photo first, or re-arrange the photos after you’ve gotten them all opened. A photo book requires a minimum of 20 pages, so make sure you have enough photos to create your book. Don’t worry if you have more than required, a photo book also has a maximum of 80 pages.
Step-By-Step Instructions
Choosing A Layout
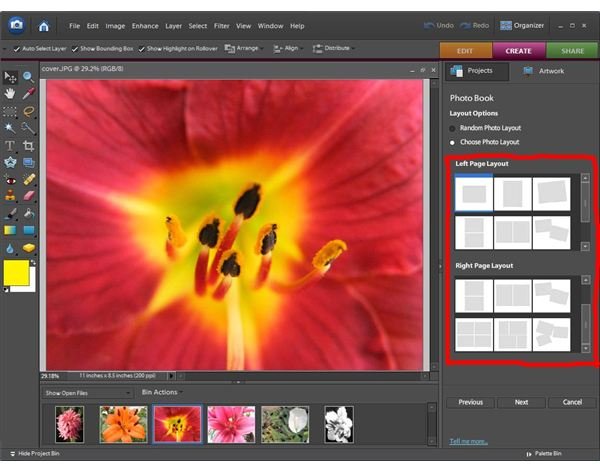
Once you have all of your photos opened and in the order you’d like them, go ahead and click the “next” button on the right-hand side of your screen. You can now choose layout options. Your choices are “random photo layout” or “choose photo layout.” Random photo layout will allow you to move your photos wherever you want on the page. If you select choose photo layout, Photoshop will give you options on how you’d like the photos to be displayed on the left and right side of the pages. The screenshot below shows some of your options.
Images
Choosing A Theme
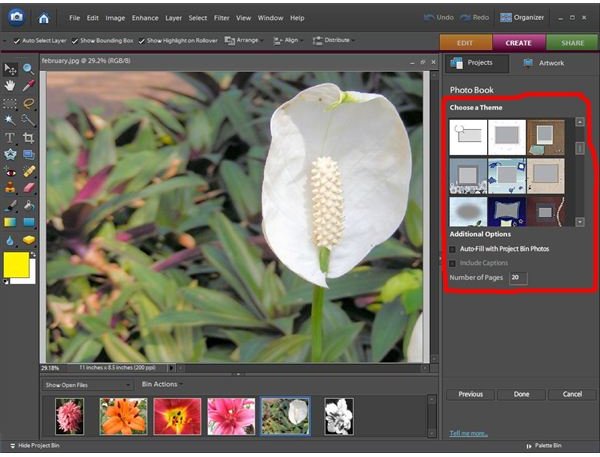
After you’ve chosen the layout for your pages, you now need to choose a theme. A theme is what the photos have in common. There are many different choices for you to pick from, such as baby shower, vacation, or an office setting. Some of these can be seen in the second screenshot above. Scroll through your different options and pick a theme that best fits your photo book. If the photos are already in the order you want them, you can click the box that says “Auto fill with project bin photos.” This will save you a bit of work by using the photos in the order they appear to place pictures in the book. If you want to place them yourself, leave this box un-checked.
The other box you can check is “include captions.” If you’d like to add words to each photo, such as who’s in it, where it was taken, or what type of animal it is, click this box. If you just want a book of photos with no words, leave the box un-checked. There is also an option to choose how many pages you want your book to have. The default is 20 pages, if you have a lot of photos, you may want to add some pages so you have room to place all of your photos. Once you’ve decided on all of these options, click the button that says “done.”
Generating the Book and Printing
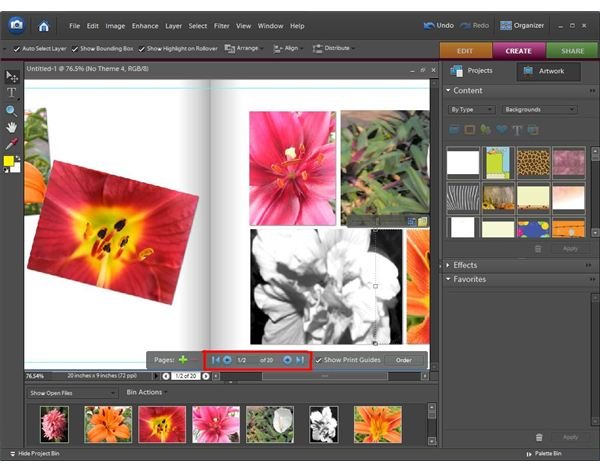
Photoshop will now generate the pages of your photo book using all of the options you just chose. This may take a few moments, so be patient. Once the photo book is done loading, you’ll have a photo in the middle of the screen showing your title page. You can now use the blue arrows at the bottom of your screen (shown below in the first screenshot) to scan through the pages of your book and to place photos in any extra spaces.
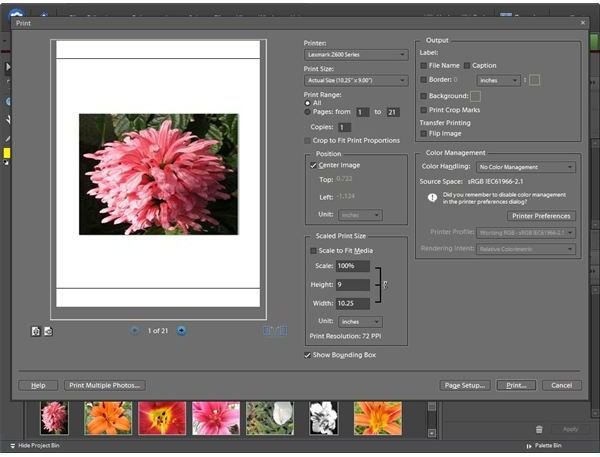
Once your photo book is finished to your liking, you can go to File>Print. A dialog box will appear like the one shown in the second screenshot below. Make sure to adjust the print settings to your needs. You don’t want to print the book and later realize they’re too small, or printed 10 times a page! You now have your own printed photo book. You can staple the pages together, or use a 3-hole punch to tie the pages using a decorated piece of string or yarn.
Images