Want to learn how to turn a color photo into a color pencil sketch with Photoshop? Then we’ve got the Adobe Photoshop tutorial for you. Learn how to create a pencil drawing in this easy to follow tutorial.
Edit Your Photo First
If you are no artist, but still want to create a pencil drawing for a project, then you can do this using Adobe Photoshop. There is an artistic filter that you can use that easily converts your image into a pencil drawing, and it’s so easy to do that even a beginner can quickly catch on how to do this. In this tutorial, we’ll go over how to turn a color photo into a color pencil sketch with Photoshop.
Before you start converting your image into a pencil sketch, you need to select a photo that will look good as a drawing. Generally, images with clearly defined edges and bright colors work best since it’s easier for the program to convert these photographs.
After you select your photograph, open it up in Photoshop. Before you add the Photoshop filter , go ahead and edit your image. Adjust the brightness, contrast and saturation. You can access the Brightness/Contrast tool in the Image dropdown menu, by going to Image then Adjust. To sharpen the image, go to Filter, then Sharpen and Sharpen again. Once you finish changing your image , select OK.
Adding an Artistic Filter
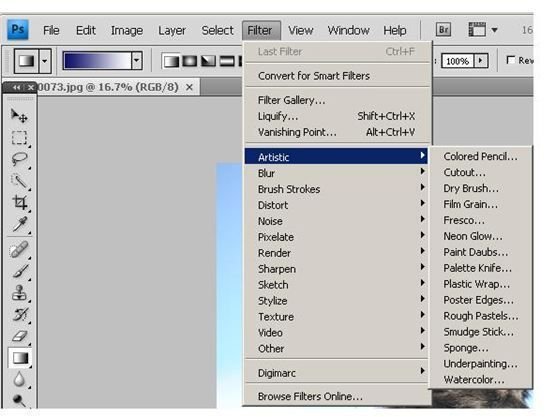
Now, it’s time to start adding the pencil effect to your drawing. Go to the Filter dropdown menu, and select Artistic then Colored Pencil.
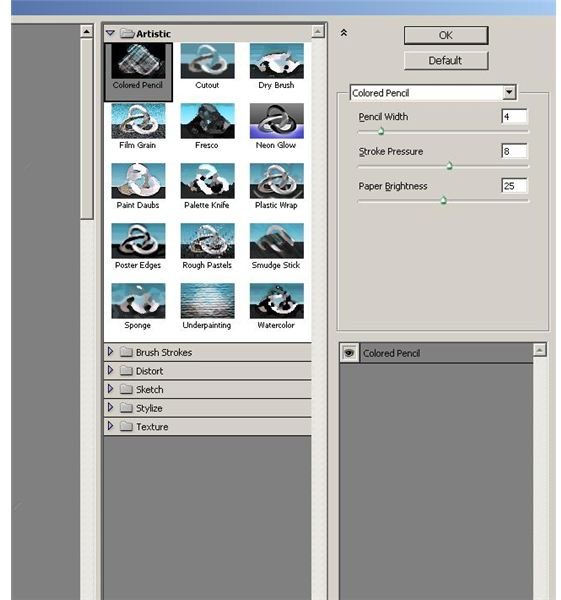
This will open the Colored Pencil Dialog box. Here, you can edit the Pencil Width, Paper Brightness and Stroke Pressure, using the amount sliders. Your changes will be reflected within the preview panel.
When you get the pencil drawing the way that you want it, then select OK. If you get back out to main photo page, and the image does not look the way that you want it to, you can hit File and then Revert. This allows you to redo the Colored Pencil Step.
You should also consider making a copy of your original image. This allows you to revert to the original picture if your final image is not to your liking.
Fade Crosshatch Filter
Next, you want to manipulate the brush strokes of the pencil drawing. To do this, go to Filter, then Brush Strokes and Crosshatch. This will bring up another dialog menu with amount sliders. Adjust the sliders as you see fit, and you can also preview your changes before
you hit OK.
Your image should now look like a line drawing. If you want to tweak the image either further, then use the Fade Crosshatch filter, which is found in the Filter dropdown menu. Generally, a fade crosshatch of 55 percent works well.
Adjusting Your Colored Pencil Drawing
If you drawing looks a little washed out, adjust the Brightness/Contrast and Color Balance . The Color Balance allows you to brighten certain areas of the image and darken others. For example, if you have a flower, then you may want to make the center darker than the leaves.
Finally, hit OK, and you’ll have now converter your photograph into a colored pencil drawing.


