If you are able to catch a space shuttle launch, then you want to remember the occasion by photographing it. But there’s more to capturing great pictures than simply pointing and shooting. Learn about the equipment that you need and the best camera settings for photographing space shuttle launches.
Finding Your Spot
Photographing the space shuttle is a momentous occasion since they don’t launch often, and the number of shuttle missions is dwindling. So, you need to take advantage of these last few missions, but you also want to make sure that you are capturing truly spectacular pictures. To do this, however, you need the right equipment, and you also need to ensure that your camera has the right settings.
Before you can even start taking photographs, you need to stake out your spot. Many places charge a fee to watch the event, but there are some public lands where you can stand for free. Regardless of whether or not you pay, you are going to be competing with thousands of other people for the privilege of seeing the shuttle launch. So, get out there at least four hours early, if not more.
Find a spot that has a clear view of the shuttle launch. Due to security precautions, you are going to be quite a ways away from the shuttle launch. So make sure that there is nothing blocking your view.
Camera Settings
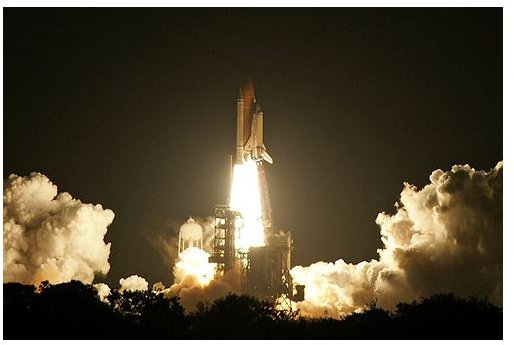
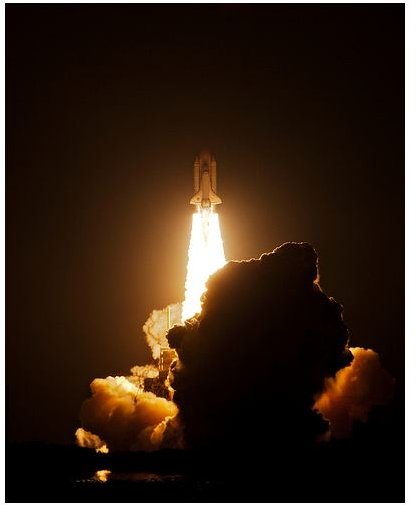
You don’t need to worry about bad weather obscuring your photos. NASA only launches in good weather, but the sky may be a bit overcast. Generally, space shuttle launches take place either during the day or in evening. You need to adjust your settings based on these conditions.
For day launches, you are going to be experiencing a lot of brightness from both the sun and the reflections off of the shuttle itself. Try setting your ISO to between 100 and 200, and take a few pictures before the launch to see which settings actually work better. For evening shots, try setting your camera at between 800 and 1600 ISO setting. Again, experiment with the shots before the shuttle takeoff.
Avoid using the flash. You are going to be far away anyway, and the flash won’t reach. Plus, you’ll probably just over-expose the shot since there is so much metal to bounce off of.
You also need to adjust your aperture settings . Generally, f/8, f/11 and f/16 are great settings for photographing the space shuttle.
Also use the manual focus for taking pictures of the space shuttle. Your auto focus is going to have trouble focusing on something so far away, and it may just focus on a nearer object that’s within the frame.
Use the focusing brackets on your camera to ensure that the space shuttle itself is within the two brackets. If not, your camera may have trouble focusing on the space shuttle over the smoke and flames.
Camera Equipment
As far as equipment goes, you want a good digital SLR camera and a telephoto lens . Experiment with your telephoto lens to determine the optimum midway point between completely zooming into the space shuttle and zooming in just enough. If you zoom in too much, you run the risk of having grainy pictures.
Always use a tripod. Zooming into an object increases the chances of the photo blurring due to hand shaking. Use a light meter about five minutes before to determine whether or not your settings are right. Then, adjust them if you need to.
Do not use the LCD screen on your camera; use the viewfinder. The LCD screen does not always reflect what the camera is actually “seeing”.
Finally, take lots of pictures as fast as possible. You only have about 30 seconds to capture the entire launch. Use them wisely. Then, shoot some pictures of the trailing smoke. They’re just as interesting as the launch itself.


