Using basic PVC pipe and household objects you can easily make your own light box. In this DIY photography tutorial, you’ll learn how to construct an easy, inexpensive, yet effective light box for close-up and macro photography.
Introduction
Photographers who specialize in product photography will often use what is known as a light box for their work. A light box provides photographers with the means to have soft, diffuse light and uniform background. The catch is that light boxes in your local camera store can easily cost you upwards of a hundred dollars! In this DIY photography tutorial, I will show you my inexpensive solution that gives you a great way to get the same results. By using a few household objects and some PVC pipe that you can get from your local hardware store, I will show you how to build a light box for photography.
What You Need to Make Your Own Light Box
The materials presented below are for a light box that is 20"x20"x20", if you want a bigger or smaller light box, you just need to adjust the size/amount of PVC pipe that you get.
Materials to Buy:
220" of white, 1/2", PVC pipe
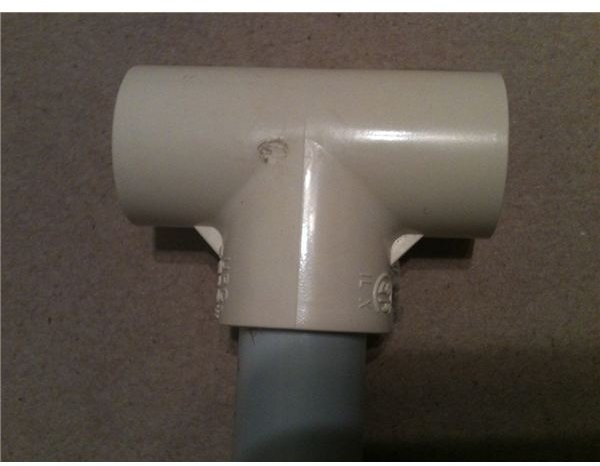
6, 1/2", plastic “T” joints for PVC pipe
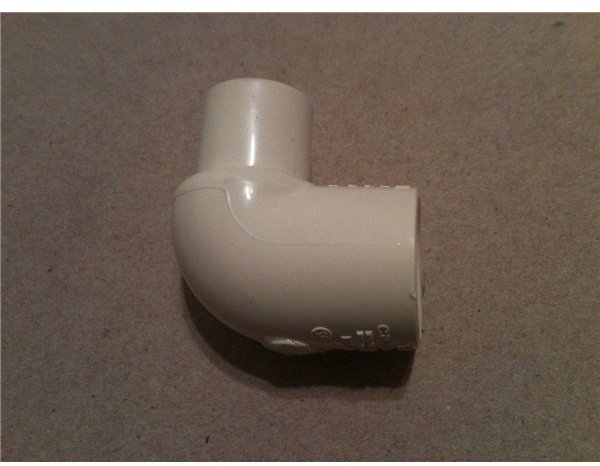
2 regular, plastic 90 degree joints for PVC pipe
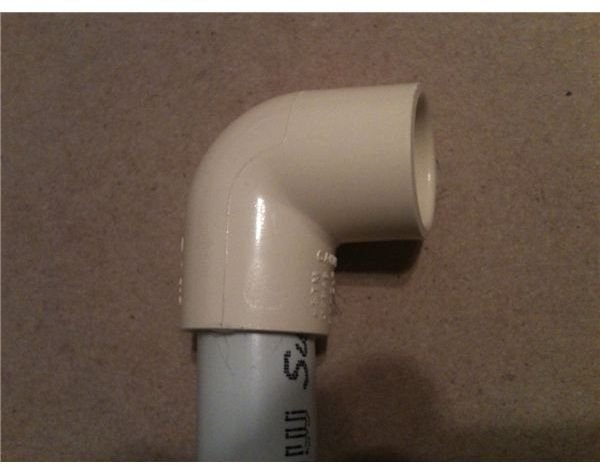
6 “interior/exterior”, plastic 90 degree joints for PVC pipe
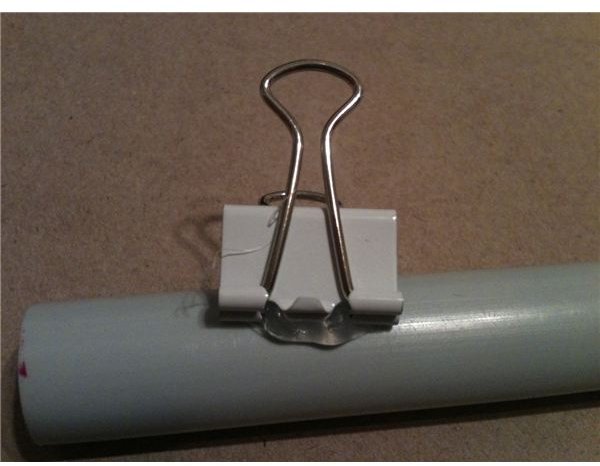
2 standard document clips
Bristle board (different sheets of different colors for backgrounds)
Tissue paper, a thin white table cloth, white plastic sheet, or something else to diffuse the light of your box.
Materials needed to make and take pictures using the light box:
Hot glue gun and glue sticks
PVC pipe cutters (A saw, sharp knife, or strong scissors will also do fine)
Light source for the box (Flash, desk lamps, and construction lights all work well)
Camera
Construction
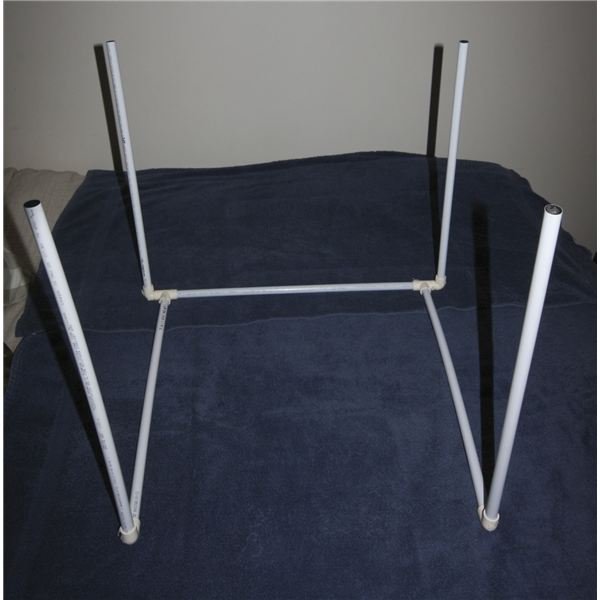
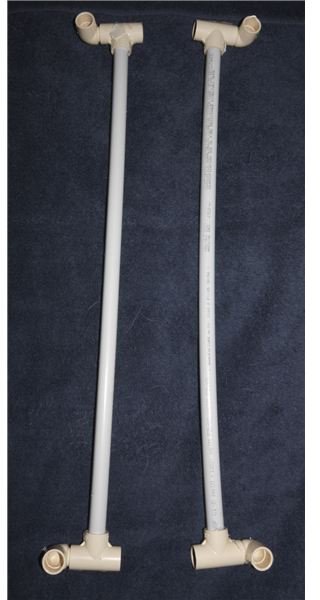
Step 1: The first thing that you need to do is to cut down your PVC pipe into 11 equally long pieces (in my case each of the PVC pipe pieces were 20" long). Take two of your pieces of PVC pipe and attach a T-joint to them. While the T-joint is lying flat, on the other end of each piece of PVC place a 90 degree joint so the one end that is still open is pointing straight up. Next place an “interior/exterior” 90 degree joint on the left side of the T-joint on one and on the right side of the T-joint of the other. Your two pieces should look like the “Step 1 image” below.
Step 2: Place a piece of PVC connecting the two open ends of the T-joints of those two pieces. Lie what you have down and you should have 4 open joints pointing upwards. Place a piece of PVC pipe in each of these slots. You should have something that looks like the “Step 2 image” below.
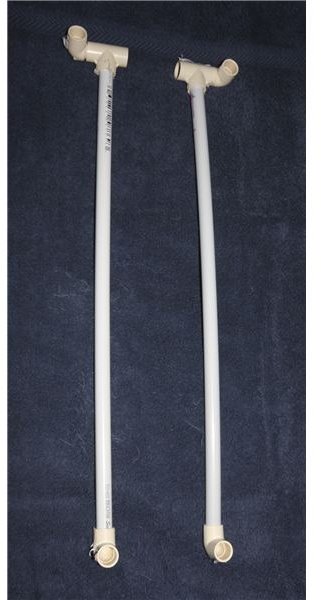
Step 3: Place this structure off to the side for the moment. Take two pieces of PVC pipe and put a T-joint on either end. Place 4 “interior/exterior” 90 degree joints on the left and right sides of the T-joints like before, but on both ends; you should now have something similar to the “Step 3 image” below.
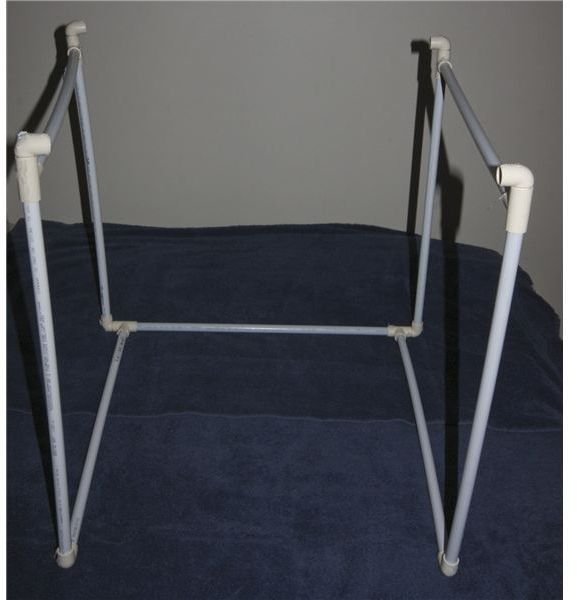
Step 4: Place these two pieces on the structure from earlier by attaching the open ends of the T-joints to the pieces of PVC sticking up in the air. Make sure that the 4 open ends of the “interior/exterior” 90 degree joints are all facing inwards as seen in the “Step 4 image” below.
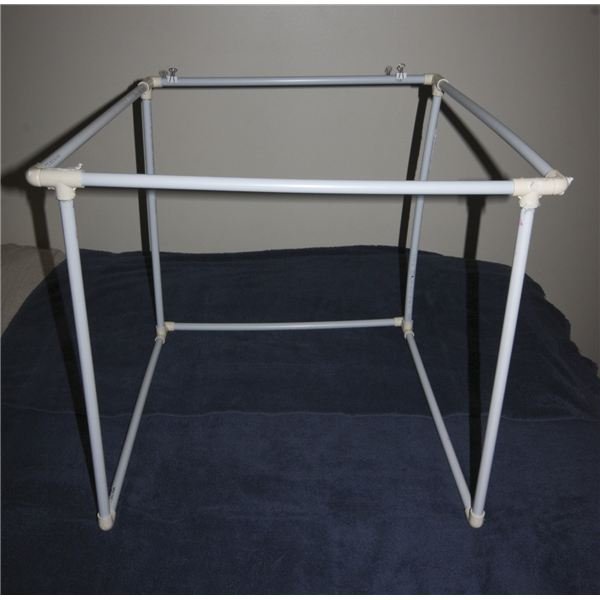
Step 5: On the remaining piece of PVC pipe, use a hot glue gun to attach the document clips about 2 inches in from either end. Place this piece, clips facing the floor, on the side which has a piece parallel to it on the ground. Insert the remaining piece of PVC in the remaining slot. Flip your structure around and place it such that the PVC piece with the document clips is on top and farthest away from you. You now have the basic structure for your light box (Note: The image below of the completed frame has been flipped already)!
Images complimenting the steps above
Please continue on to the final page of tis DIY photography article to learn the final steps on how to build a light box for photography, information on using the light box, and a breakdown of how much it costs to make your own light box.
Light Diffuser, Collapsibility, and Sturdiness
If you want to keep your structure assembled at all times, you can solidify each of the joints with a dab or two of hot glue on the inside of the connections. You also have the option of leaving the joints loose so that you can take down the light box for storage purposes.
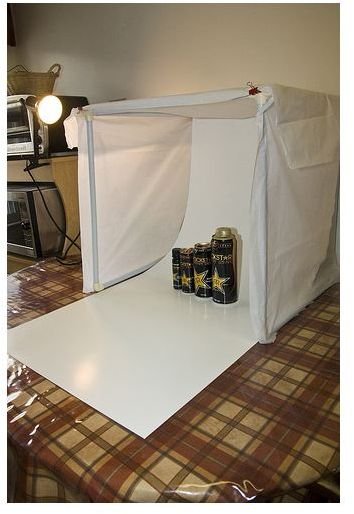
In order to get the soft, even light associated with light box photography you need to cover your newly built structure with a white, semi-transparent material. When I first built my light box I used a hot glue gun to attach tissue paper all the way around the structure except for the bottom and the front of the box. The paper worked great as a diffuser but ripped too easily. I have since replaced the tissue paper with a plastic table cloth from the dollar store.
Once you have the outsides covered with a diffusing material you can bring in the lights. To get started you can use a desk lamp on either side of the light box. You can use a desk lamp with a clamp and attach it to one of the light box’s pieces of PVC. You can use one (or multiple) flashes around or above (maybe using a DIY flash clamp ) to light the object in the box to your heart’s content.
Use the Light Box
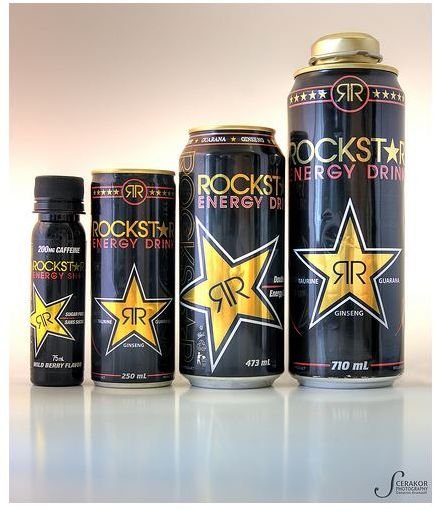
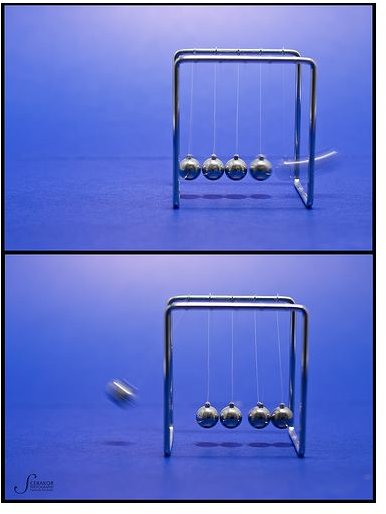
Now that you’ve learned how to build a light box for photography, the only thing left to do now is to put the light box to some good use. Set up your light box on a table or wherever you wish to take your pictures. Take a piece of bristle board (white, black, or colored depending on what you want your particular background to be) and insert one end of the bristle board into each of the document clips. Allow the bristle board to curve its way down and onto the table. Place the object on top of the bristle board to take its picture (note that you may need to anchor the edge of the bristle board down if you are photographing something that is too light to hold it in place). The only thing left to do now is to set up and take your shot. See the three images below for a view of the final setup and a couple of example images with the DIY photography light box. Congratulations you now know how to build a light box for photography.
Cost to Make Your Own Light Box
You can go ahead and buy a pre-made light box from your local photography store tomorrow and that could possible set you back over $100 or you could save some money and make your own light box. Let’s take a look at how much this DIY photography light box cost us:
- PVC pipe and joints - ~$20
- Document clips <$1
- Diffusing Material ~$2
- Bristle Board ~<1 each color
This means that your DIY photography light box will easily cost you less than $30 dollars and give you the satisfaction to have taken the time to build it yourself! It is necessary to note here that I have assumed you have hot glue (or other adhesive), something to cut the PVC pipe with, and lighting equipment , so I have not included these items in the price.


