If you want to separate your digital photography from that of rank amateurs and the “wanna be’s” or the “point and shoot” crowd, here are a few tips and techniques that can be learned, practiced or corrected.
Eliminate Camera Shake
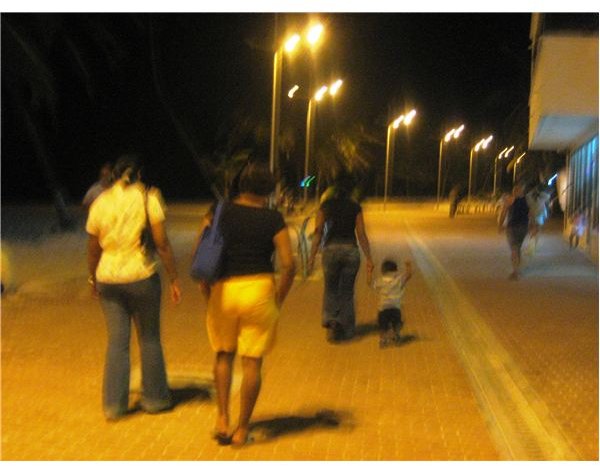
Have you ever heard the expression, “It must be jelly, ‘cause jam don’t shake like that”? Does this apply to your photographs? One of the things which greatly separate the amateurs from the pros is the sharpness and clarity of their respective images. You must do all you can to eliminate “camera shake” as it occurs while shooting moving subjects with the camera hand held at night like this scene.
Here are several methods to help eliminate “the shakes”:
- Use a tripod
- Brace yourself and your camera when shooting
- Use the fastest shutter speed and smallest apertures possible
- Try taking shots using auto-focus, then manual focus
- Learn how to hold a camera correctly
For a more indepth look at how to eliminate camera shake, please click here .
Change the Camera Angle

About nine times out of ten when viewing “amateur” photos you can guess the height of the photographer fairly closely. Why? Because they tend to shoot everything from eye-level. Have you ever watched a photojournalist at work? They’ll shoot an object, person or scene “nine different ways to Sunday”. They’ll climb up on something to get a higher view point, then kneel or squat to shoot below eye-level and finally prostrate themselves on the ground to get the lowest possible viewing angle of the subject. They’re often not finished then either. Next they’ll “circle the wagons” shooting from the side and behind before getting up as close as possible to shoot even more frames of their subject. So you should shoot images of your subject from every conceivable, possible angle . I had to get both dirty and wet up to the neck to capture this boatman but the resulting shot was well worth it.
Watch the Lights…

…No, not the ones in the sky from the “X-Files”, but the ones that are illuminating your subject. Mo

st pros tend to shoot outdoors early in the morning or late in the afternoon. Why? I thought you’d never ask. It’s because those particular times of the day tend to have strong, distinctive lighting, giving photographs a much more dramatic appearance. When using flash indoors, try shooting with two flash units: a main one plus a fill-in or “slave” flash unit for more complex, but natural lighting.
Try lighting the subject from different vantage points too. From the top, from behind or even from below for special lighting effects, instead of only from the front and occasionally the side. Be careful when metering too. Note the dramatic difference in these two shots with one metered off the sky and the other metered off the foreground subject in shadow which made the ocean disappear!
Killer Composition Tricks

One thing you’re sure to notice when flipping through a batch of professionally-composed images is the variety of compositions they encompass. Professional photographers feel free to use the “rule of thirds ” when shooting images. But they also feel just as free to “break the rules” to get eye-stopping, breath-taking photographic compositions such as this Caribbean beach sunset scene.
Make Every Image Count
Every image that you shoot should tell a story, convey a message or evoke an emotion. If not, what’s the point of the photograph? Each image should be creditable and saleable on its own. Professional photographers know this and strive to get just the right image to convey what they’re trying to express or demonstrate. If you apply these professional tips and techniques to your photography, soon you’ll start to see a dramatic change in the quality and visual impact of your images. Yes, with practice and technique, you CAN shoot images with just as much visual impact as “the pros” do.


