If you love uploading and sharing your photos on Flickr, you might be asking, “How do I put a Flickr badge on my site?” Making and posting a Flickr badge allows anyone who visits your blog, profile or other site to preview and go directly to your Flickr profile.
Overview
One way to help your photos gain more views on Flickr is by adding a Flickr badge to your blog or website. The badge displays thumbnails or small previews of several of your Flickr photos. You can create an HTML badge or a flash badge and then use the code provided to add the badge to your site.
Creating a Flickr Badge
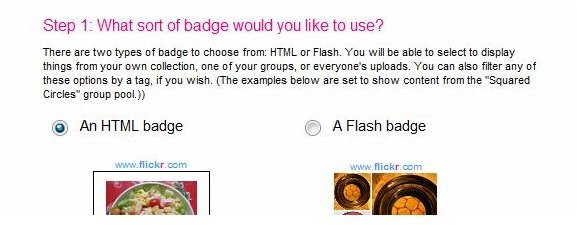
Log into your Flickr account and then go to the Create Your Own Flickr Badge page. Under What sort of badge would you like to use? select An HTML badge if you want a static badge that displays several photos and links to your Flickr profile. Select A Flash badge if you want a dynamic badge that enlarges one photo at a time and links to your Flickr profile. Click Next after selecting the type of Flickr badge you want to add to your site.
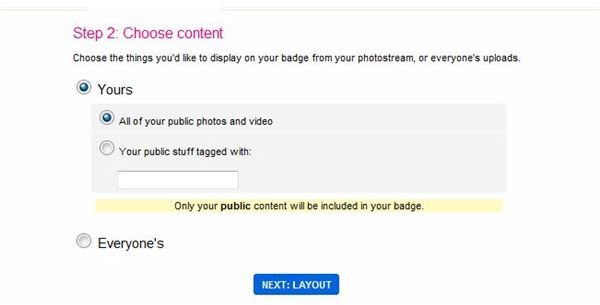
On the Choose Content section you have three choices. You can display images from all of your public photos and videos. You can enter a specific tag and only display photos with that tag, which is ideal if you want to create a Flickr badge with a theme that is relevant to your blog or site. Your third choice is Everyone’s, which displays content from all public photostreams. After selecting your content, click Next.
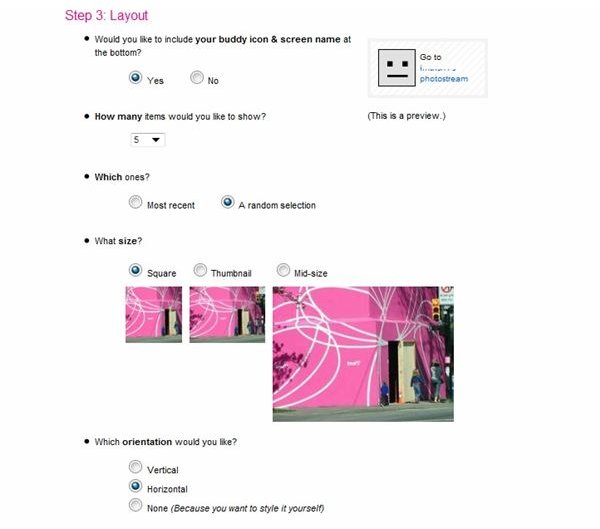
If you are creating an HTML Flickr badge, the next step is to select from several extra options. You can add your Flickr buddy icon and screen name at the bottom of your Flickr badge. You can select the number of photos you want to include in the Flickr badge on your site. Opt for Flickr to randomly select photos to display in your badge, or choose your most recent photos. Choose a size, select an orientation and click Next. If you selected a flash version of the Flickr badge, this step is not present.
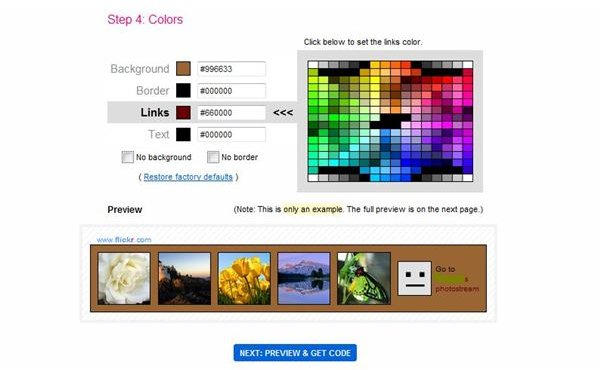
Choose colors for your Flickr badge. Select Background and click on the color you want to use for the badge background. Change the border color, links color and text color if desired. You can also select No Background or No Border. Click Next to continue.
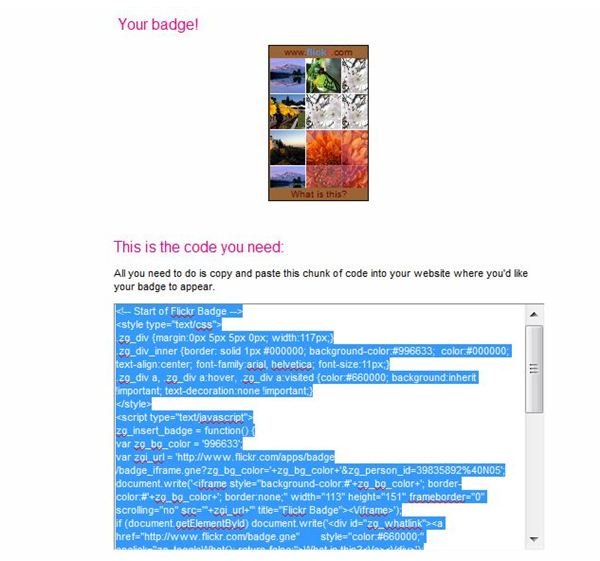
At the last step, you will see a preview of the Flickr badge and a box containing the code you need to add the badge to your site. Simply click on the code to select it, copy it and paste it into your website creator where you want the badge to appear. Once you publish the changes to your site, your visitors can view some of your Flickr photos and click on the badge to visit your Flickr profile page.
You might also be interested in learning how to embed Flickr slideshows on your website .


