No one likes a double chin! Learn how to get rid of a double chin in a photo by editing it out or avoiding it in the first place.
Introduction
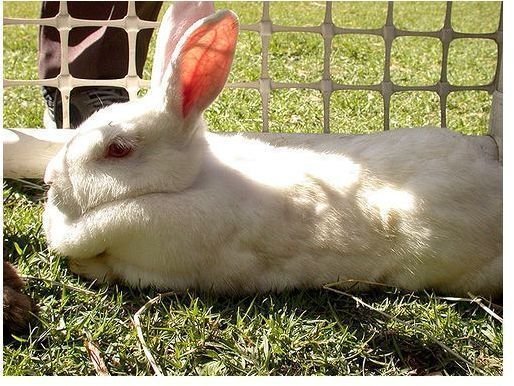
Taking portraits of people is no easy task. There are a lot of things to consider and sometimes little things get overlooked like the hair, eyes, or in this case a double chin. The good news is that with modern software tools like Adobe’s Photoshop , it is very easy to get rid of a double chin and make it look like it never even happened in the first place! Then, on future shoots, you can learn to avoid a double chin in the first place, saving you time in post when getting the photos out to your family, friends, and clients.
Photo by headexplodie
Photoshop Magic to Get Rid of the Double Chin and other Unwanted Blemishes
Here is how to fix a double chin in Photoshop. Remember that this will also works for other areas of the body, skin with blemishes (acne and pimples), and wrinkles.
Part 1 will slim your subject by reshaping their neck and face. Part 2 will erase folds and wrinkles for an even flattering result.
Part 1
-
First start by creating a new layer by pressing Ctrl+J on PCs or Command+J on Macs.
Advertisement -
Go to Filter > Liquify (or Shift+Ctrl+X on PCs or Command+Option+X on Macs).
-
Select the default tool (forward warp tool) on the left which is the top most tool.
Advertisement -
Set your brush size to an appropriate size (use the circular cursor to estimate).
-
Set your brush settings as indicated in the picture. (Brush Density 60, Brush Pressure 40, Brush Rate 80, and Turbulent Jitter 50)
Advertisement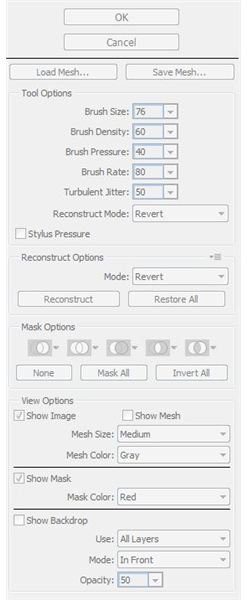
-
Slowly nudge into the neck or chin, by clicking outside the head or neck and pushing into the skin. Your goal is to slim the figure and reshape the chin. If you make a mistake, undo with CTRL+Z on PCs or Command+Z on Macs.
Advertisement
Part 2
- Use the clone stamp tool (shortcut: c on the keyboard) and alt-left click on an area right below a fold or wrinkle to “sample that area.”
- Set your Opacity to 50-65%.
- Simply brush over the fold or wrinkle several times while holding down the left mouse button until it disappears.
How do you know you’ve done a good job? Click the eye next to the second layer and view the before and after images. The most important thing is to make sure it looks natural. We are just doing a touchup on the double chin and not a full makeover!
Tips on How To Avoiding the Double Chin
Obviously the best way to fix a double chin is to prevent it in the first place.
- Direct your subject to extend their neck, sit or stand tall, slightly raise their chin, and relax their shoulders.
- Watch your lighting see where the shadows fall (after the first few shots on your camera’s LCD)
- Shoot “down” on your subject from a higher angle . Avoid low angled shots.
- Use longer focal length lenses to compress your subject. Wide focal lengths tend to cause distortion creating a very unflattering look. A longer focal length also allows you to work from a greater distance helping to put your subject(s) at ease.
- Use a wide aperture for the shallower depth of field, focusing of course on the subject’s eyes, to deemphasize the rest of the head and neck.
- For more ideas, see how to be photogenic and look good in pictures !


