If you think you’ve seen every possible way of bedazzling jewelry you might have missed out on this one. This will surely tickle your creative senses and bring out the artist in you. Learn how to make photo jewelry with this DIY photography project.
Photo Jewelry
Photo jewelry isn’t a new concept. A lot of people like how personal and unique photo jewelry can be. Here are some easy-to-follow steps on how to make photo jewelry of your own.
Photo Bracelet
Forget about the chunky and expensive bangles. Try the more minimalist version that is sure to put a smile on everyone’s face, including you.
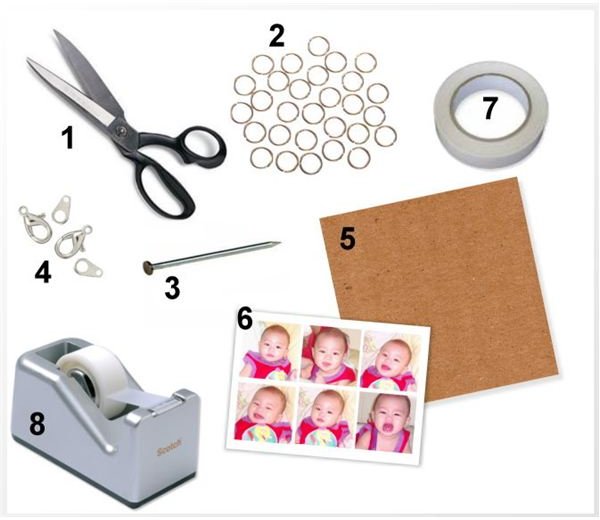
Materials Needed
1. Scissors
2. Jump Rings - you can purchase this from any arts and craft store or you can buy 100 pieces online at Amazon.com for the price of $1.99
3. Nail or anything with a pointed sharp tip
4. 2 sets of jewelry clasps - also available online for $2.38
5. A piece of cardboard
6. 5-6 pieces (1x1 inch) printed digital photos
7. Double sided tape
8. Clear scotch tape (2 inches)
How to Make It
Step 1: Cut out your printed images (1x1 inch) and cardboard (a little bigger than the picture to give a border look) and stick it together using your double sided tape.

Step 2:To give that glossy and furnished feel to each square picture, cover the photos with the clear scotch tape and smooth out the entire surface area including the edges sealing it clean. This will also harden the picture giving it a strong hold and make it water resistant. Do the same with the rest of the picture squares.
Step 3: After sealing each square with the clear tape, you’re ready to punch holes into them. Use a nail or any sharp pointed object to safely secure and bore a small hole into each side of the square.

Step 4: Attach each picture square with the jump rings by inserting it to the holes connecting them together as a chain.
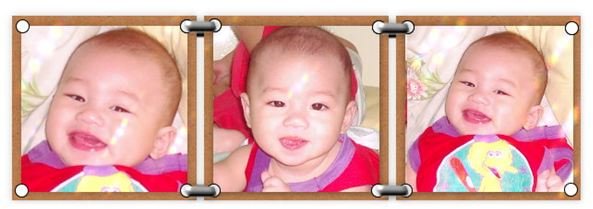
Step 5: After connecting all the squares together, complete the photo bracelet by attaching the jewelry clasps at both ends of the last picture square.

There you have it! Your very own stylish photo bracelet made from scratch.
Of course you can’t single out that cool new bracelet you just made, that’s why I prepared two additional photo jewelries to complete your one of a kind ensemble.
Photo Earrings & Necklace
Photo earrings scream fun and art while they dangle in your ears. Basically, your imagination is the limit. Follow these simple steps to get started with your bracelet match, photo earrings.
For a short cut, you will need to follow the first 3 steps of the photo bracelet. Instead of using the jewelry clasp, we need earring holders which can be bought at Amazon.com for the price of $3.75 (100 pieces hypo-allergenic & silver plated holders). You can still use your extra jump rings to connect your photo squares. Bore holes on the center top of your photo squares and attach the earring holders.
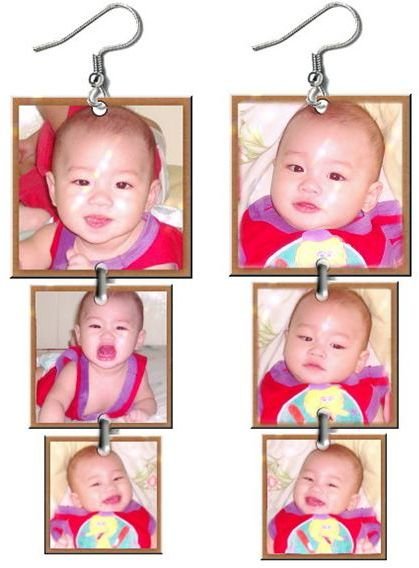
For your necklace, attach the jump rings to make a necklace chain. Dangle it with your photo squares. Use your imagination and your creativity on how you will pattern the photos. You can also use your existing necklace chain and make a chained photo pendant. Remember that you can always change the size and shape or use additional materials to enhance your photo jewelry.
Now, you have a complete jewelry set to use, sell or give out to your friends.


