DIY - How To Get Printed Photos on Mugs
Personalized Items - Photos on Mugs
Personalized items or tokens are some of the best gifts and giveaways for any occasion whether it is for birthdays, weddings, corporate events or simply a present for your special someone. Thankfully, it is so easy to add a personal touch to your project. You can print digital photos of your choice on t-shirts, invitations, greeting cards, pens, hats, mugs or any object you want to customize. Among the mentioned items, I will show you how to properly affix printed photos on mugs to make an inexpensive and unique gift. This is a great present especially for those who enjoy drinking coffee.
Materials Needed to Make a Personalized Photo Coffee Mug
Before we start, you need to make sure that all needed materials are at hand so that you can work continuously and have your project done right away.
- plain ceramic mug
- your chosen digital photo on your computer
- Microsoft Word (optional)
- waterslide decal paper
- printer
- scissor
- bowl of water
- Envirot Tex resin sealer (available in many crafts store)
Choose a plain coffee mug. It should not have any cracks and ridges. It could come in any color but the most ideal is white. Make sure to wash or wipe the mug before using to ensure that the mug is free from dirt and dust. Decal paper can be bought online at about $8.25 per 5 sheets. Decal papers are either clear or white. Clear decal is used for white ceramic mugs while the latter is used for mugs of any color. If you are going to make more than one photo mug, make sure you have already chosen those photos ahead so that you can print it together in one sheet. You can use Microsoft Word for adding a message or quotes in your photo or add designs using your photo editing software.
Do-It-Yourself Instructions
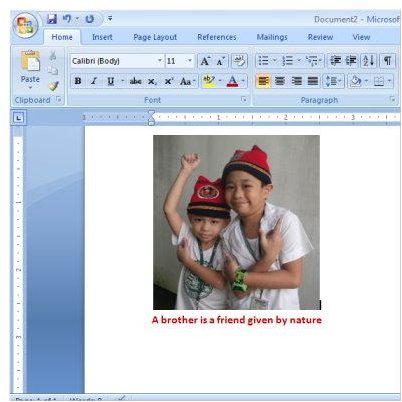
Step 1: This step is optional for those who desire to add text to their image. If no text is needed, you can proceed to step 2. Let’s get on to your computer and open Microsoft Word. Paste your image in MS Word and reduce its size to less than 3 inches in height and not more than 6 inches in width. If you want to place the photo on one side only, you can use less than 3x3 inches in size. Type in your text just below your image or within the picture using the “draw text box”.
[caption id="" align=“aligncenter” width=“600”]
Step 2: Using ordinary paper, print the image using your inkjet printer. Check the printed image with your mug if you are satisfied with the size. If satisfied, get your decal paper and print it on the glossy side. Step 3: Spray some fixative spray on the paper according to the manufacturer’s instruction. Air-dry the paper to prevent the ink from blotting or spreading. Step 3: Cut the decal to the size of the mug. Step 4: Soak the decal in water for few minutes. It is to loosen the image to make the transfer easy. With the printed side of the decal, stick or slide it to the mug and carefully peel the backside of the paper. Make sure that the decal is smoothly placed to avoid wrinkles that may destroy the image. Step 5: After which, cool it again and spray on the resin sealer so that the image can withstand washing.
[caption id="" align=“aligncenter” width=“600”] Finished product![/caption]
Now, there you have it, your home-made photo coffee mug to display in your home or give it as a gift or giveaway.
Make More Projects
Don’t limit yourself to coffee mugs alone. With the same process, you can complete your table set with uniform designs like your plates, cup & saucer or any other item you wish to place your photos on. Just see to it that you read the instructions written in the package of your decal paper if it is applicable on the object you’re going to use. Check out our guide on the best DIY photography gifts and how to create a custom wall mural!
