A full step-by-step digital scrapbook layout tutorial using the free software ArtWeaver. Learn how to make a unique and fun digital scrapbook page from scratch. There is no need to purchase specialized scrapbooking software!
Decide on Your Layout’s Color Scheme
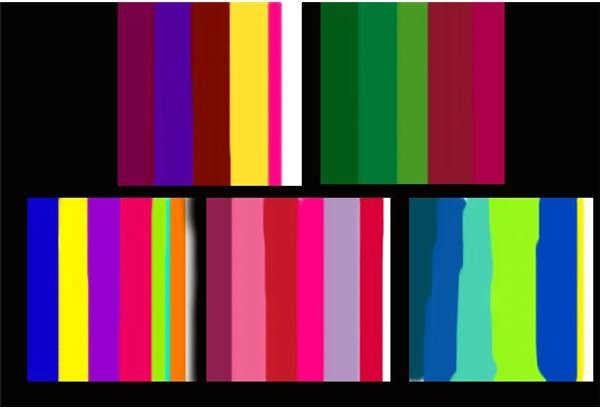
Before you even start making a digital scrapbook layout, it is a good idea to know what colors or palette you’d like to use for your layout so that you don’t end up with one that looks scattered or uncared for. To keep this in mind while I am building any layout, I create a small image (3x3 inches) with color samples I’d like to use.
I tend to stay around 5-6 colors for each scrapbook layout, but you may use however many you like.
Once you’ve decided on a color palette, you can begin making your digital scrapbook. In ArtWeaver, go to File–>New. Be sure the size is in Inches and not Pixels, and make this new document the exact size you will want it to be when it is printed if that is what you will be doing. I almost always make my layouts 12X12 inches.
Finding great backgrounds is free, and only takes a simple search for “scrapbook paper” to get you started. It is also a good idea to be on the lookout for new layout ideas whenever you browse the web.
Tip: Create a brand new folder on your computer for your digital scrapbook files. Within that folder, you can even create sub folders titled “Backgrounds”, “Textures”, “Stickers”, “Borders” and so on. Whenever you are online and find something you think would be perfect for a scrapbook layout, even if you don’t plan to use it right away, you can save it to one of these folders and start building your own unique library.
Step 1: Customize Your Digital Scrapbook Background
I personally like to create my own background using patterns or textures I find online. For this tutorial, I will be creating a completely new digital layout using
Using the Paint Bucket, fill the whole page with a low opacity color you want to use. I will be using a blue-green at 52%. The default name for this layer is Background, and that’s fine.
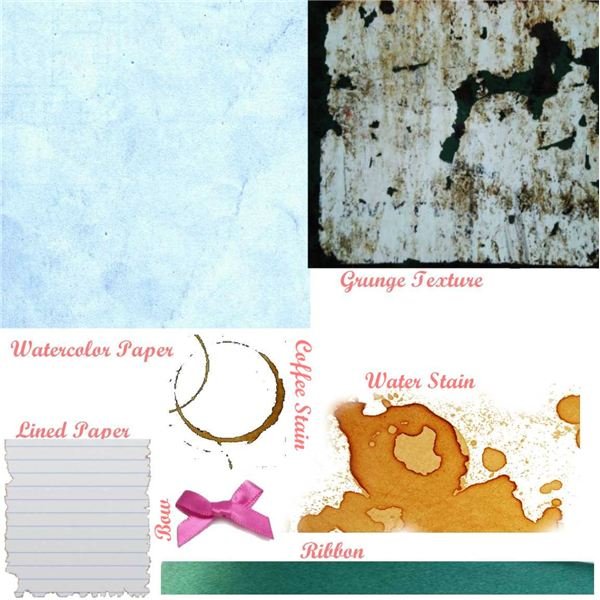
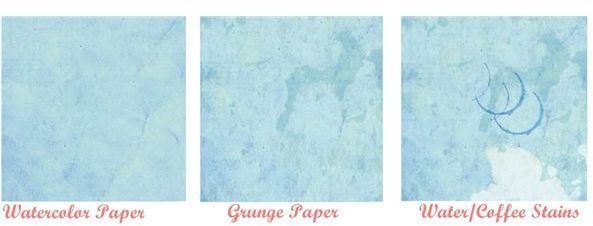
To create a digital layout with a bit of interest and texture, you can do a search using any search engine for “paper texture”. Other interesting choices to use are satin, embroidered fabric, canvas, or wood grain. I did a search for “watercolor paper” and chose a blue tinted one the fits right in.
Once you find the image you want, right click on it and select Copy (you can come back and save it at any point), then go back to ArtWeaver and go to Edit–>Paste. Resize it to cover the whole background, then go to your layers palette, select the texture layer, and set the mode to Multiply.
This will have probably created a new layer titled “1”. To change this name, double click on it (anywhere but the text), and type in whatever name you want in the box that pops up. I chose to name this layer Paper.
Alternatively, you can create a scrapbook background by using the pencil tool around size 130, 50% opacity, and set the paper (in the lower left corner of tool box) to pavement. This creates sort of a “water color wash” effect using whatever colors I choose.
You could stop here and use the results for a background, but I like to use a watermark for the entire area, or just the border. Ideas to use for this are floral, gothic, water stains, lace patterns, or fun designs such as hearts or teddy bears. I find these images by doing a quick search for any feel I want. For this page, I wanted a grunge look and feel, so I did a quick search for “grunge texture”.
With the paper I found, I copied and pasted, resized, and set the opacity to 65 and the blending mode to Soft Light. I named this new layer Grunge Texture.
Then I decided I wanted a few coffee and water stains as well, so I did a search for these textures to complete the look I wanted. The coffee stain I chose to set at 52 opacity using the Difference blending mode, while the water stain was set to 53 and Color Dodge. These two new layers were then named Coffee Stains and Water Stains. You may notice that I pasted the coffee stain twice on my background as well.
Backgrounds Stages for Digital Scrapbook
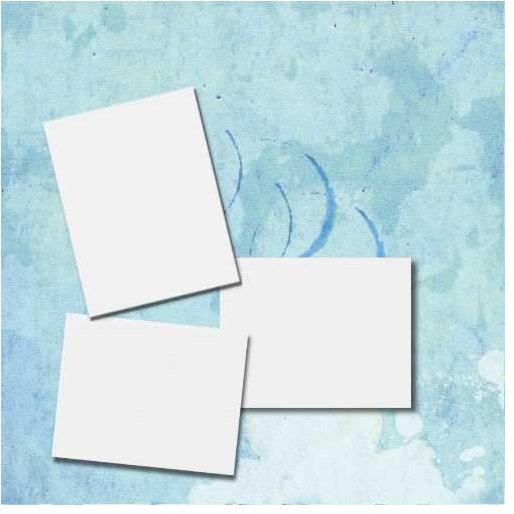
Step 2: Prepare Spaces for Pictures in Your Layout.
Now it’s time to begin blocking off areas for your photos to go. Doing this at an early stage like this helps you in decorating the layout later, so you will always be able to see the best places to put your embellishments.
For this scrapbook layout, I will be using three images of different sizes. Create a New Layer by going to Layer–>New–>New Layer and name it “Picture 1”. Then use the square selection tool to select an area that is roughly the same size and shape as one of your images (it doesn’t have to be exact just yet). Fill that area with a white or off-white color, deselect by hitting Ctrl+D, and then do the same for each picture you will put on your page. You can then select each layer one at a time and hit Crtl+T to rotate them however you are going to want them to lay on the page.
If the edges of these areas turn jagged once you rotate the image, don’t panic. This can easily be fixed by going to Filter–>Blur–>Gaussian Blur and setting it to about 15.
Photo Layout
Optional step: Make a Drop Shadow
To make a drop shadow, copy the box by right clicking on it in the Layers Palette and selecting Duplicate, select the light area using the Magic Wand Tool, and use the Paint Bucket to fill the area with a black or dark color. Move this Layer (I named it Shadow) down one by dragging it down in Layers Palette. Then select Filter–>Gaussian blur. Set the Gaussian Blur between 90 and 200, move the Shadow slightly to whichever side you want the shadow on, and then lower opacity to around 60%. Remember that the higher the blur, the larger your shadow will be.
This step can take some time, especially if you want a lot of pictures on one page. Once you are happy with the photo area placements, combine each white area with its shadow by going up to Layer–> Merge Down.
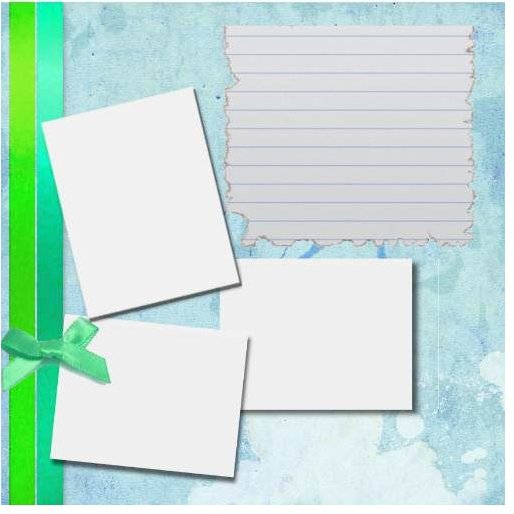
Step 3: Add Digital Scrapbook Embellishments.
Now you know where your pictures are going to sit on the layout, so it is time to add some embellishments and have fun with the page! If you’d like to add a journaling area to the layout, you can find lined paper by doing a search for that, or you can simply block off an area for it the same way we blocked off the areas for the photos.
I’ve chosen a torn up piece of paper, because it adds to the grunge feel I am looking for. I didn’t give it a drop shadow, because I wanted it to look like it was glued to the background.
Common embellishments for your digital scrapbook pages are bows, ribbons, buttons, flowers, clipart “stickers”, borders, banners, and stamps. Finding cute and unique embellishments is where most of the fun lies, and keeping them organized is essential. This is where having a folder (and sub folders) completely dedicated to your digital scrapbooking comes in really handy. I wanted to keep my page fairly clean and simple, so I am only using a bow and two ribbons on the side for embellishments.
Remember you can resize and angle any embellishment on a digital scrapbook by hitting Ctrl+T on the layer, allowing for endless possibilities.
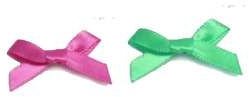
My Scrapbook Embellishments
Step 4: Changing Colors
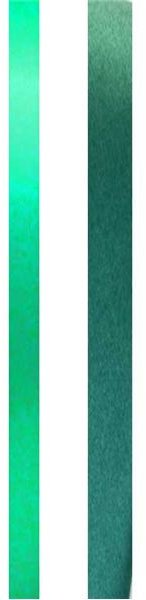
Quite often, I will find an item I really want for my layout, but it will be the wrong color completely. While making this particular layout I found a picture of satin ribbon I really wanted to use, but it was the wrong shade of green and didn’t really fit my palette. And the bow I wanted was pink!
To fix this, copy and paste the embellishment onto your layout and size and position it the way you’d like. Then go to Image–>Adjustments–>Hue/Saturation. Play with the sliders for Hue, Saturation, and Lightness until you get as close to the color as you’d like. It may take a few minutes, and don’t worry if you can’t get the perfect shade just yet. Hit Ok when you are ready.
If you are still not quite happy with the shade, go to Image–>Adjustments–>Color Balance and adjust the sliders for the Shadows, Midtones, and Highlights until you are happy. You can perform these steps to get endless variations of just one embellishment. I did it twice with the same ribbon to achieve two lovely shades of green.
Before and After Photos
Step 5: Save and Add Pictures
You can play around with embellishments for as long as you like, but when you feel done you will need to save your scrapbook layout. This ensures that you can use this layout over and over again, and that the following steps wont ruin it.
If you plan on printing the page for a physical scrapbook, you can do so now. As long as you made sure the size of your image is the same size as the paper you wish to print in, this step should be very simple. If you plan to add pictures to your digital scrapbook page, it’s time get to it!
Go to File–>Open , find the first picture you’d like to add, and double click it. Once open, go to Select–>All. Now copy the selected area and open the panel with your scrapbook layout and paste. You will need to resize and rotate the image to fit the white area you want it on. This normally takes a few tries, even for experts. When you are happy with the placement, repeat the process for each additional picture .
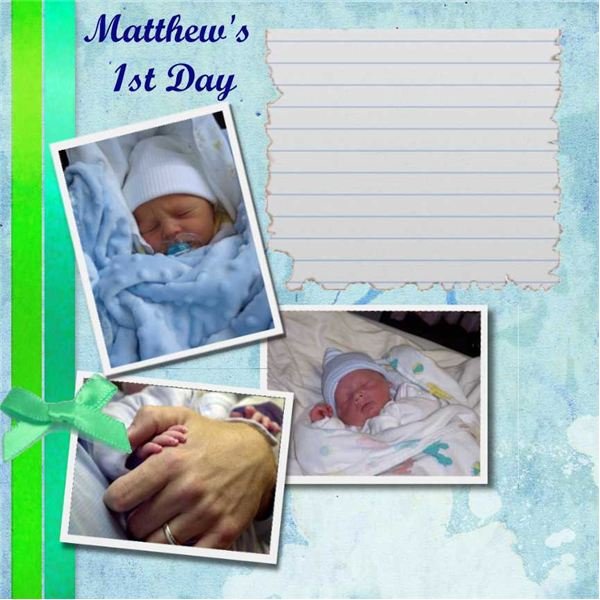
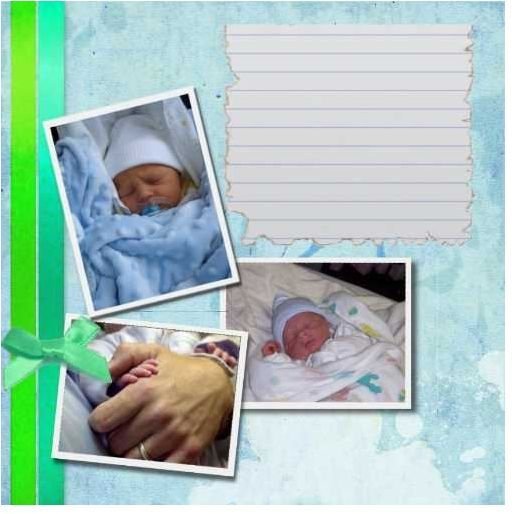
Pictures on My Scrapbook Layout
Step 6: Add Text to Your Layout
You are now just about done with your digital scrapbook page. In this final step, it is time to add your text. Many people like to create headers for their page such as “Family Vacation” or “Julie and Jamie”, and adding text to a digital scrapbook layout is very simple. Simply click the text tool (T) and then click on the spot you want to start typing. Then before you start typing, select the font, size, and color you’d like at the top of your workspace. You may need to play around with these settings a couple of times until you get exactly what you want.
Then you can add more text in the journal area if you set one up, or print out your page and handwrite in this area. I tend handwrite these areas for a personal touch. You have now created a digital scrapbook layout completely free! As you create more and more layouts, you will pick up your own set of digital scrapbook tips, tricks, and style, and you’d be amazed at how quickly your library can build up once your creative juices start flowing.
Finished Digital Scrapbook Layout