Photoshop CS3 now has Smart Filters. Filter effects can be edited over and over without have to go back to the original images. Small changes in blending and opacity no longer have to be done when the filter is first applied. Filter effects are edited using non-destructive Smart Filters.
Photoshop CS3 Filters Overview
Adobe Photoshop CS3 has significant changes in the Filters Palette and how the filters are used in the Layers Palette. Now, they are non-destructive editable filters that give the photographer more control. Each filter has more options and choices added that allow for more detail work. Overall, the additions make filters a powerful creative tool for the photographer. Here is rundown of upgrades and new features.
Smart Filters
Adobe added the Smart Filter with Photoshop CS3. This is a great tool for working in the Layers Palette using filter effects. There are so many different applications for using filter effects from special effects to regular image editing refinements. Now, thanks to the new Smart Filter, filters are easier to use and more powerful. The non-destructive filter effects allow a photographer to edit an effect many times after the effect has been applied.
New Filter Options
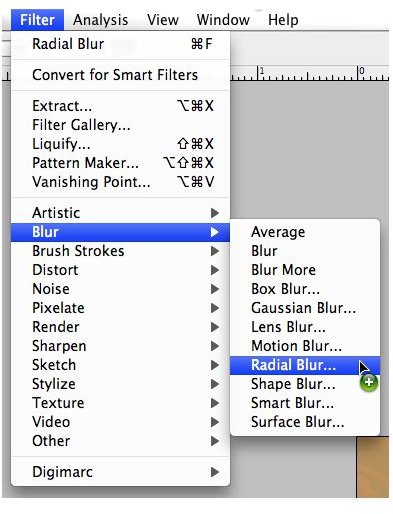
Individual filters have new options that refine the characteristics of the filter. The Blur Filter has a drop down menu that has several selections for different blur effects.
Filter Masking
When the image has been converted for Smart Filters, Photoshop automatically puts a Layer Mask on the image. This makes editing effects easy. Now the photographer does not have to go back to the original image and start over to change the opacity or other settings of the effect. The non-destructive Smart Filter allows for editing and refining repeatedly without ever going back to the original state.
Filter Options in Layers
Now when a filter effect is applied, there is an icon to the right of the filter effect that allows the photographer to change blending and opacity settings. Clicking on the filter name in the Layers Palette can change the filter effect itself. Clicking on the Layer Mask does changing the filter effect. All these tasks used to be done on the Main Toolbar Menu and each change would have to be made by returning to the original image.
Filter Gallery
Another great time saver is the Filter Gallery. This is found under the Filter Menu on the Main Toolbar. This brings up all the artistic filters into one window with the image. Now each filter can be viewed and set without ever leaving the Filter Gallery Window.
Using Smart Filters Preview
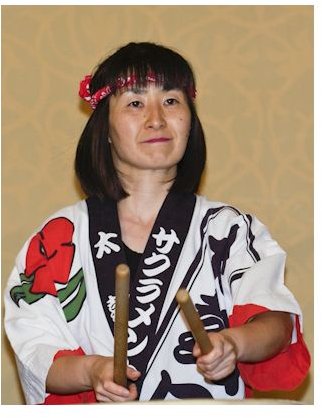
The filter effect used in this example is a radial blur.
- Figure 1 is the original image of the Tiko Drummer.
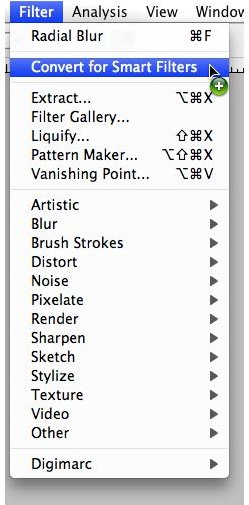
- Convert the image for Smart Filters (Figure 2)
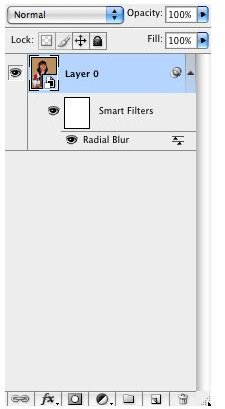
- Figure 3 shows the image in the Layers Palette has been converted to a Smart Object.
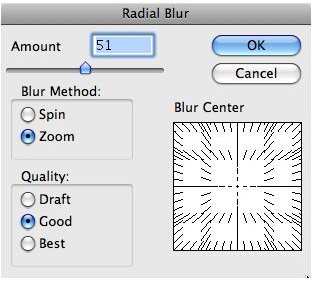
- Choose Filter>Blur>Radial Blur. This opens the filter window. Set the Amount to 50, Blur Method to Zoom and Quality to Good. Click OK. (Figures 4 & 5)
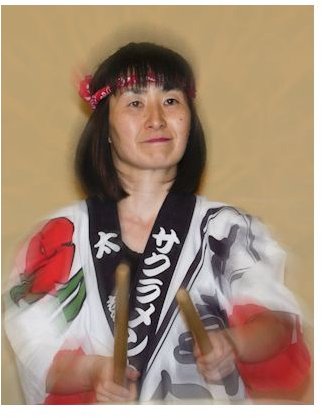
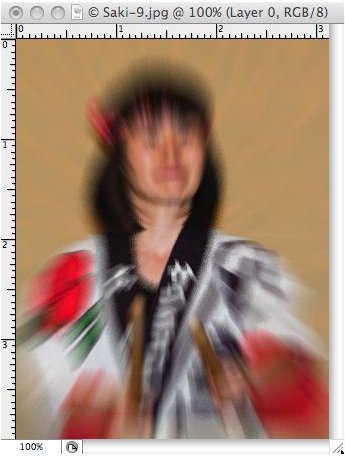
- Figure 6 shows the image with the Blur effect applied.
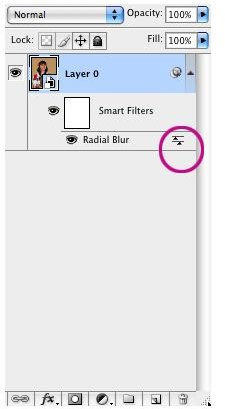
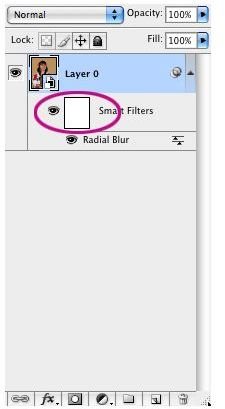
- Figure 7 shows the Blur Filter with the mask in the Layers Palette.
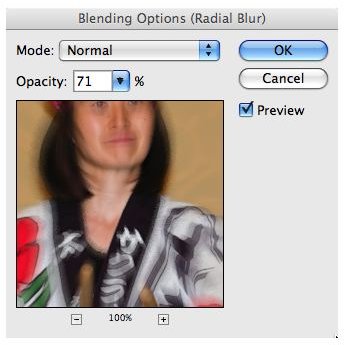
- Click on the icon to the right of the Blur Filter in the Layers Palette. This will open the Blending and Opacity Mode window. (Figures 8, 9 & 10) This is where different Blending Modes can be set and Opacity levels changed. The opacity on this image can use some lightening. Move the slider to change the opacity to around 70 percent. Click OK
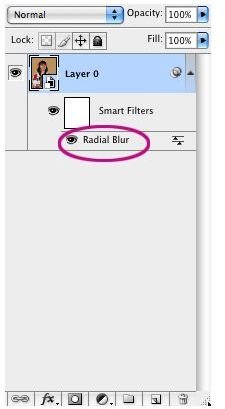
- To edit the filter, click on the Mask in the Layers Palette. (Figure 11) Select the Paintbrush Tool from the Tools Palette. Make sure the Foreground Color is set to black. Move the Paintbrush over the face of the woman to remove some of the blur and make her face clear.
- Figure 12 shows the final image after editing.
This shows how easy it is to apply a filter, change the filter settings and then re-edit the filter by using the mask.
Apply the Filter

Edit the Filter