There’s a lot that goes into taking good photographs of the sunrise, from choosing the right place to photograph to having the best equipment for the job to being in the right mindset. This article provides some basic things to keep in mind for dawn photography.
Location, Location, Location
Look for places with spectacular east-facing vistas, from hilltops to lakesides. Where can you best take advantage of the fabulous display of colors that dawn offers? Think places that display as much as the sky as possible, and places where the light will reflect.
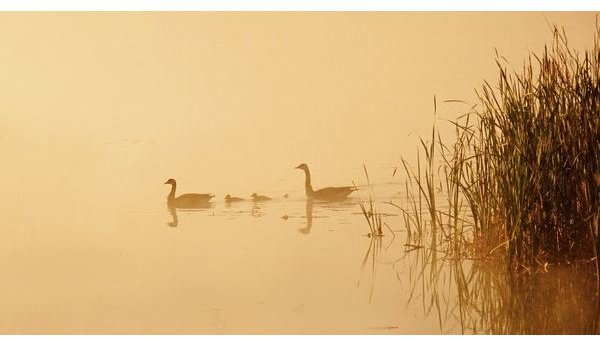
Don’t forget, the sunrise is more than just a pretty skyscape. Dawn also provides beautiful ambient lighting in shades of gold and rose, and is often accompanied by diffusing mist. Think of things you might want placed in such lighting conditions, forest silhouettes, a lovely model, skyscrapers fading away upwards into the sky. Be creative with the lighting that dawn affords you! Otherwise photographically unstriking objects can be transformed by the sunrise, and there may be things happening at this early hour of the morning that you were previously unaware of. Take a walk downtown and take a shot at early commuters sipping their coffee with the sunrise, or by the lakeside and see the birds.
Another consideration: distance from wherever you’ll be lodged. The closer, the better, as that means less driving you’ll have to do. You may be an excellent driver, but that doesn’t mean that rolling out of bed and into a car is necessarily the best thing to do in the dark before dawn—between poor lighting conditions and grogginess, accidents can happen.
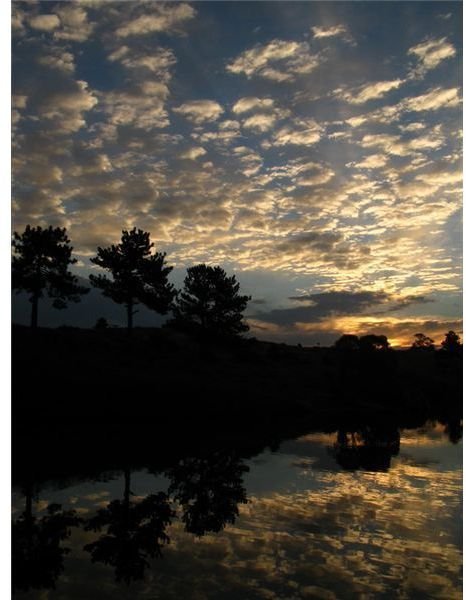
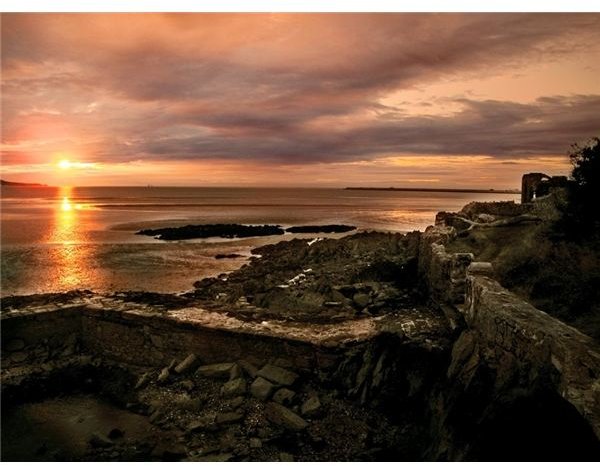
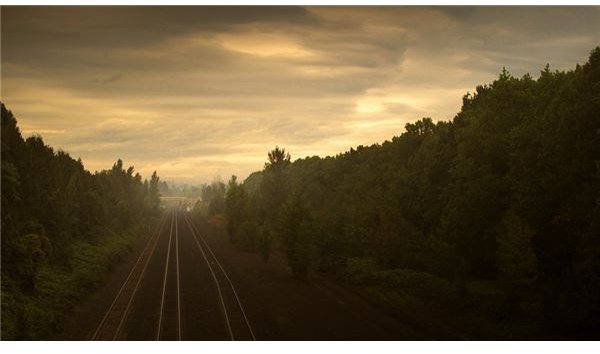
Dawn Skyscape Examples
Technical Considerations
Dawn involves some complex lighting situations, which make certain demands on your technical skills as a photographer. Particularly early dawn, before the sun has come up, the low level conditions may require longer exposures, for which a tripod or other stabilizing device comes in particular handy.
Manual exposure is really a must, as getting exactly the right metering can be difficult in these conditions. Even so, with the sun right on the horizon, it may be impossible to get both the sky and the land both exposed correctly. There’s a few things you can do here. Use of a graduated ND lens filter may help , or you could try HDR techniques by taking multiple exposures of a single image and putting them together later. Extensive editing of the image afterwards may also allow you to create an image where everything appears to be correctly exposed.
There’s no single good approach to aperture, ISO and focus for dawn photography: it entirely depends on the particular shot. ISO and aperture may be adjusted for available light accordingly, though you might want to keep a large depth of field if you’re taking landscapes. Focus, chances are you’ll want it out to infinity for those skyscapes, but again, there are other things to shoot than the sky!
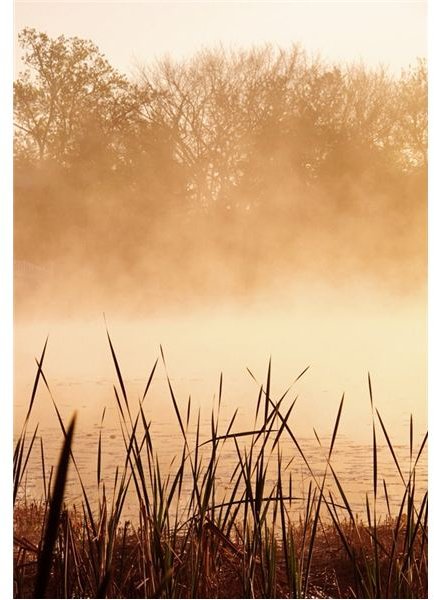
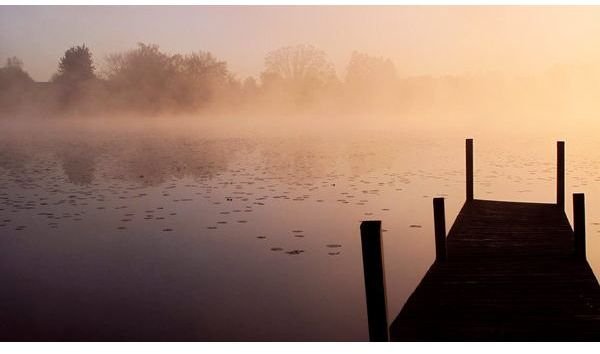
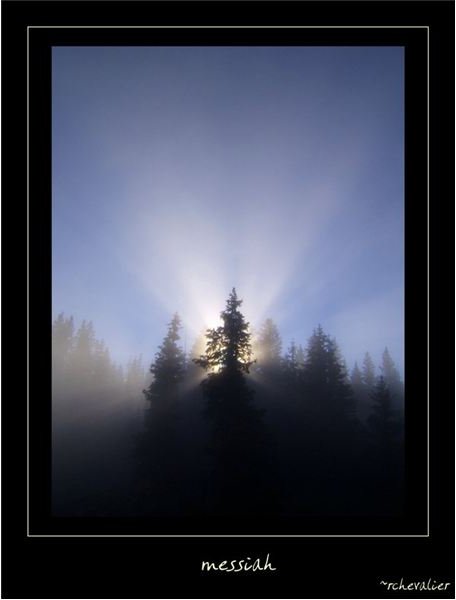
Taken At Dawn: Misty Scenes
Important Gear
As previously mentioned, sunrise means low light, which means a tripod is especially handy, and high contrast, for which a graduated ND filter might be useful. If you have one, a wide angle lens might help you take advantage of an expansive skyscape that will open up before you at dawn. Otherwise, with a little stitch-assist , you can still take panoramic views of the dawn.
Don’t forget about taking care of yourself, either. You know the phrase, “it’s darkest before dawn?” Well, it’s also the coldest, and having shaking, numb hands will not lead to good photography. Make sure to wear warm gloves that still allow your fingers to nimbly access your camera’s buttons and dials. If you’re in a place that tends to frost and dew heavily, wear stiff, closed-toe shoes with good traction.
Before You Leave
There are a few other things to consider as well. Check the weather forecast the night before: there’s no point in getting up that early if all you’ll see is the same gray drizzle you’ll see all day. If you’re going further afield for your shot, make sure you know the route to your area so you aren’t puzzling it out while also racing the sunrise. Check sunrise times for the area in question, and make sure to be there at least fifteen minutes before the actual sunrise, and plan to be there at least a half hour afterwards: the shifting play of lights makes for a constantly evolving show for you to photograph. Preparing coffee and at least a light snack is also a good idea: a cranky photographer is not a good photographer! So that the morning goes smoothly, try to lay out your photography equipment and everything else in advance the night before.
So, all that being said, set an alarm, and good luck!


