Are you planning a vacation to a cave any time soon? Learn to photograph a dark cave and capture the ancient memories.
Shooting nice pictures in caves can be a real challenge for those not used to working in dark enclosed environments. In most caves, there is little or no artificial lighting to help expose an image, so you must be prepared to light the cave yourself. This poses the potential for limitless creativity and a daunting challenge of coming up with ideas on how to paint with light.
Photographic Gear Needed
Camera Selection - A digital SLR will work best although a point and shoot will be able to capture a few shots (provided you use the camera’s flash or a tripod). With an SLR or other camera with manual control, you will be able to control
Lens Selection - With an SLR, you have a variety of lenses at your disposal. The ideal lenses for cave photography are those with apertures of F/2.8 or faster. My top four lens picks would be as follows:
Ultra-Wide angle zoom - A fast wide-angle zoom lens (like the Tokina 11-16mm AT-X DX F/2.8) on a cropped-sensor camera will allow you to capture the most area in the tightest of spaces while keeping the aperture as wide as possible for a zoom lens (F/2.8) to maintain the shortest exposure time possible. Even without a tripod, you should still be able to sufficiently hand-hold a lens like this as the ultra-wide angle zoom is less susceptible to camera movement.
On a full frame camera (Nikon D700/D3, Canon 5D/1Ds, or Sony A850/A900), a 14-24mm F/2.8 or 16-35mm F/2.8 lens is recommended for Nikon shooters and Canon/Sony shooters respectively. The Nikkor 14-24mm F/2.8 is renowned in its sharpness and ability to capture stunning images. Likewise, Canon and Sony both have superb L and Zeiss Alpha glass to cover the ultra-wide shots. These lenses may seem awfully expensive, but they help you make the most out of your full frame’s sensor size and megapixels.
Standard Zoom (Preferably F/2.8) - This is the one lens you cannot get away with because it will cover some of your wide angle and more intermediate focal lengths when needed. The good news is that you probably already have one that has at least F/3.5 at the widest end.
Fast Prime (F/1.8) - A lens with a bright aperture will help you capture as much light as possible in the shortest of shutter speeds. In combination with a high-ISO, you will be able to virtually “see in the dark.” A 50mm F/1.8 lens is cheap and easy to come by. They are also decently sharp and make a great addition to anyone’s budget kit.
Macro - This lens is optional but as a macro shooter myself, I would never pass up the opportunity to get some closeups of cave formations. With a macro lens or macro function on your point and shoot, you will be able to pull out some incredible details. It is also particularly useful in low-light situations as they have apertures of F/2.8 or wider.
Flashes/Strobes - A couple flashes should be plenty. Even with one flash you could get some neat effects.
Other Accessories and Special Considerations
Flashlight - It goes without saying that in a cave, you should probably have at least one flashlight, but you can also use this to help your camera focus in the dark.
Tripod and remote shutter release - These two items will help you achieve long exposures without worrying about camera shake. You can even take your time lighting the scene by leaving the shutter open on your camera when it is on the tripod (by manually setting the camera’s shutter speed to BULB)
Manual Focus - Even with a flashlight, it may be hard to focus, so switch your camera to manual focus and do it yourself.
Off-Camera Flash - This is the most advanced of setups and requires some expertise in the world of off-camera flash. If you the ability to trigger multiple flashes wirelessly, you can light an entire cavern with a few flashes (without even having a tripod or light stands). Simply get someone else to hold your lights and point them in the direction you want. If you only have one light, but are able to use a tripod, set the camera to BULB exposure, and walk around with the light and selectively light your scene (press the test button on the flash to start painting with light). Because the cave is so dark and you are using a long exposure, you probably will not even show up in the image. Be sure to review your camera’s LCD and histogram to check your exposure on these shots as you will need to adjust your flash’s power.
Camera Settings
- Use long shutter speeds if you have a tripod
- Use a high ISO if you do not or cannot have a tripod in the cave
- Shoot in RAW, if possible so you can fine tune the white balance (WB) later.
Shooting Techniques
- Look for interesting formations above, below, in front, and behind you.
- Find a creative perspective (try getting down low).
- Get a sense of perspective by including a person (friend or family member) in the photo for a neat portrait.
- If you don’t have a flash, paint the cave with your flashlight while the shutter is open.
References
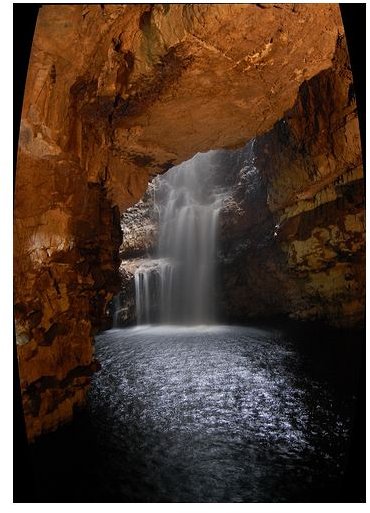
- Image Credit: subflux


