Combine ambient light and flash for beautiful illumination and a great photo. This is how the pros do it.
Used properly, a camera flash can do a lot more than just illuminate your subject when light levels are low.
One of the more advanced flash techniques that experienced photographers rely on is a technique for combining available light with flash to produce the best possible image. This is different than fill flash, which merely fills in the shadows. Instead, “Dragging the shutter” (sometimes known as “Slow-shutter flash photography”) produces an evenly lit photo with all areas properly exposed.
Images
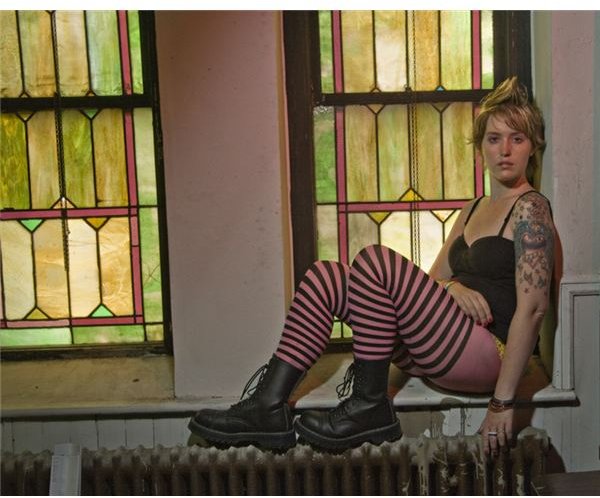
Photo information
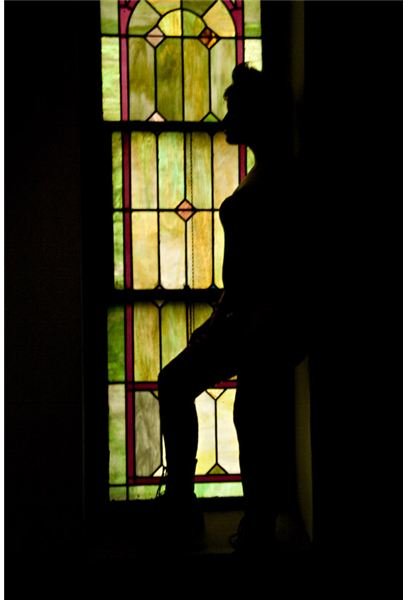
The first photo was straight ambient light shining through the stained glass window, resulting in a silhouetted foreground and subject. (ISO 200, 1/15th, f27). The second photo combined the ambient light from the windows with a studio flash to light the foreground and Randi. (ISO 200, 1/15th, f16). If I’d shot at the camera’s normal flash sync speed of 1/250th, I still would have had a properly exposed photograph, but instead of getting that beautiful glow from the light shining through the windows, I would have ended up with much duller, flatter looking front lit stained glass windows.
Using the technique
The basic idea behind the technique is use flash as a primary light source, but to open the shutter long enough for the ambient light to also register on the image. Compare this to the shot where the flash just bombs away and leaves the subject washed out and the background black. The way you use this technique is to set your aperture for the desired flash exposure (using E-TTL for a high end flash or setting a more basic unit to an appropriate setting) and then setting the appropriate shutter speed for proper exposure of the ambient light. Keep in mind that the larger the lens opening you use for the flash the greater the distance the area from the flash will illuminate, but the shallower your depth of field. For an image requiring greater depth of field go with a small lens opening and a longer shutter speed. Because the flash is providing much of the light, you can get away with handholding the camera at a slower shutter speed than usual and still get a sharp image. When in doubt though, use a tripod for best results. You’ll generally get the best results by setting your camera to manual exposure or aperture priority (AV setting). You may have to make a couple of test exposures to dial in the best exposure for the conditions.


