The Extraction Tool in PhotoPlus X3 lets you select an object or group of objects to isolate and extract from a digital photograph, effectively removing the background from that photo. This tutorial describes how to use this tool and compares it to other background removal methods in PhotoPlus.
Different Background Removal Tools
In a previous tutorial, we described how to use the Background Eraser to remove the background of a digital photograph. If patient, that tool can give some very good results, but it can be very time-consuming, especially if you want to extract objects from several different photos. Another way to remove the background in a digital photo in PhotoPlus X3 is to use the Extraction Tool. This tutorial will focus on that latter option and walk through an example of its usage.
For those just starting out, the Extraction Tool may seem a lot more complicated in principle than the Background Eraser. However, with some practice, the Extraction Tool generally makes quicker work of the background removal process and gives cleaner results. So, it’s definitely worthwhile to take the time and learn how to use it.
Using the Extraction Tool
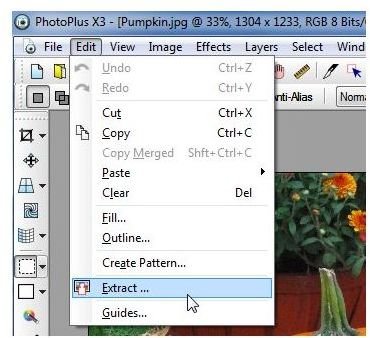
Step 1: With the photo open in PhotoPlus (we’ll be using the same photo as we did in the Background Eraser tutorial), select Extract from the Edit menu on the main toolbar. (Click any image for a larger view.)
This will open a new window titled Extraction in which you can select the object you want to extract.
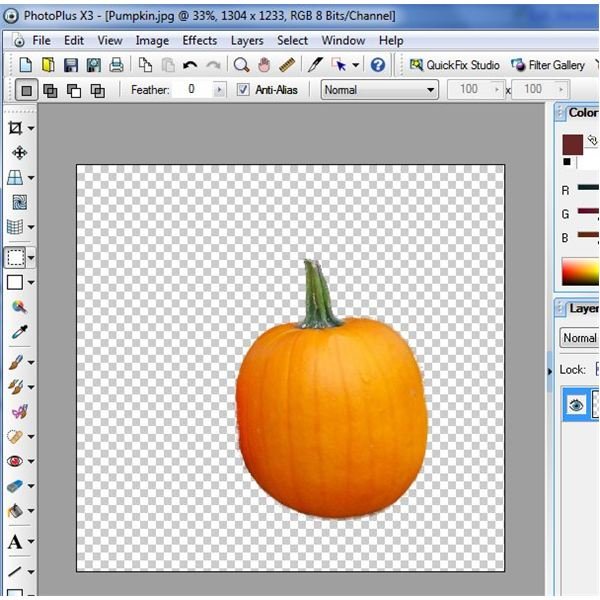
Step 2: Use the Pan and Zoom tools in the Extraction window to find the object – in our case, it’s the pumpkin – that you want to separate from the other items in the photo.

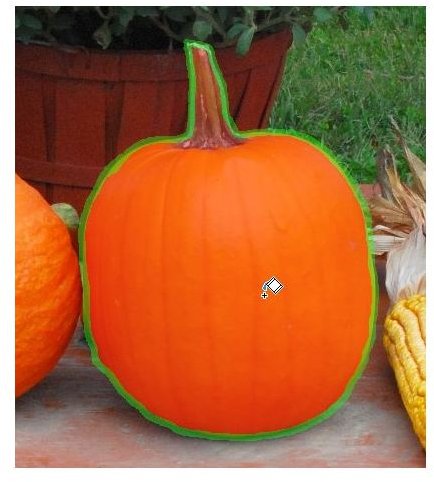
Step 3: Next, select the Edge Marker from the side tool panel.
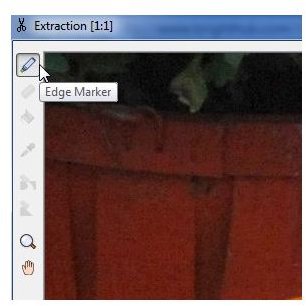
Use this tool to trace the edges of the object you want to extract. You may need to adjust the brush size of the tool – you can do this in the Tool Options section on the right side of the window after you select the Edge Marker.
Note that you don’t have to outline the object in one fell swoop. You can take your time, starting and stopping your edge tracing as often as you like. You can also select the edges of multiple items if you want to extract more than one object.
While tracing the edges with the Edge Marker, you may want to stop from time to time to use the Pan tool to reposition your image. This way, you can zoom in close while tracing and don’t need the entire object in your screen view.
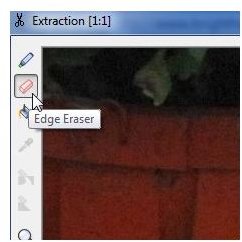
If you make a mistake while tracing, you can select the Edge Eraser tool to remove any markings made with the Edge Marker.
When finished tracing, your image should look something like the one shown below.

Step 4: After all of your edges are marked, select the Foreground tool.
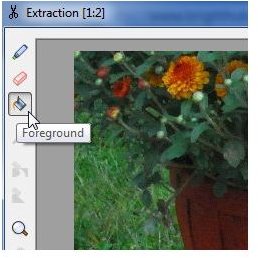
With this tool selected, click on the object or objects you want to extract. Normally, this would be inside the lines marked by the Edge Marker. However, sometimes this may be on the outside if you want to extract everything in a photo except the object selected.
Step 5: Click the Preview button located on the right side of the Extraction window. Now use the Touchup and Edge Cleaner tools to clean up your selection area.
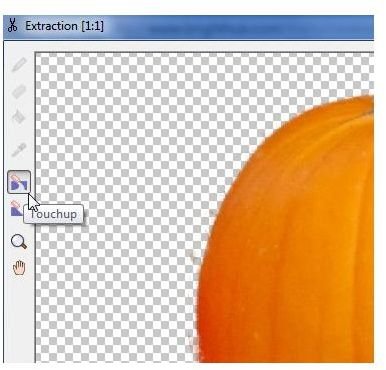
Again, here you may want to use the Pan and Zoom tools to move in close so you can touch up areas very close to the edges of the object.
Step 6: When finished, click OK and you’ll exit from the Extraction window with all of your changes applied to the original photo.