There are several ways to transfer photos from one computer to another. We discussed how to email photos in part one of this series. This article will look at the benefits of using a flash drive to transfer photos and give step-by-step instruction on how to do so.
This is part 3 of a 6 part article series. To read the introduction, please visit How to Transfer Your Photos from One Computer to Another .
The Benefits of USB Flash Drives
[caption id=“attachment_171573” align=“aligncenter” width=“640”]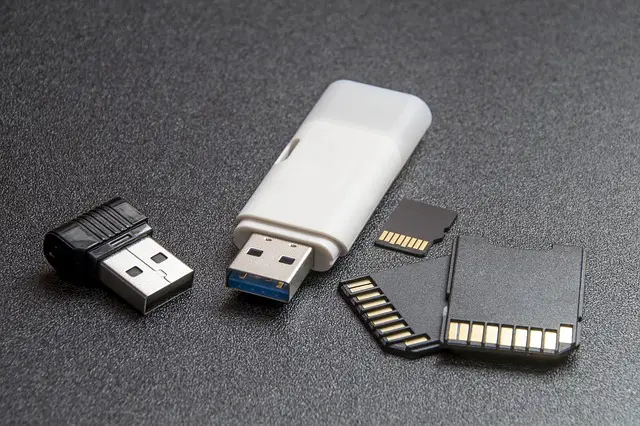 Flash drives come in a number of sizes and shapes[/caption] While flash drives are incredibly versatile allowing you to easily transfer, share and backup any kind of data, you may want to know how to put pictures on a flash drive. A USB flash drive - also known as USB drive, pen drive, thumb drive, key drive or jump drive - is an excellent way to transfer photos from one computer to another. Flash drives are relatively inexpensive (taking into account they’re reusable), compact, convenient, easy to use, compatible with both PC and Mac, and don’t require any software installations. In addition to these advantages, flash drives are very durable and aren’t prone to scratches like CDs and DVDs. Check out our USB Flash Drive buyers guide
for more info on how to purchase the right drive for your needs. Keep reading to learn how to put pictures on a flash drive!
Flash drives come in a number of sizes and shapes[/caption] While flash drives are incredibly versatile allowing you to easily transfer, share and backup any kind of data, you may want to know how to put pictures on a flash drive. A USB flash drive - also known as USB drive, pen drive, thumb drive, key drive or jump drive - is an excellent way to transfer photos from one computer to another. Flash drives are relatively inexpensive (taking into account they’re reusable), compact, convenient, easy to use, compatible with both PC and Mac, and don’t require any software installations. In addition to these advantages, flash drives are very durable and aren’t prone to scratches like CDs and DVDs. Check out our USB Flash Drive buyers guide
for more info on how to purchase the right drive for your needs. Keep reading to learn how to put pictures on a flash drive!
How to Put Pictures on a Flash Drive
Using a flash drive to transfer photos is very quick and super easy: Step 1: Insert your flash drive into your computer’s USB port. Step 2: You may be presented with a window open that says “Auto Play”
If this is the case, simply click on “Open folder to view files”. If you don’t have this window automatically open, open “My Computer”, locate and double-click on the appropriate device to open. Most flash drives will be labelled as a Removable Disk, but some will be labelled as a hard drive. If you have troubles locating your device, remove the flash drive from your computer, open “My Computer” and take note of the drives and devices already there, then reinsert your flash drive into the USB port and watch for a new device to appear. Take note of the name Windows uses to label the flash drive, Removable Disk (F:), for example. Double-click to open.
Step 3: Open the location of the photos and/or folders you wish to transfer to the other computer. Step 4: Select the photos and/or folders. To select multiple images or folders, hold down the Ctrl key while making your selections. Step 5: Right-click on your selection, choose “Send To” and then the appropriate destination (in my case, Removable Disk (F:). Alternatively, you can drag-and-drop your photos or folders into the opened flash drive folder, so long as both windows are seen on your computer’s monitor. Step 6: Once your files have been moved over to the flash drive, click on the “Safely Remove Hardware” icon located in the notification area (bottom right corner of your computer’s monitor). Select the device and click “Stop”. You may have another window open asking you to confirm which devices to stop. Select the device from the list and click “OK”. You’ll then be prompted that it is safe to remove the device.
Step 7: Plug the flash drive into the USB port of the computer you want your photos on. Open the flash drive folder (as described in step 2), click on one of the images/folders and then click Ctrl + A to select all. Now, either drag-and-drop your folders onto your desktop or right-click and choose “copy”. If you like, select “cut” rather than “copy and once you complete step 8, your photos will no longer be on your flash drive. Step 8: Navigate to the location you want your photos copied to, right-click and choose “paste”. You have now learned how to transfer files from a flash drive to a computer! If you have yet to purchase a flash drive, keep in mind that they come in a variety of storage sizes. Obviously, the more a flash drive can hold, the more costly it will be. You don’t necessarily need to purchase the flash drive with the largest storage. Depending on how many photos you’re transferring, a smaller flash drive simply means you’ll need to repeat these steps a few times to get all your images moved over. Image Credits: Computer Accessories by Pexels from Pixabay Next» Transferring Photos Via Uploading to Photo Sharing Websites
Other Photo Transferring Methods in This Series
Transferring Photos Via Email Burning Your Photos to CD or DVD as a Transfer Method Transferring Photos with Windows Easy Transfer
This post is part of the series: Transferring Photos from One Computer to Another
There are many ways to get photos from one computer to another. We’ll cover six methods in this series.


