
One type of effect commonly used in digital scrapbooking and other photo editing projects is blending the edges of a photo into a background scene. This PhotoPlus X3 tutorial will describe how using the vignette effect can be used to accomplish this goal.
The Vignette Effect
Many photo editors will use some type of vignette effect in their edited images when they want to draw attention to a certain scene in the photograph. However, this technique can also be used for a number of other reasons – one of which is to allow the edges of one photo or layer to gradually blend into another.
This is a particularly nice effect to use when preparing your photos before placing them in a digital scrapbook or using them in a photo montage. In this tutorial, we’ll take a look at how to create this type of effect in PhotoPlus X3 .
Creating the Vignette Effect in PhotoPlus X3
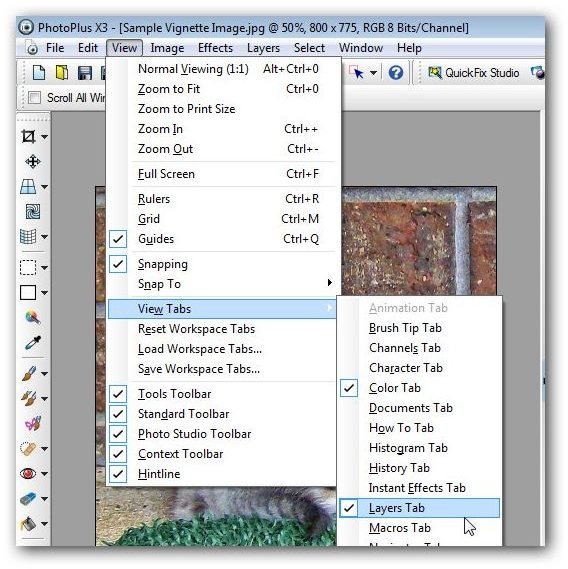
Step 1: First, make sure that the Layers tab is visible in the PhotoPlus workspace. To do this, go to the View menu, select View Tabs, and make sure there is a check next to Layers Tab as shown in the screen shot below. (Click any image for a larger view.)
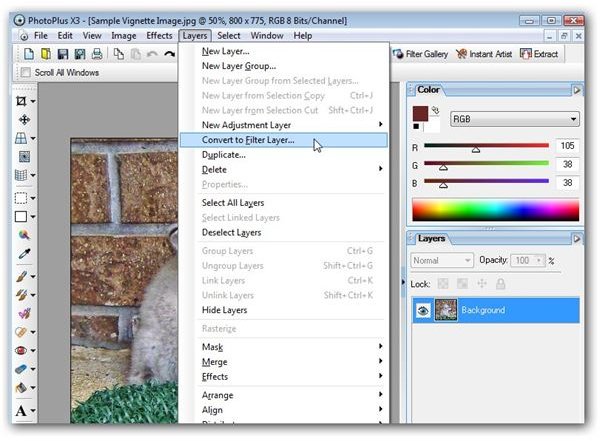
Step 2: Make sure that the layer containing the digital photograph is selected in the Layers tab, and then open the Layers menu on the main toolbar. Select the Convert to Filter Layer option.
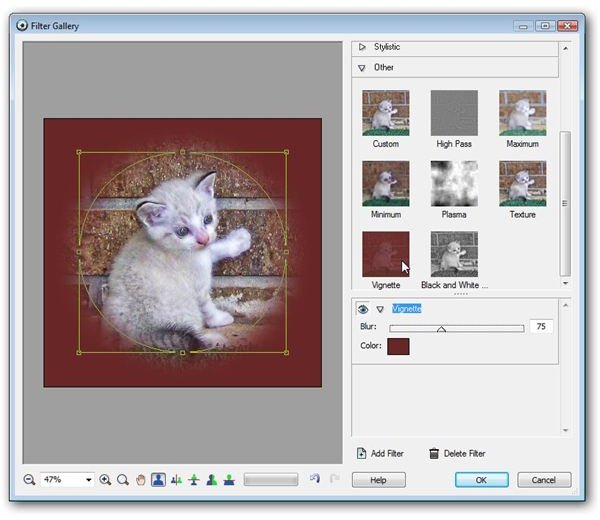
Step 3: Now you should see the Filter Gallery window on your screen. Expand the Other category in the top portion of the right panel and select the Vignette filter.
Step 4: Click on the Color square in the bottom portion of the right panel that contains the options for the Vignette filter. This will open the Adjust Color window where you can choose the color to use for the background of the digital photograph. In this example, we’ll change the color to white.
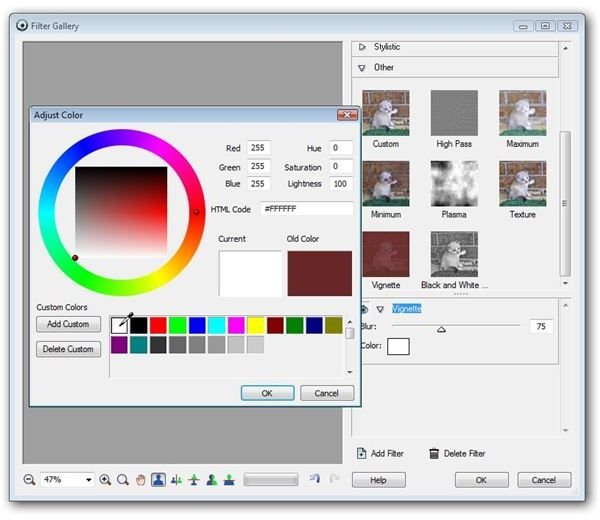
After selecting a color, click OK to return to the Filter Gallery window.
Step 5: In the preview area of the Filter Gallery adjust the location and shape of the oval that surrounds the area of the photograph that you want to emphasize and keep.
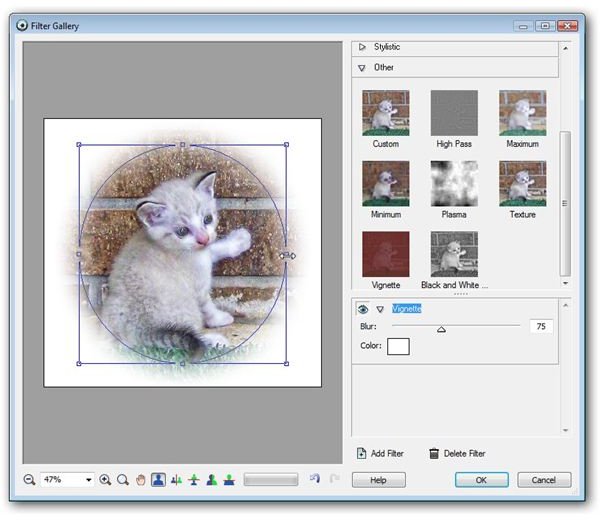
As you’re making adjustments here, you can also change the setting of the Blur option by moving the slider. Higher values of this setting will result in a more gradual blending of the edges into the background while smaller values will “tighten up” the effect. When you’ve finished making all of the adjustments, click on the OK button to return to the main PhotoPlus interface with your changes in place.
Even though this is a fairly simple filter to apply, you can get all sorts of results by using different background colors, blur settings, and oval placement on the photo. Below are just a few examples obtained using the same photograph.