Photographing birds and animals in their natural surroundings, going about their daily routine, is one of the most fascinating and most difficult of tasks. The second article in this series reveals the top 10 tips for wildlife photography, with respect to camera settings and image parameters.
1. Have the Right Lens
The ideal time for shooting is dawn and dusk , when light is poor and you really cant get too close to animals. Hence the right lens for wildlife photography should be as wide and as long as possible.
2. Tripod or Beanbag
If you’re going to be on foot, a tripod or monopod should do good. But if its a vehicle safari, the vibrations from the engine would render a tripod useless. A beanbag fits the bill perfectly in such a situation. It’s also much easier to set up than a tripod.
3. ISO, Shutter Speed, and Aperture
Light is quite at a premium early in the morning, so start off with as high an ISO as possible. With dSLRs, you can safely go to 1600. Having a high ISO helps get a high enough shutter speed in low light conditions. As the day progresses, decrease ISO to 400 and subsequently to as low as possible to reduce noise. You can learn more about ISO by reading What Does ISO Stand For?
Shooting fast moving birds, especially at a close range, requires very high shutter speeds in the range of 1/2000 or less. It’s preferable to shoot at high shutter speeds for even static animals, as the slightest of blurs can ruin a shot. A general rule is to use a shutter speed at least that of the effective focal length of your lens. Means if you’re shooting at 300mm using a camera with a crop factor of 1.6x (most Canon dSLRs), your minimum shutter speed should be 1/480. Again, keep wide apertures to enable a high shutter speed as well as blur the background.
4. Focus and Burst Mode
Use your auto focus and lock the focus properly before shooting off a burst, else you’ll end up getting a lot of blurred images. It’s better to miss one shot trying to focus correctly than miss the entire series.
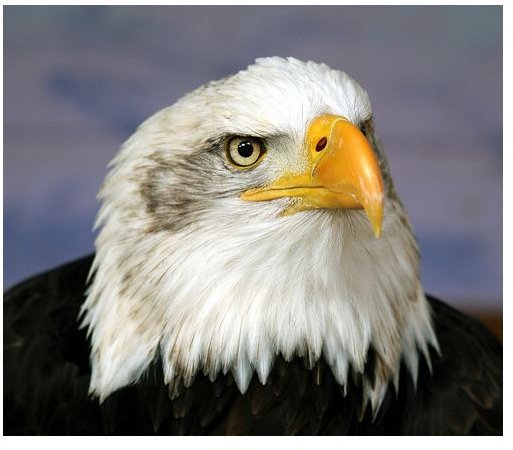
5. Focus On The Eye
When we talk to a person, we look them in the eye. A photo with the eye sharply focused gives the same impression, that of a direct dialogue with the subject. Remember there’s no exception to this rule!
Photo Credit : law_kaven
6. Zoom in for a Unique Photo
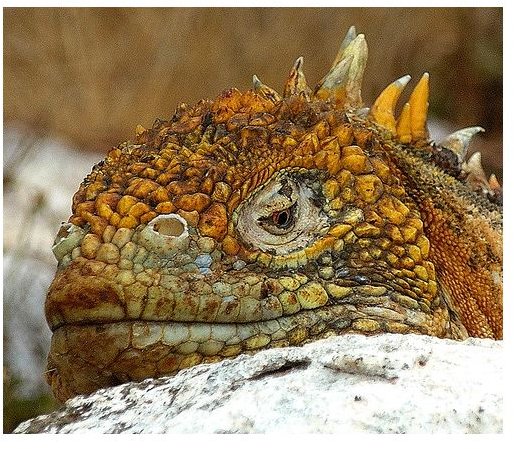
If you have a long lens, use it to good effect. Zoom in close and fill the frame with the animal’s head/face. It gives a totally different effect to get so close and personal to a wild animal!
Photo Credits : sly06 , TheBusyBrain
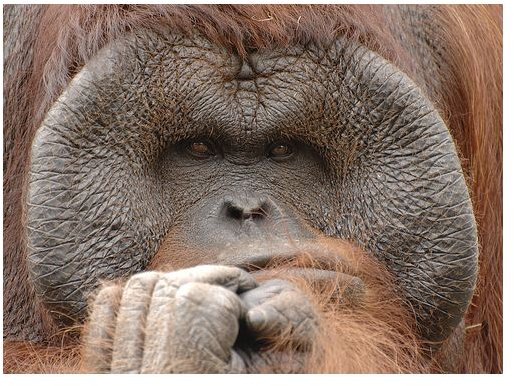
7. Photograph at Eye Level
So goes the rule. Though most photos at eye level come out good, it sometimes pays to shoot from a low point, especially when shooting a small animal. This helps accentuate its size.
Photo Credit : Kusadasi-guy
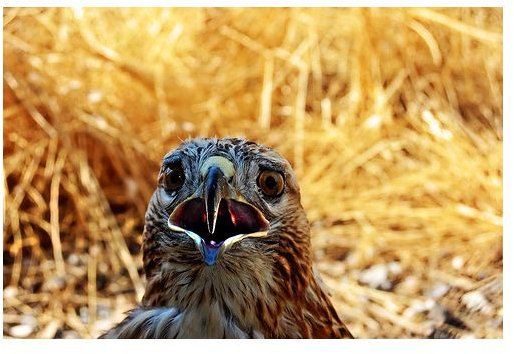
8. Blur the Background

A jungle or national park has a lot of distracting background elements. Isolate your subject by using a wide aperture and blurring out the background. A properly blurred background with the subject sharply in focus makes for the most appealing of photos. But restrict this to situations where there is only one, or at max, two subjects in frame. If shooting a herd of animals, you may want all of them in focus. If in doubt, try aperture bracketing, ie. shoot multiple photos, each at a different aperture, in close succession. What you’re doing in effect is increasing the ‘depth of field’, or region in focus, with decreasing aperture. A range of 5 f-stops is bound to give you at-least one desirable photo.
Photo Credit : Kittyseye
9. Framing Your Shot - Leave ‘Active’ Space
This means, that while framing your shot, leave some space in front of the animal, so that it gives an impression that the animal has some space to ‘move into’. In other words, never have the head of the animal tightly opposed to the border of your image.
Photo Credit : Eric Charlton
10. Relax and Take it Easy
Just being out there in the wilderness should calm you down. Forget the city for a while and immerse yourself in your surroundings. Animals too are not accustomed to sudden movements, and go into a ‘fight or flight’ mode when encountered with sudden, quick movements. Predatory animals usually think anything which runs away from them is a prey, while the prey animals usually run away from anything which moves quickly. So be slow and smooth in your motions. Spend sometime around the animals at a safe distance, so they get accustomed to your presence and go about their routine. The sooner you learn to ‘blend into the background’, the better photos you’ll get.
This post is part of the series: Wildlife Photography Tips & Techniques
This article series will provide you with the top wildlife photography tips and techniques. From preparing for the shoot and wildlife ethics to tips on camera settings, composition and image parameters, learning how to take the best wildlife photos starts here.


