
Have you ever wondered how to add your own reflections to sunglasses? With Photoshop and the help of this tutorial, now you can!
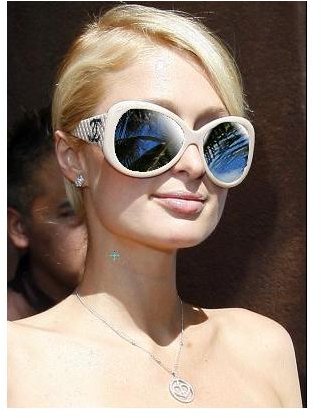
Before
After
How to Add Reflections to Sunglasses
(Click on any image for a larger view)
There are so many neat things you can do with Photoshop CS3. Even though the application is rather expensive, it is definitely worth you’re money if you enjoy taking and editing pictures. One really neat effect you can do with Photoshop CS3 is add reflections in sunglasses.
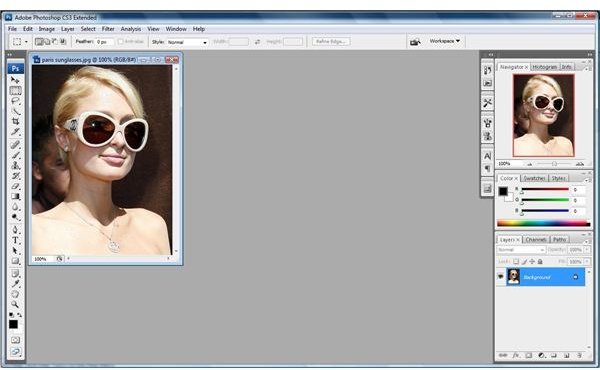
Step 1
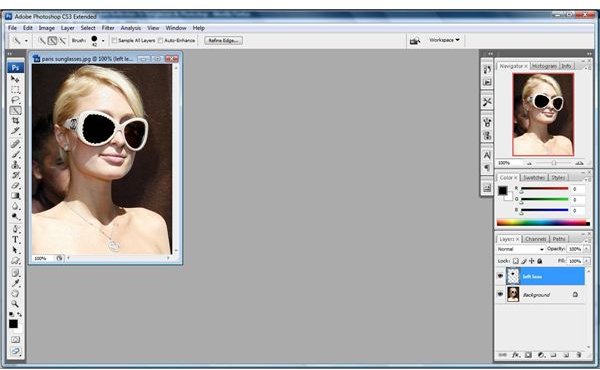
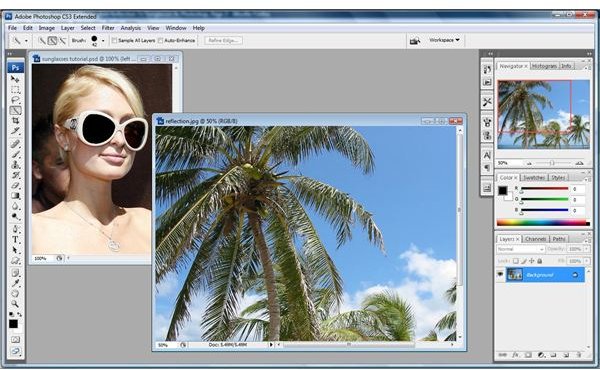
To add reflections to sunglasses, you must first start up Photoshop and open a picture of yourself or someone else wearing sunglasses. You’ll want to have the subject up close enough where you can see a good amount of surface area on the glasses, otherwise the effect isn’t as persuasive. Next, find a picture you’d like to use as the reflection. I suggest using a speeding car, another person, or some kind out outdoor scenery.
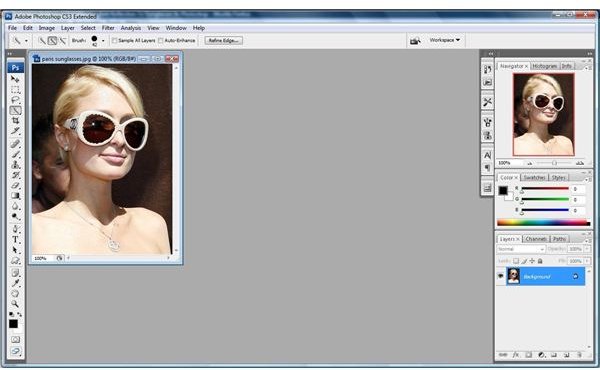
Step 2
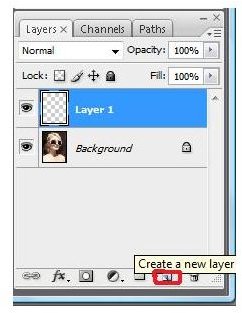
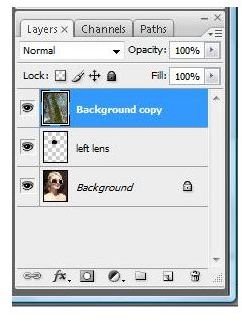
Start off by working on one sunglasses lens at a time. Select the lens you want to work on by using the pen or quick selection tool. Next, click New Layer on the Layers palette to add a blank layer on the lens. This new layer is named Layer 1. If you want, name the layer to what lens you’re working on; either left or right. Make sure the layer is selected, and reset your foreground color to black by typing ‘D’ on your keyboard. Then click ‘Alt+Backspace’ on Windows or ‘Option+Delete’ on Mac to make your selection black.
Step 3
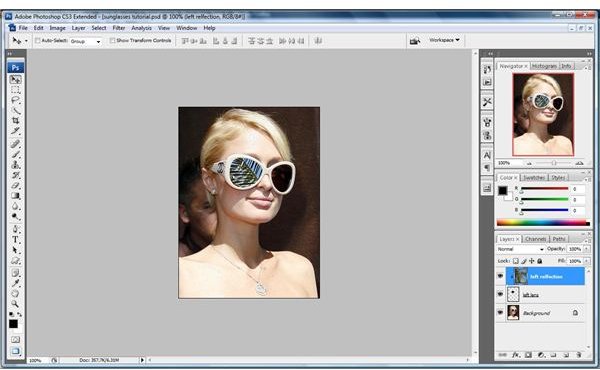
Now you need to combine the original image and the image you want as the reflection. To do this, open up your second image and notice that it has been added as a new layer on your first image. You can rename this image as a ’left/right reflection’ to make it easier, if you want. Now, re-size the image currently in the reflection in the sunglasses. To do this, create a clipping mask by clicking Layer → Create Clipping Mask. You’ll notice an arrow pointing down to the black lens in your Layers palette; this shows that the reflection image layer is being clipped by the lens layer. Re-size and reposition the image in the lens by using the Free Transformation command.

Step 4
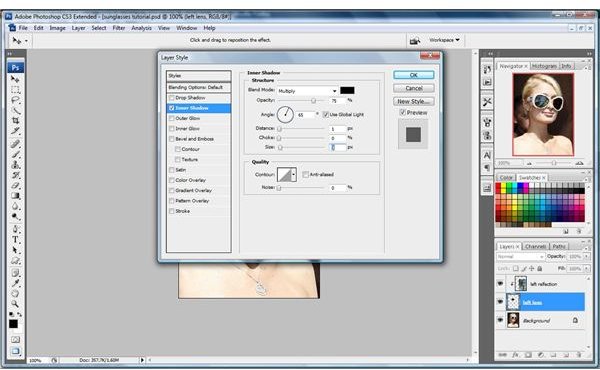
To make your reflection seem more realistic, you need to add an inner shadow. To do this, select the lens image in the Layers palette and click the Layers Style icon on the palette. Select Inner Shadow → 65 degree angle → 1 pixel distance → 3 pixels size. This varies by image, but it should look good with virtual every angle of the glasses and the reflection. If not, just tweak it to your liking. Next, you want to spherize the reflection by clicking on the lens image in the palette, then “Ctrl-click” on Windows or “Command+click” on Mac, to select the image so there are dotted lines around it. Now, click Filter → Distort → Spherize → Horizontal Only → 30%. Deselect the image.

Step 5
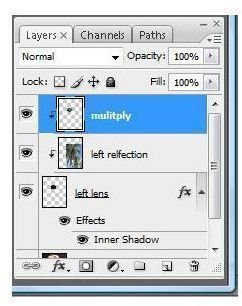
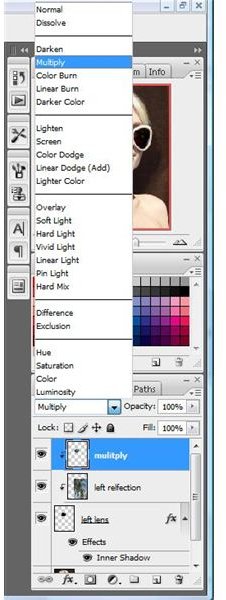
Now, duplicate the reflection layer. Rename this layer to ‘Multiply’. We need to clip this new layer, so go to Layer → Create Clipping Mask. Change this layer blend to Multiply by selecting is from a drop down list in the top corner of the palette box.
Step 6
You can add a highlight gradient to the lenses so that it looks like there is the sun reflecting in the corners of the lenses. To do this, make sure the lens is selected, then press ‘G’ to display the gradient tool options and click the second gradient in the first row, the ‘gradient to transparent’ option. Create a new layer above the top multiply layer and name it highlight. Click and drag where you want the highlight to be.

Step 7
You’re done with the first lens! Now, begin the second one by following all of the above steps. Make sure that with the other lens, you position the reflection image so that it looks like it’s coming from a different angle, not just straight-on.
Enjoy!


