Have you ever wondered how to capture those brilliant Northern or Southern Lights in the sky with your camera? Here are some tips on photographing that colorful show in the sky if you find yourself in the right location!
What Causes the Northern Lights?
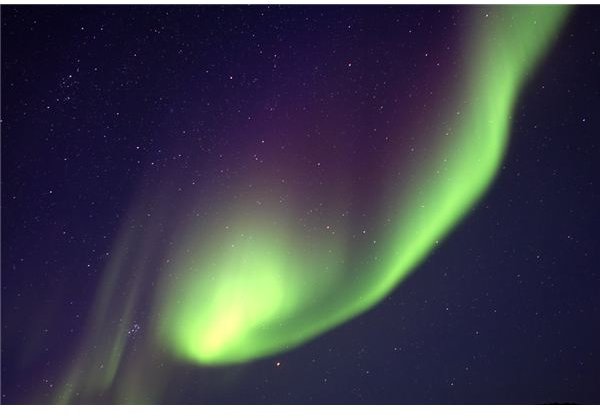
The phenomena of the Aurora Borealis, also commonly referred to as the Northern Lights, is a truly awesome and spectacular display of color and patterns in the sky. If you have been lucky enough to see it, you certainly know what I mean. The lights in the sky are caused by the Earth’s magnetic field interacting with energy from the sun (in the form of charged particles). This energy excites electrons and they release that energy as visible light. The more intense the solar radiation from the sun is, the brighter the lights appear. The most common colors are green or red, but other colors are possible depending on the gas in the atmosphere interacting with the sun’s energy.
(Click on any image for a larger view)
Photo by: nick russill
Location, Location, Location!

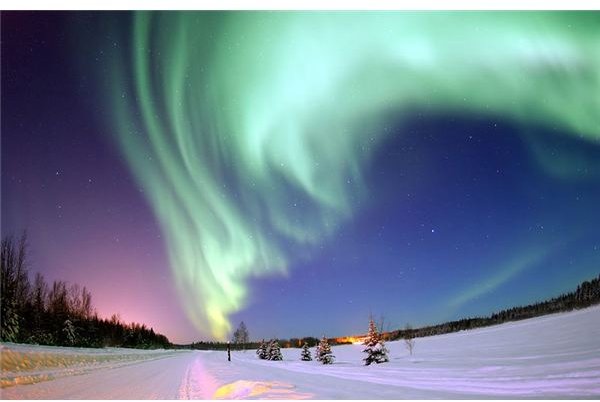
Obviously taking the best shot is knowing where to stand. First and foremost, you have to be at the right spot at the right time. It is best to scout out a couple locations and become familiar with the area. After all, you will be there at night and it’s good to know where you are. The best places to watch the aurora are in the far northern or southern hemisphere. The best time of the year varies, but generally the Spring and Fall months (March and September) are on average the best, although great shots can be had year round. The time of day that seems to be the most active is around 10:00 P.M. to 2:00 A.M. For a unique and different perspective, try somewhere overlooking a city, mountains, or a body of water for some cool reflections .
Photo (left) by: Senior Airman Joshua Strang
Photo (right) by: nick russill
What to Bring
Now that you know the best time and place to see the Northern Lights, let’s go over what you will need to bring to capture the moment. To start, you will need yourself and some warm clothing. Additionally, you will need your camera (preferably a DSLR or one with good manual controls) with its battery and memory card and a steady tripod at the least. These two items are the bare minimum, although you should be bringing along these additional items: a remote shutter release, extra memory cards, and extra batteries for the cold. For a remote shutter release, consider a wireless one if you want to maybe sit somewhere warm while your camera does all the work (like huddled in the car). As for lenses for your SLR, you should have a wide to standard zoom lens (roughly 16-35mm 35mm equivalent for a wide-angle zoom and a 24-70mm standard zoom lens). The faster (wider maximum aperture) the lens (f/2.8 is recommended) the better. You probably will not need a long telephoto as the display will be quite large and you can capture a lot with a standard lens while keeping a tight frame around the aurora. For a twist on the wide angle, try a fisheye lens to capture images like the one shown below.

Photo by: Philippe Moussette at Observatoire Mont Cosmos, Quebec, Canada
Getting the Shot!
Now that you know what to bring, let’s go over a few tips on getting the best pictures. If your camera has the ability, shoot in RAW mode to capture the most detail and allow for easier post-processing of the final image. As a starting point, shoot in manual mode, roughly ISO 400 to 800, an aperture of f/2.8, and a shutter speed of 30 seconds. If you do not have the f/2.8 capability, you will need to bump up the ISO to 800, 1600, or greater to compensate. If you have a shutter release, set your camera to BULB mode and experiment with different shutter speeds to capture the stars and lights more effectively.
I must stress though that these are some general guidelines and you will have to shoot a couple of pictures, check the LCD and histogram , and make adjustments as needed. Lastly, remember that practice makes perfect!


