
If you’re having trouble with annoying purple fringe surrounding objects in your digital photos, there is a solution. This tutorial will show how to fix that problem with Photoshop Elements 7.
Purple Fringe and Digital Photos
Purple fringing can really ruin an otherwise perfect digital photograph. However, this problem is actually fairly simple to fix if you have a decent photo editing application. Here, we’ll describe how to get rid of purple fringe in digital photographs using the tools found in Photoshop Elements 7 .
How to Remove Purple Fringe in Photoshop Elements 7
Step 1: Open the digital photo that you want to edit in Photoshop Elements 7. Zoom into the area afflicted with the dreaded purple fringing. (Click any image in this article for a larger view.)
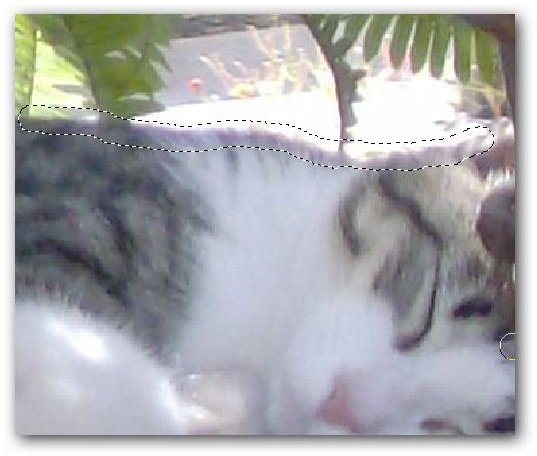
Note that this image has been magnified several times to give a close up of the purple fringed area, so some elements in the photo may appear blurred or out of focus.
Step 2 (optional): Use one of the selection tools to make a rough selection around the area with purple fringe. While this is an optional step, it will tend to give better results since any changes made to the photo will be restricted to the area selected.
If more than one area of the photo suffers from purple fringing, you can select all of these areas now. You can use any selection tool that you like, but I really like using the Selection Brush Tool here. With this tool, you can simply paint a line along the purple fringed edge and create a selection that includes the purple fringing along with a few pixels overlap on either side as shown in the image below.
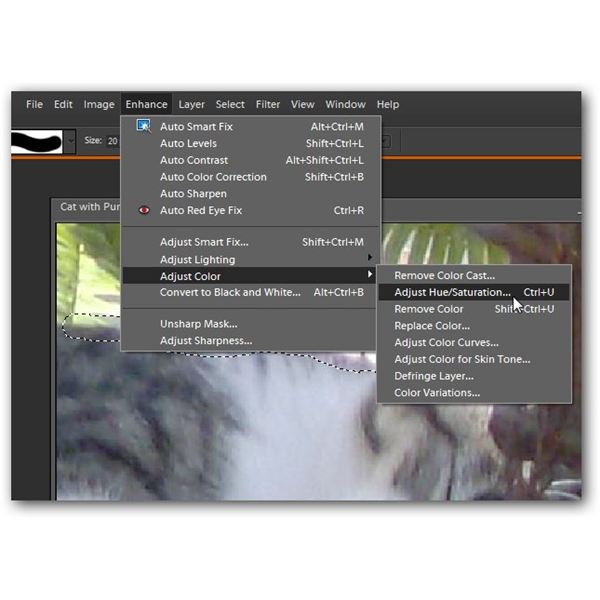
Step 3: From the Enhance menu on the main tool bar of Photoshop Elements 7, select Adjust Color and then Adjust Hue/Saturation.
Step 4: In the Hue/Saturation dialog box, make sure there is a check in the box next to Preview. Then, select Magentas from the Edit drop down box.
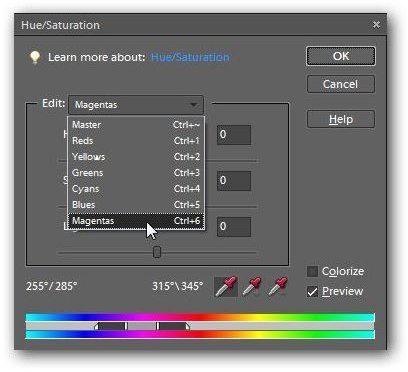
Note: If the purple fringe in your photo is more on the bluish side, you may want to choose Blues instead of Magentas in this step. You can always try both and see which one works best.
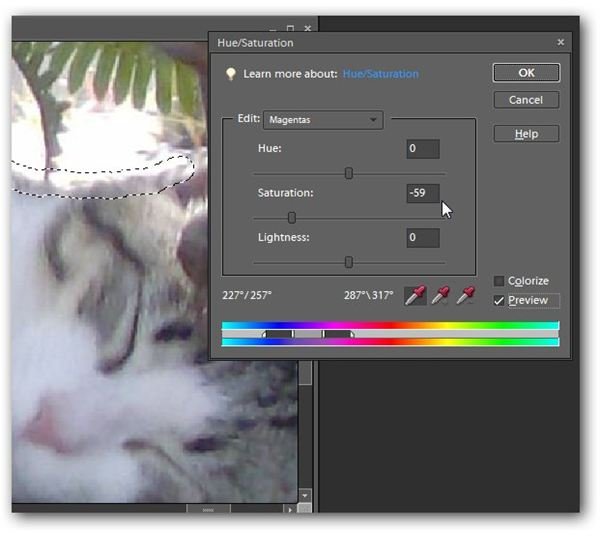
Next, with this dialog box still open, use the eyedropper to click on the purple fringe in the selected area of the photo.

Now, use the slider to slowly reduce the Saturation level until the purple fringe is no longer visible in the photograph.
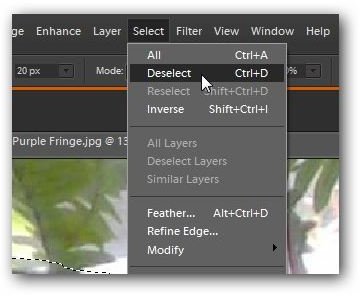
Step 5: When done, click OK to apply the changes to the photo. From the Select menu, choose Deselect to remove the selection lines from your photo so you can get a better look at the modifications.
Here is our final result.