One of the coolest features found in Photoshop Elements 7 is the new Smart Brush tool. In this tutorial, we’ll explain what this tool does and how to use it.
The Smart Brush Tool
If you often make color, brightness, and other types of adjustments to select areas of digital photographs, you’re really going to like the new Smart Brush tool found in Photoshop Elements 7 . This special brush combines several features into one tool, allowing you to effectively create an adjustment layer, select a specific area of a photo, and modify that selection all at the same time. This tutorial will show how to use the brush and explain more about its capabilities.
Using the Smart Brush Tool
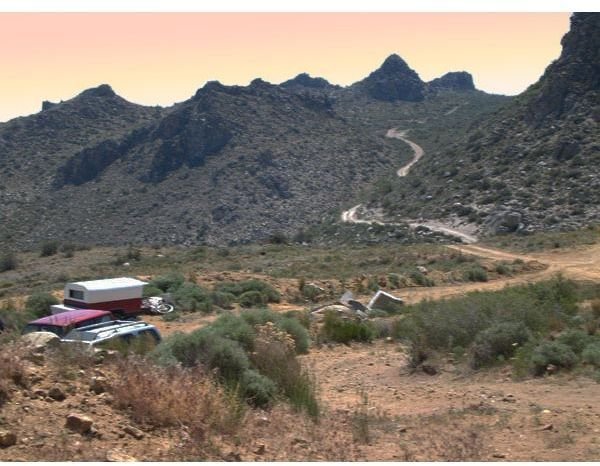
Begin by opening the digital photo that you want to modify in Photoshop Elements 7. For this example, I’ll use a rather bland photo of Petersen Mountain shown below. (Click any image for a larger view.)
One thing that I’d like to try with this photo is make some change to the dreary sky in the background. To do that, I’ll use the Smart Brush.
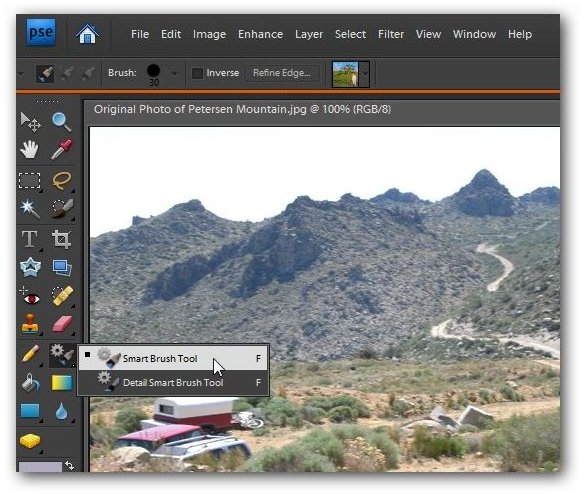
Step 1: Select the Smart Brush tool from the left vertical tool menu in Photoshop Elements. The icon for the tool looks similar to a gear and paintbrush. See the screenshot before for the tool’s location.
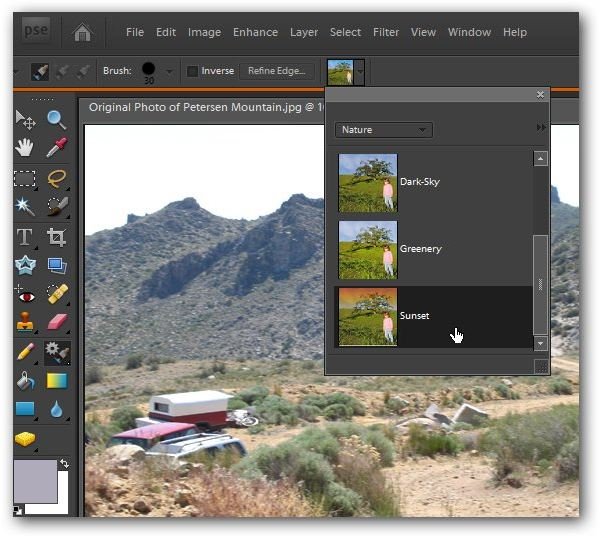
Step 2: Once you select the Smart Brush, a window containing several effect choices should appear on your screen as in the image shown below.
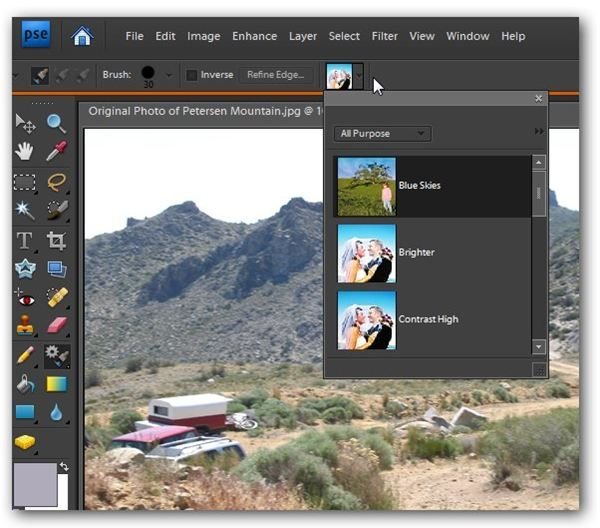
If this window doesn’t appear, you can click on the mini icon on the main toolbar (shown in the screenshot next to the white arrow) to activate it.
Step 3: From this window, you can select a category from the drop down box of effect choices. Since I want to make changes to the sky, I’ll pick the Nature category. To make the photo editing a little more fun, I’ll choose the Sunset effect.
Once the selection has been made, you can click on the main toolbar again to hide the options window or you can just drag it to someplace out of the way on your screen.
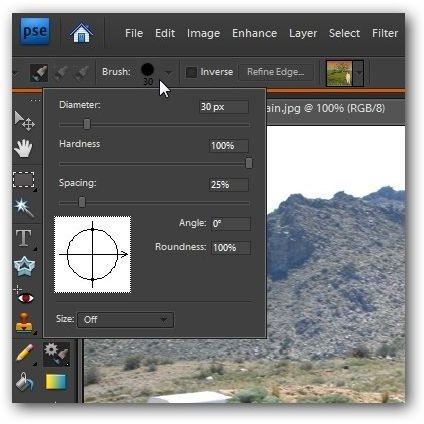
Step 4: At this point, you may want to make changes to the shape and size of the Smart Brush. To do so, click on Brush on the main toolbar and change any settings you wish.
Step 5: Now, just start “painting” on the effect in the areas to which you want it applied. Note that the Smart Brush tool will automatically detect edges, filling in the entire area for you. If you don’t want to use this “smart edge” feature, you can trade the Smart Brush tool for the Detail Smart Brush tool.
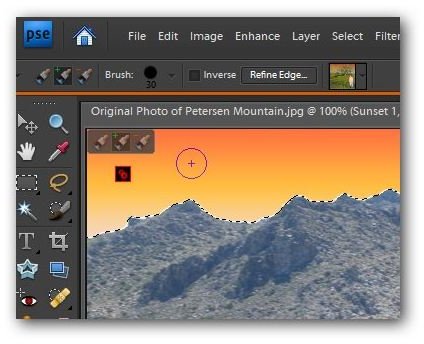
If you make a mistake and paint over an area that you wanted to leave untouched, you don’t have to start over. Instead, note the brushes that appear in the upper left-hand corner of the photo while you’re painting with the Smart Brush. If you click on the brush with the red minus sign, you can delete any part of your selection by painting over it. You can switch back and forth between the brush with the plus sign and the one with the minus sign as often as you want.
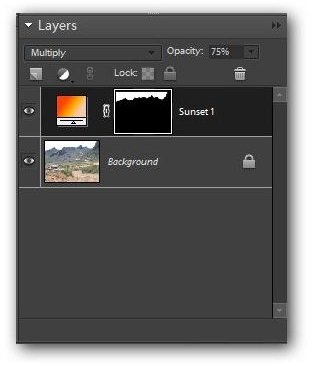
There’s another important thing to note in this step. As soon as you begin painting in any area of the photo, a new adjustment layer will be created in the layers panel. Any of the changes you make will be applied to this layer.
This great feature offers two advantages. First, you can always return to your original digital photo if you decide not to make any changes. Secondly, if you want to tweak or modify the adjustment, you can easily do so on that layer without having to start again. This is a great way to try out several different effects and see how they’ll appear on a specific photo.
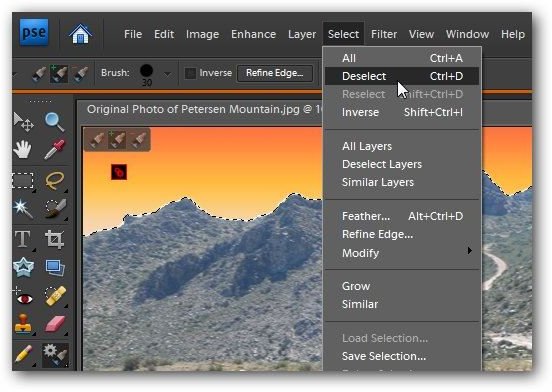
Step 6: When you’re done applying the Smart Brush, you can deselect the area so you can see what the modification looks like without the blinking selection border.
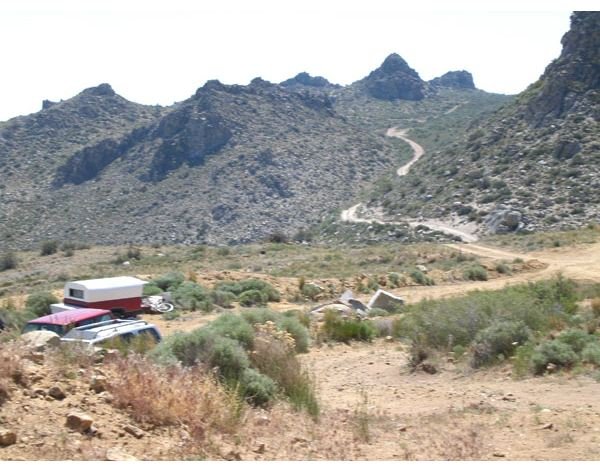
At this point, if you don’t like what you see, you can make sure that the adjustment layer is selected in the layers panel and make any needed modifications. For instance, I found the Sunset effect to look a bit too overpowering in this image, so I lowered the opacity of the adjustment layer to make it blend in better with the rest of the photograph.

After making a few other modifications, here is the resulting image.