
Creating the best flower images doesn’t need to be difficult. Discover common mistakes people make when photographing flowers and tips and tricks on lighting, angles, perspective and backgrounds.
In the first part of this article series, we looked at the optimal time of day and the best weather to photograph flowers. Now, let’s discover additional tips on how to enhance your flower photography skills, including ways to backlight your flowers, shoot from different angles and how to create the best background.
Photo by James Jordan .
(Click on any image for a larger view)
Try Backlighting the Flower
Flower Photography Mistake #2: You take pictures of flowers with total disregard to lighting.
You see a flower. You think the flower is pretty. You take a picture of the flower. End of story.
Sound familiar? If it does, I bet you are often unhappy with the results of your photos. Lighting is one of the most important aspects to photography, and flower photography is no exception.
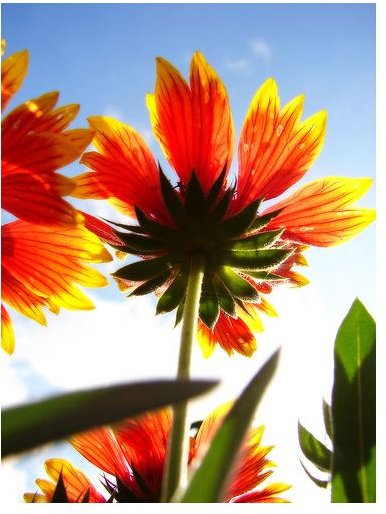
The next time you find yourself wanting a great picture of a flower, but the sun is high, try positioning yourself so that the sun is directly behind the flower. This approach can result in a whole new view of the flower; details, textures and colors can all be enhanced by following this technique.
Photo by aussiegall .
Shoot from Different Angles
Flower Photography Mistake #3: You always take pictures of flowers head-on.
Though flower photos can turn out okay when composed directly in front of the camera, taking flower pictures can become a lot more interesting if you get down and dirty and shoot from different angles or perspectives .

Photo by Daxis .
The Background Should be Simple
Flower Photography Mistake #4: You take pictures of flowers without considering what’s in the background.
With flower photography, it’s quite obvious what the subject is. Having a cluttered background will distract the eye away from the flower. Two ways you can eliminate a busy background are by controlling the depth of field or by filling your frame by shooting close-up or with your digital camera’s macro mode. We’ll take a closer look at each of these techniques in a moment.
Another way to create a simply background for your flower photos is by placing a backdrop behind the flower. You can use nearly anything for a backdrop; a piece of cardboard; construction paper; t-shirt; a painted piece of plywood; pillow case; or even the blue sky - your only limitation is your imagination. Because the purpose of your backdrop is to eliminate distracting background objects, make sure that whatever you’re using doesn’t defeat the whole point. Dark colored backdrops, especially black, work well with flower photos. Creating a backdrop that contrasts with the color of the flower is also a great technique. If you’re feeling crafty, learn how to make a professional looking backdrop for $20 with this tutorial .
While we’re on the subject of distractions, keep in mind that it’s also okay to clean up a little. If the flower has distracting elements on it, like twigs or dirt, gently brush them off for a better photo.
Please continue on to part 3, where you will learn how to create depth of field in your flower photos and how to shoot close-up and macro images. Discover the benefits of these techniques, in addition to introducing additional elements to your flower photos.
This post is part of the series: Flower Photography Tips, Tricks & Mistakes
In this article series, learn everything you need to know about flower photography. Here you will learn the best tips & tricks, mistakes people make and how to avoid them, ideas on what you can do with your flower pictures after you’ve created them and much more!


