If you have ever used reflectors, you know those flimsy wire-frame reflectors don’t hold up in the wind. They always end up twisted and bouncing light in directions other than the one you want. With this rigid reflector, you’ll have no problem standing out in the wind and looking professional.
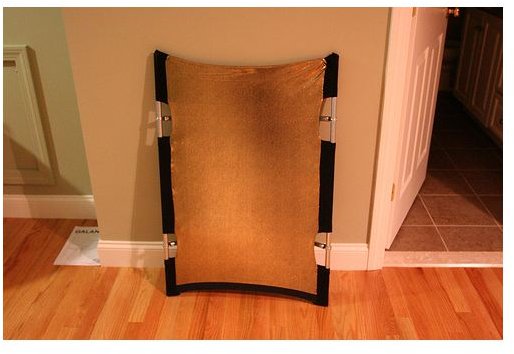
Final Product
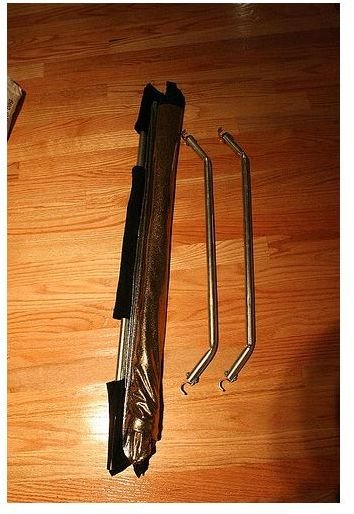
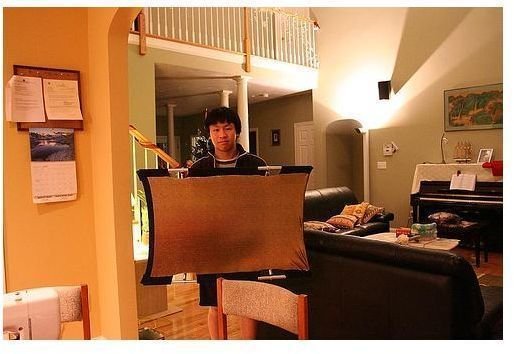
The final product is a 3’x2’ rigid reflector constructed of metal and nylon cloth. It weighs approximately 2 lbs and is able to withstand high winds. Both sides can be used to bounce light. One side is gold for a tanner look, and the other is silver for a truer look. The reflector is collapsible, making it very easy to store. The only thing this reflector lacks is the DIY look.
(Click on the image below or any image at the bottom of the page to enlarge)
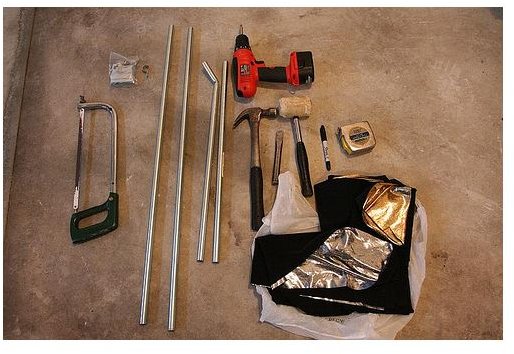
Materials
- Hand saw with a blade to cut metal
- 10’ EMT 1/2" conduit
- Four pack of 1/2" EMT clamps
- Sandpaper or a file
- Drill
- Screws, washers, and nuts
- Hammer
- Chisel
- Rubber mallet
- Sharpie
- Tape measure
- Nylon cloth (One cloth with a gold side, another with silver)
- Sewing machine
- Vice grip
Construction
-
Cut the 10’ conduit into 4 pieces. Two 3 foot and two 2 foot pieces.
-
File or sand the tips of each conduit until they aren’t sharp.
Advertisement -
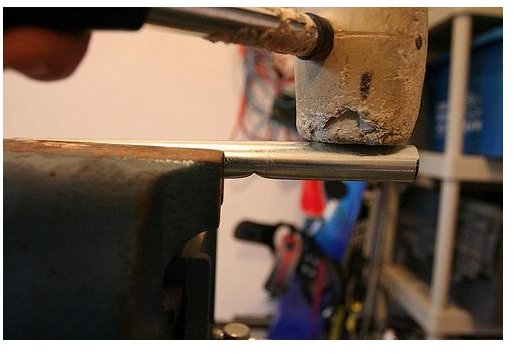
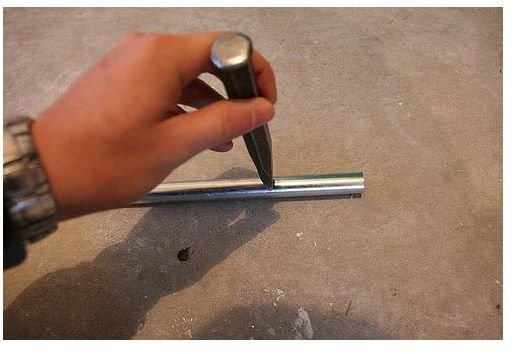
Grab a 2’ conduit and mark 2 inches from both ends.
-
Use the hammer and chisel to make a dent in the conduit at the 2" marks. These dents will be used as pilots for the bending. Try to make the dents symmetrical.
Advertisement -
Put the piece into the vice grip and use the rubber mallet to bend the 2" ends to 40-45 degrees.
-
-
Repeat step 2 with the other 2’ conduit.
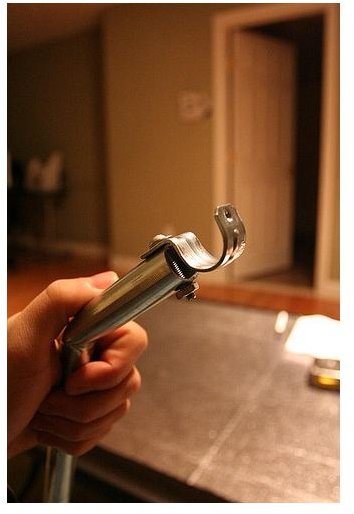
Advertisement -
Using a 2’ conduit again, drill holes at the ends to attach the EMT 1/2" clamps. See images prior to drilling.
-
Repeat step 4 with the other 2’ conduit.
Advertisement -
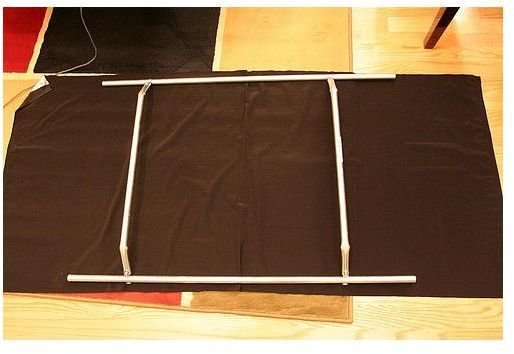
Congratulate yourself, you’ve just completed the frame.
-
Now cut 4 pieces of fabric to 3.5" x 5.5". These are the corner loops.
Advertisement -
Cut 2 pieces to 3.5" x 13.5". These are the middle loops.
-
Cut the gold sided fabric to 19.5" x 32.5".
Advertisement -
Repeat step 10 with the silver sided fabric.
-
Sew the pieces together. See images prior to sewing.
Advertisement -
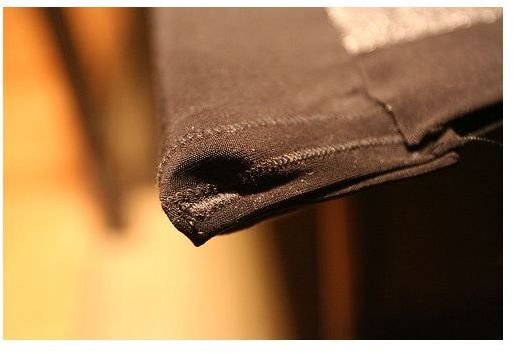
For each corner, sew about half an inch down to create a pocket for the conduit to sit in. See images
-
Congratulations! You’ve completed the reflector!
Advertisement
Why it’s stable
The more tension there is, the more stable the frame becomes. This is the reason for the nylon. Nylon is a stretchy fabric which has restoring forces. The forces pull the frame in tighter which makes the entire reflector stronger. In this DIY reflector, the cloth is undergoing about 10% stretch.
Conclusion
This reflector works well for headshots. Because of its small nature, it will not have the capabilities to do full body or group photographs . I am confident, however, that under this technique, one could create a much larger reflector for the larger tasks. There is also a little bit of torsion problem, but it does not seem to affect the stability.
DIY Reflector