One dramatic difference between professional digital images and those of “amateurs” is the quality of sharpness in the image. You can use these five tips to help you learn how to eliminate camera shake, a principal cause of blurred or out of focus images.
Eliminate Camera Shake
Have you ever heard the expression, “It must be jelly, ‘cause jam don’t shake like that”? Does this apply to your photographs? One of the things which greatly separates the amateurs and pros is the sharpness and clarity of their respective images. You must do all you can to eliminate camera shake for sharper, more professional images.
Here are five how to tips to eliminate “camera shake”:
1. Use a tripod or camera support
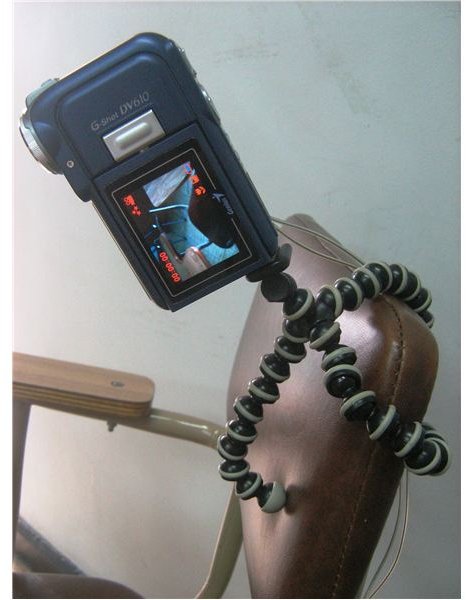
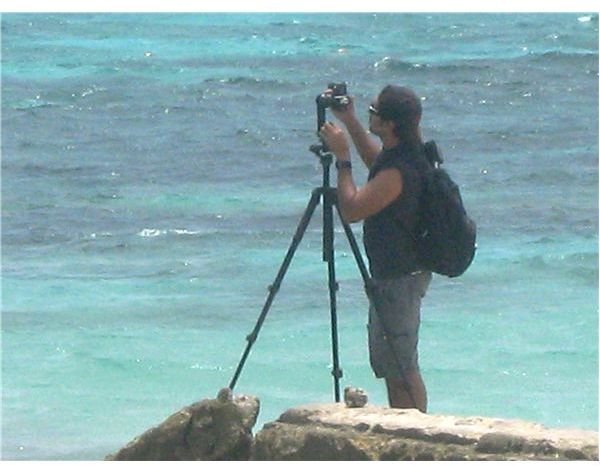
You can probably only hand-hold a camera down to around 1/30 of a second at best. After that movements from your body will take the sharp edge of focus off of everything. With many automatic digital camera settings, you can’t be sure what shutter speed you’re shooting at so using a standard tripod, a flexible “Gorillapod ” tripod (shown here “hanging” on the back of a chair), a mono-pod like “Monostat’s Unipod ”, or other camera-steadying technique and tool such as an arm and shoulder-mounted “Bush Hawk ” is essential. You could also use a bean-filled bag, gyro-stabilizer or clamp-on style camera holder to shoot from. When shooting long-range, telephoto or macro, close-up images, camera stability can be especially critical. You must be diligent, doing all you can to eliminate camera shake.
Also note: in some places like museums and indoor exhibits, you can pay a small fee that allows you to use a tripod.
2. Brace yourself or your camera when shooting
There are occasions when you can’t or shouldn’t use a tripod, such as when you’re shooting in tight quarters, in heavy crowds or in places which specifically prohibit the use of tripods. This doesn’t mean that you can’t use external means to steady the camera while shooting. It simply calls for a little more creativity when doing so. Try setting the camera on a stable surface like a table, desk, wall or floor. Use yourself as a human tripod by bracing yourself, your arms or elbows against a wall, tree, fence or other object with your legs spread and locked. A seated position also works where your butt and two feet represent a three-point stance for maximum stability.
3. Use the fastest shutter speed and smallest apertures possible
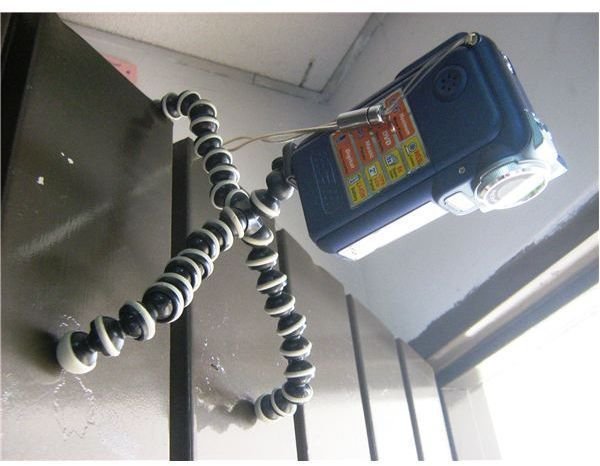
When you can use manual settings when shooting images, try to always use the fastest shutter speed and the smallest aperture that you can in order to minimize the effects of minor camera shake or movement. It will also help with depth of field and blur from any moving objects in your image. 1/500 to 1/1000 of a second or faster will effectively eliminate some blur caused by hand-held camera movement much of the time. This can be especially true when care is taken to restrict camera movement using additional means as well. This is another reason I like to use a Gorilla-Pod flexible tripod (shown here “hanging” from the top of a metal door). You can position it in the craziest ways, set the shutter timer or remote fire the shutter to take images and videos from unique angles.
4. Try taking shots using auto-focus, then manual focus
In addition to using the auto-focus settings on your digital (or film) camera, if at all possible, try using manual settings which should give you more control over virtual shutter speed and camera apertures (lens stops). This is yet another way to reduce or eliminate camera shake when shooting images on the fly or outside of an indoor or “studio” setting.
5. Learn how to hold a camera rock-solid steady
This may seem rather basic, but from what I’ve been seeing of late, many photographers just have bad practice in the way their camera is held. If you are right-handed, your left hand, palm, wrist and lower forearm all help to brace and steady the camera for shooting images. This is while your right hand cuddles the front and back of the camera body with your trigger finger in the “ready” position. Remember to wrap your left arm through the camera strap too; you know, something like you do with the sling on a rifle. With many of the awkward grips I’ve seen, you almost can’t avoid camera shake when you press the shutter button. The more weight your camera has, the more a good, steady, bracing camera grip is called for as an aid to eliminate camera shake.
Hold It Steady
If you’re a belly-dancer or a bowl of flavored gelatin dessert, then shake all you want. But when shooting for saleable-quality digital images, hold still and keep that camera steady. Use these five tips to develop stances, positions and rock-solid camera holds that will help ensure that you eliminate camera shake for sharper, more professional images.


