In this Adobe Illustrator tutorial I will show you how to apply artistic effects to your digital photos. All of the artistic effects are applied nearly the same way. Read on to learn more.
In Adobe Illustrator you can apply many different artistic effects to your digital photos. Some of the artistic effects that you can apply are Plastic Wrap, Colored Pencil, Neon Glow, and Watercolor. This tutorial will show you how to apply the artistic effects to your digital photos.
To begin, you will need to open Illustrator and let it load. Then you will need to open a photo that you want to use for this tutorial. The Artistic menu is located under Effect > Artistic>. Every time we apply a new artistic effect, you will need to go to that menu to select the effect. You will also need to undo each effect before applying another one. To undo an effect, click Edit > Undo.
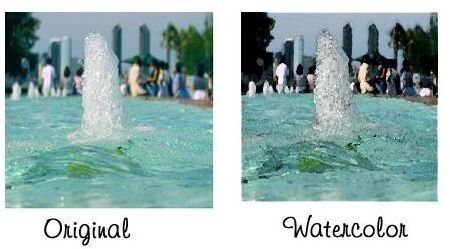
Watercolor Artistic Effect
Let’s begin with the Watercolor Artistic Effect. Click Effect > Artistic > Watercolor at the top of your window. A box will open and you will see the little preview box in the top left corner. Below the preview box is the zoom bar. Zoom out to about 16%. Zooming out of the photo will allow you to see what you are working with. Adjust the three bars in this box. Once you have the effect that you want, click OK to apply the Watercolor Effect to your photo.
Colored Pencil Artistic Effect
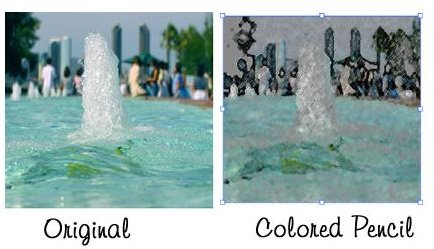
The Colored Pencil Artistic Effect is a very popular effect to apply to digital photos. To open the Colored Pencil box, click Effect > Artistic > Colored Pencil. When the box opens, zoom out like you did before. If the default settings are good enough, go ahead and click OK to apply the effect. If you feel that the settings need adjusting, adjust the bars. Once you have the colored pencil effect like you want it, click OK to apply it to your photo.


