Photobucket is a photo sharing site that allows you unlimited storage for your photos and to be able to share them easily with friends. Photobucket backgrounds can be used in a variety of ways including making collages and slideshows. Everything created on Photobucket can be shared.
Photobucket backgrounds
Photobucket has a range of backgrounds that you can download to use on your own PC at home. Photobucket backgrounds are displayed in groups so it is easy to find what you want. For instance, if you wanted a beach then you can just type in “beach” and you will find an array of pictures that have been shared by the users. On the right hand side of the screen you will find a list in alphabetical order of backgrounds available and you can choose what you want to view from this list. When you have found an image that you would like to use as wallpaper on your desktop, Facebook, Twitter, and MySpace or want to share by email, just click on the image. This will make it larger and the links that you need for the image are displayed on the right hand side. As an example if you wanted to attach to your Facebook page you just click on the Facebook icon and you can post it the website and share it with friends. Underneath the image there is space to make comments so that you can join in the community on Photobucket. Uploading your own images is easy to do just by clicking on the “Upload Now” button at the top of the page. This will bring up a new screen where you can choose where you upload your images from. You can upload from your computer, the web, email, mobile phone or webcam. If you have a lot of images that you want to do all at once you can use the bulk uploader function which makes the process quicker and easier. You can upload your images into albums which makes them easier to find and sort through. You can choose which images you would like to share and which you would like to stay private just by adjusting the settings once you have uploaded your pictures.
Making a Desktop Collage
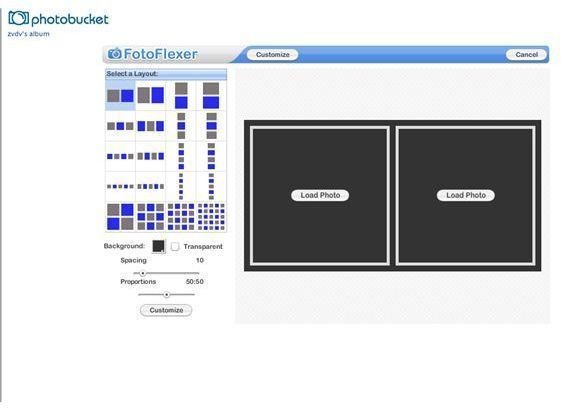
To make a collage for your desktop is easily achieved with Photobucket backgrounds. This method of making a collage is done using the image editor on the Photobucket site. Once you are in your account click “tools” and then “image editor” in the options listed. This should bring up the image editor and it will ask you give you a screen where you can retrieve photos from your files . Choose an album from your files and the photos should appear on screen. Click on the “Create a Collage” tab; this will give you a range of collage options on the left hand side. Choose the type of collage you would like to make and then click on it. Your collage design will now come up on the screen. On each box from the collage you have chosen it will say “load image” click on this and load the images you would like in each box. Now go back to the left hand side and look underneath the collage choices, you will see that you can also choose the background. Click in the right hand corner of the black box and it will give you an array of colors to choose from. Pick your color by clicking on it. Underneath the backgrounds there is spacing; this determines how much space you want between each image use the slide bar to increase or decrease the space between pictures. Underneath spacing is proportions; this will change the proportions of the space that you will placing pictures in, again simply move the slide bar to make the spaces wider of longer. Now click on “customise” this will give you all the editing tools you need to create a really good collage. There is a tab menu at the top of the screen; you will start on basic which will give you simple edits that you can make such as cropping, auto fix, flipping and rotating. The next tab gives you effects so you can add effects such as “cartoon”, “patchwork”, “grayscale” and much more. The tab next to this “retro” has more effects with a retro feel such as sepia, old photo and film grain. You will find the “decorate” tab next; this will allow you to add stickers, text, glitter text, draw, add speech bubbles, and insert a face and a border. Other options include “animate” using stars and stickers, “beautify” where you can smooth wrinkles and fix blemishes. You can also “distort” an image, use “layers” and the “geek” options allows you to really test your editing skills with “smart color”, “smart scissors”, “webcam” and “smart scissors.” Although this is making a collage there are so many editing options on here that you can use it for one picture or many, either way you will be able to make something that will look very impressive.
Make a Slideshow
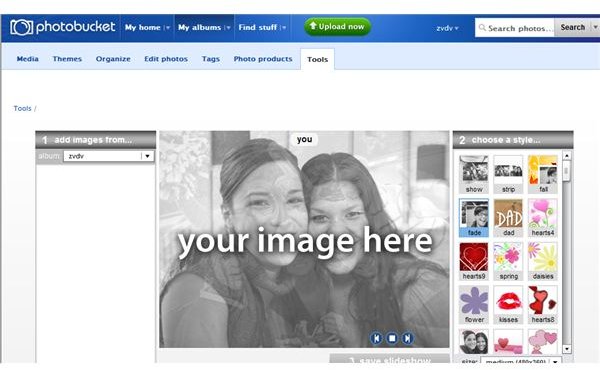
Making a slideshow out of images or baclkgrounds that you have created of uploaded in your albums in Photobucket is a great way to create a moving backdrop for your desktop or social networking homepage. Select the album that you want to make a slideshow from, if you want to use images from other albums as well you can add these later. Click on “Tools” in the menu bar at the top of the page. You will then be taken to “Creation Tools”; click on “Create a Slideshow.” A new page will pop up with your album on the left hand side, the slide show screen in the center of the page and a style menu on the right hand side. To add images to your slideshow double click on the images from your album on the left hand side. These will then appear in the order you have selected them in thumbnails at the bottom of the page. When the images have appeared here you can add titles to each image if you wish simply by clicking where it states “Add Title Here” at the top of each image. Once you have the selected all the images that you want to use and they are at the bottom of the page you can move them around to the order that you wish them to appear by clicking and dragging the images into place. You can then choose your style by going to the right hand menu and clicking on the icons. There are an array of styles to suit any purpose you may wish to use your slideshow for. Once you are happy with your slideshow click on the “save” button that appears at the bottom of the center screen. A new window will pop up and you type in the name of your slideshow. Upon saving a new window will pop up that will allow you to post to a website, share on Twitter, Facebook, MySpace or Messengers. You can also share via email and get a link code to share elsewhere. You can also add a message and choose to “share now” if you know where you would like to place your slideshow.
Useful Resources
Photobucket Blog: Make Desktop Background Collages on Photobucket
Photobucket Tutorials: Linking to MySpace Background
Steve’s Digicams: How To Create a Slideshow on Photobucket
Image Credits
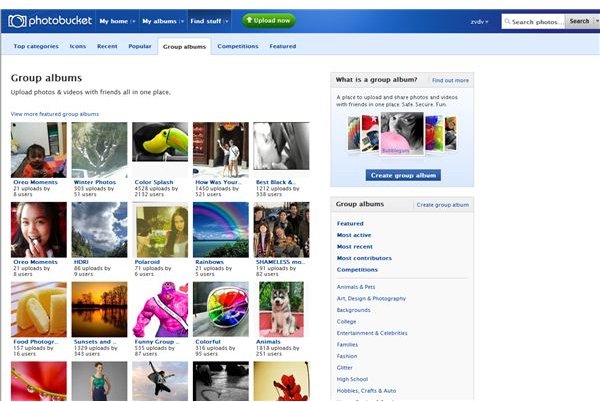
Image One: Screenshot from Photobucket Group Albums
Image Two: Screenshot from Photobucket Image Editor
Image Three: Screenshot from Photobucket Slideshow Creator


